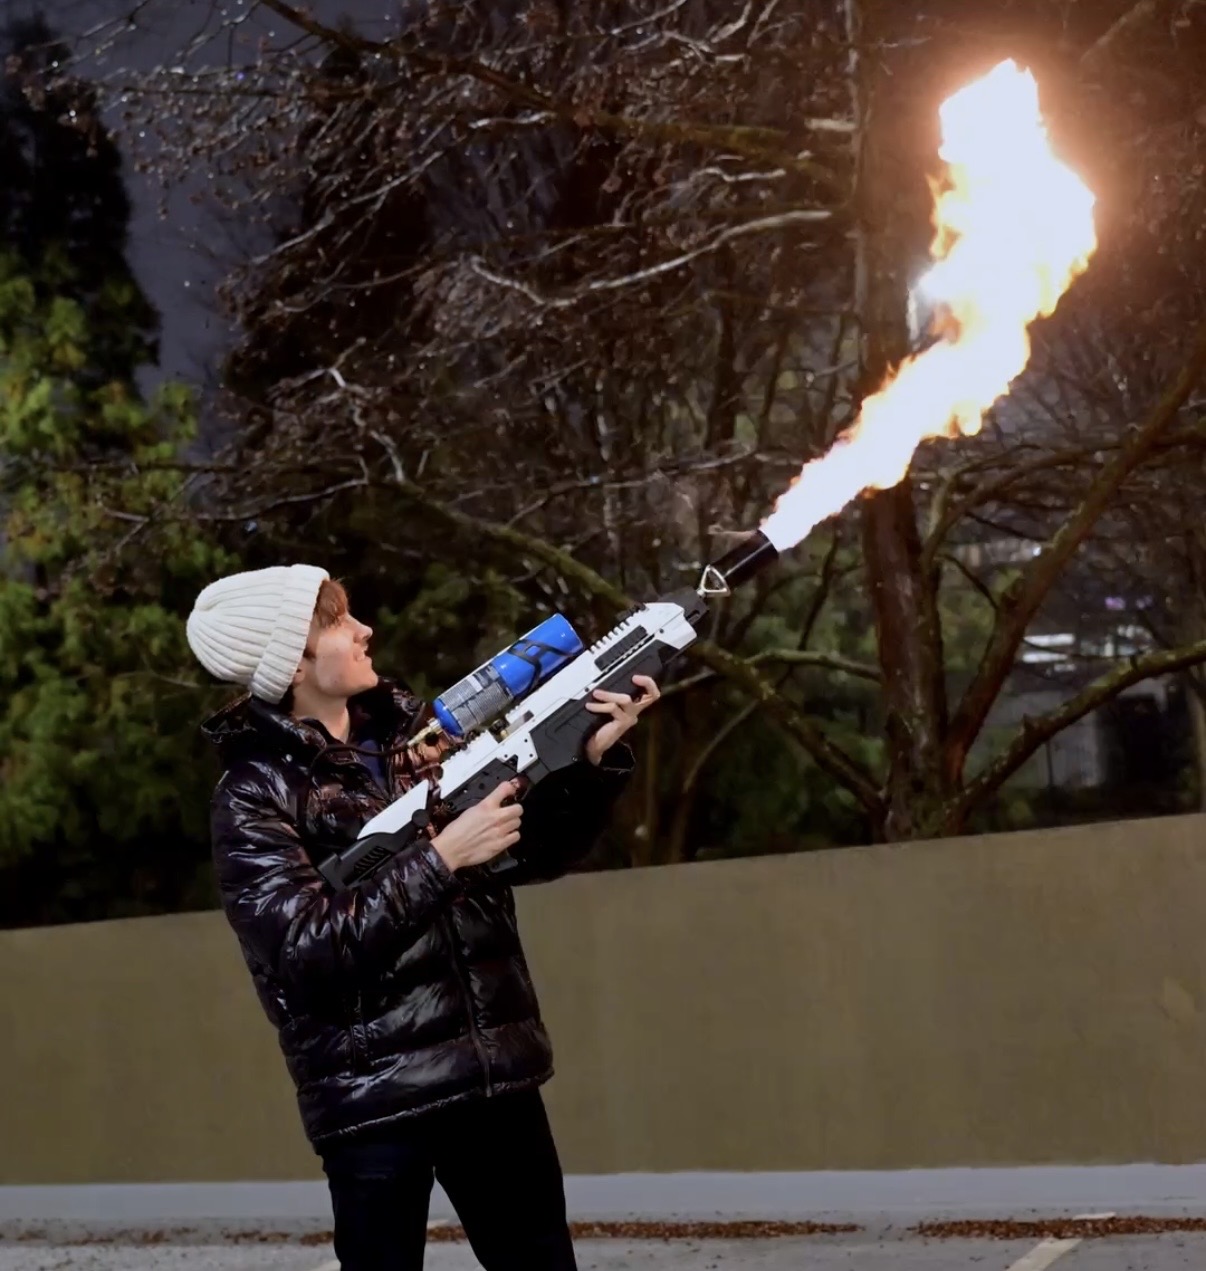
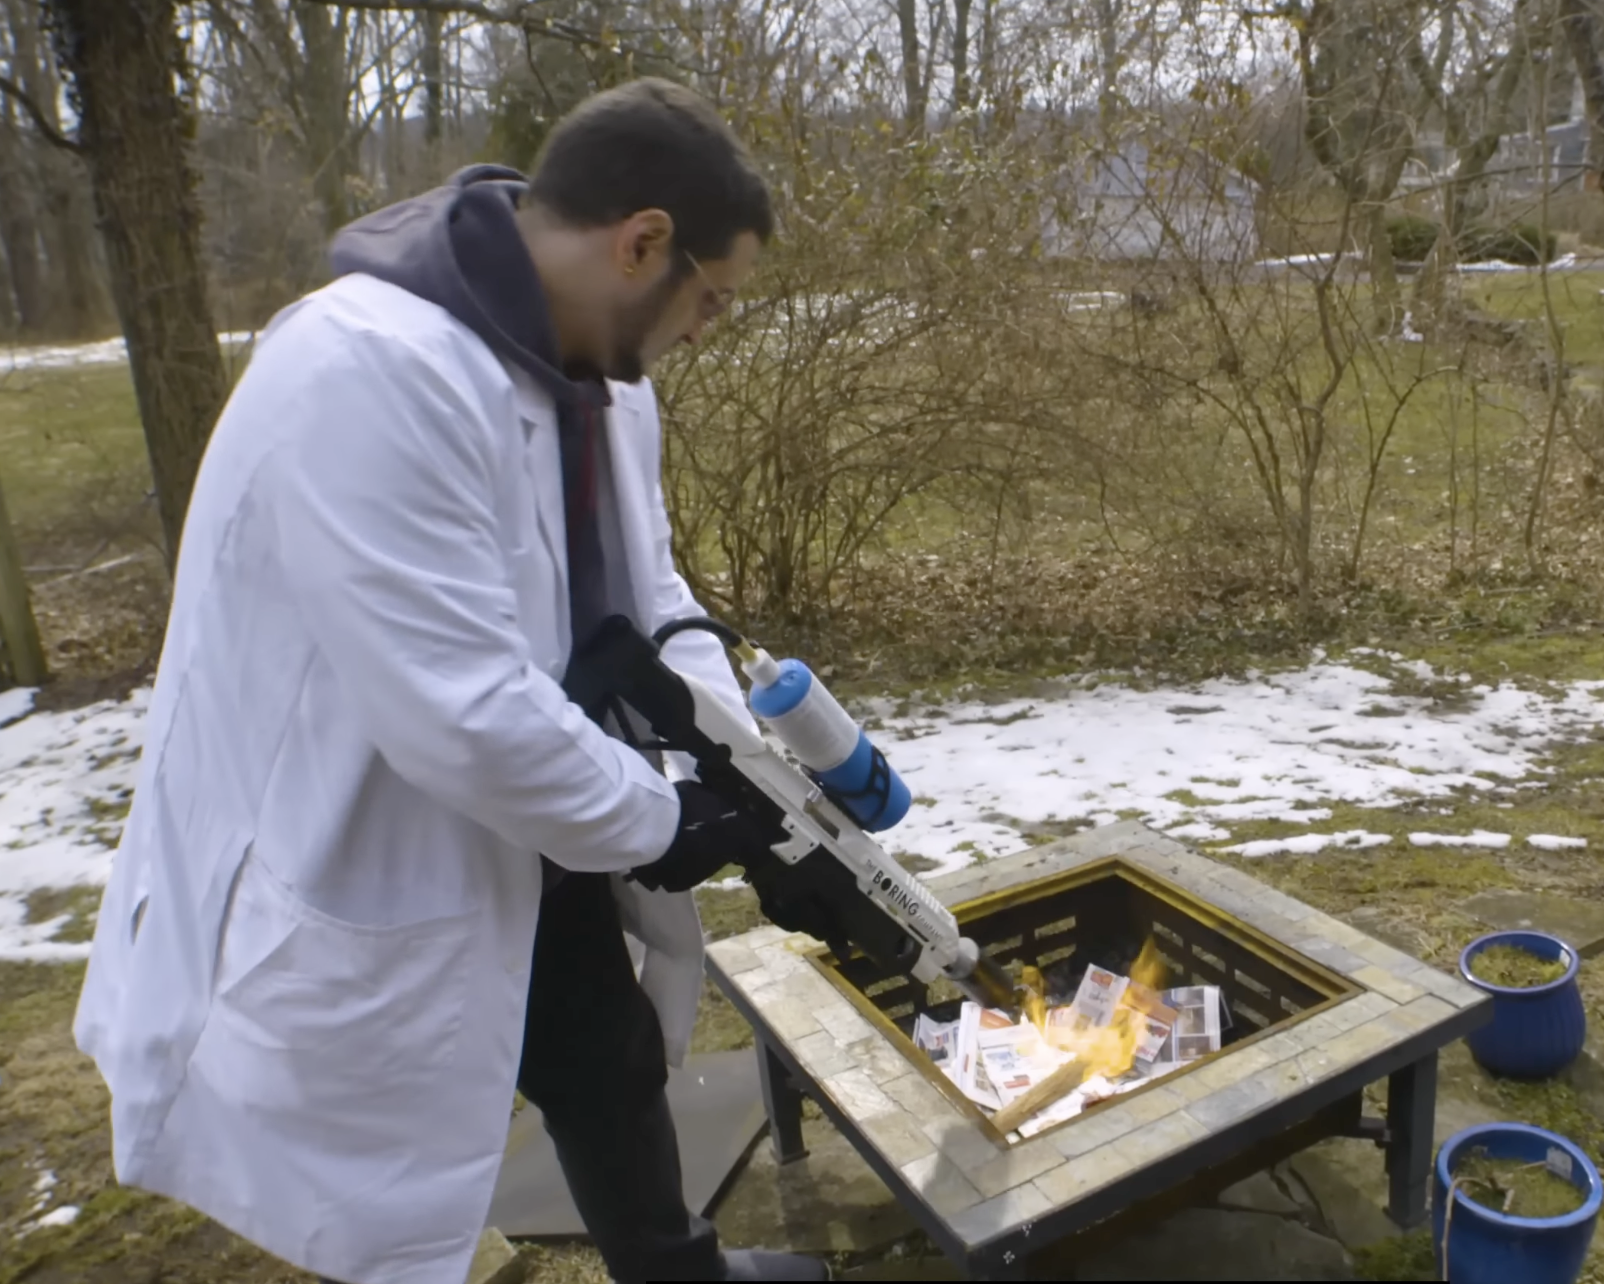
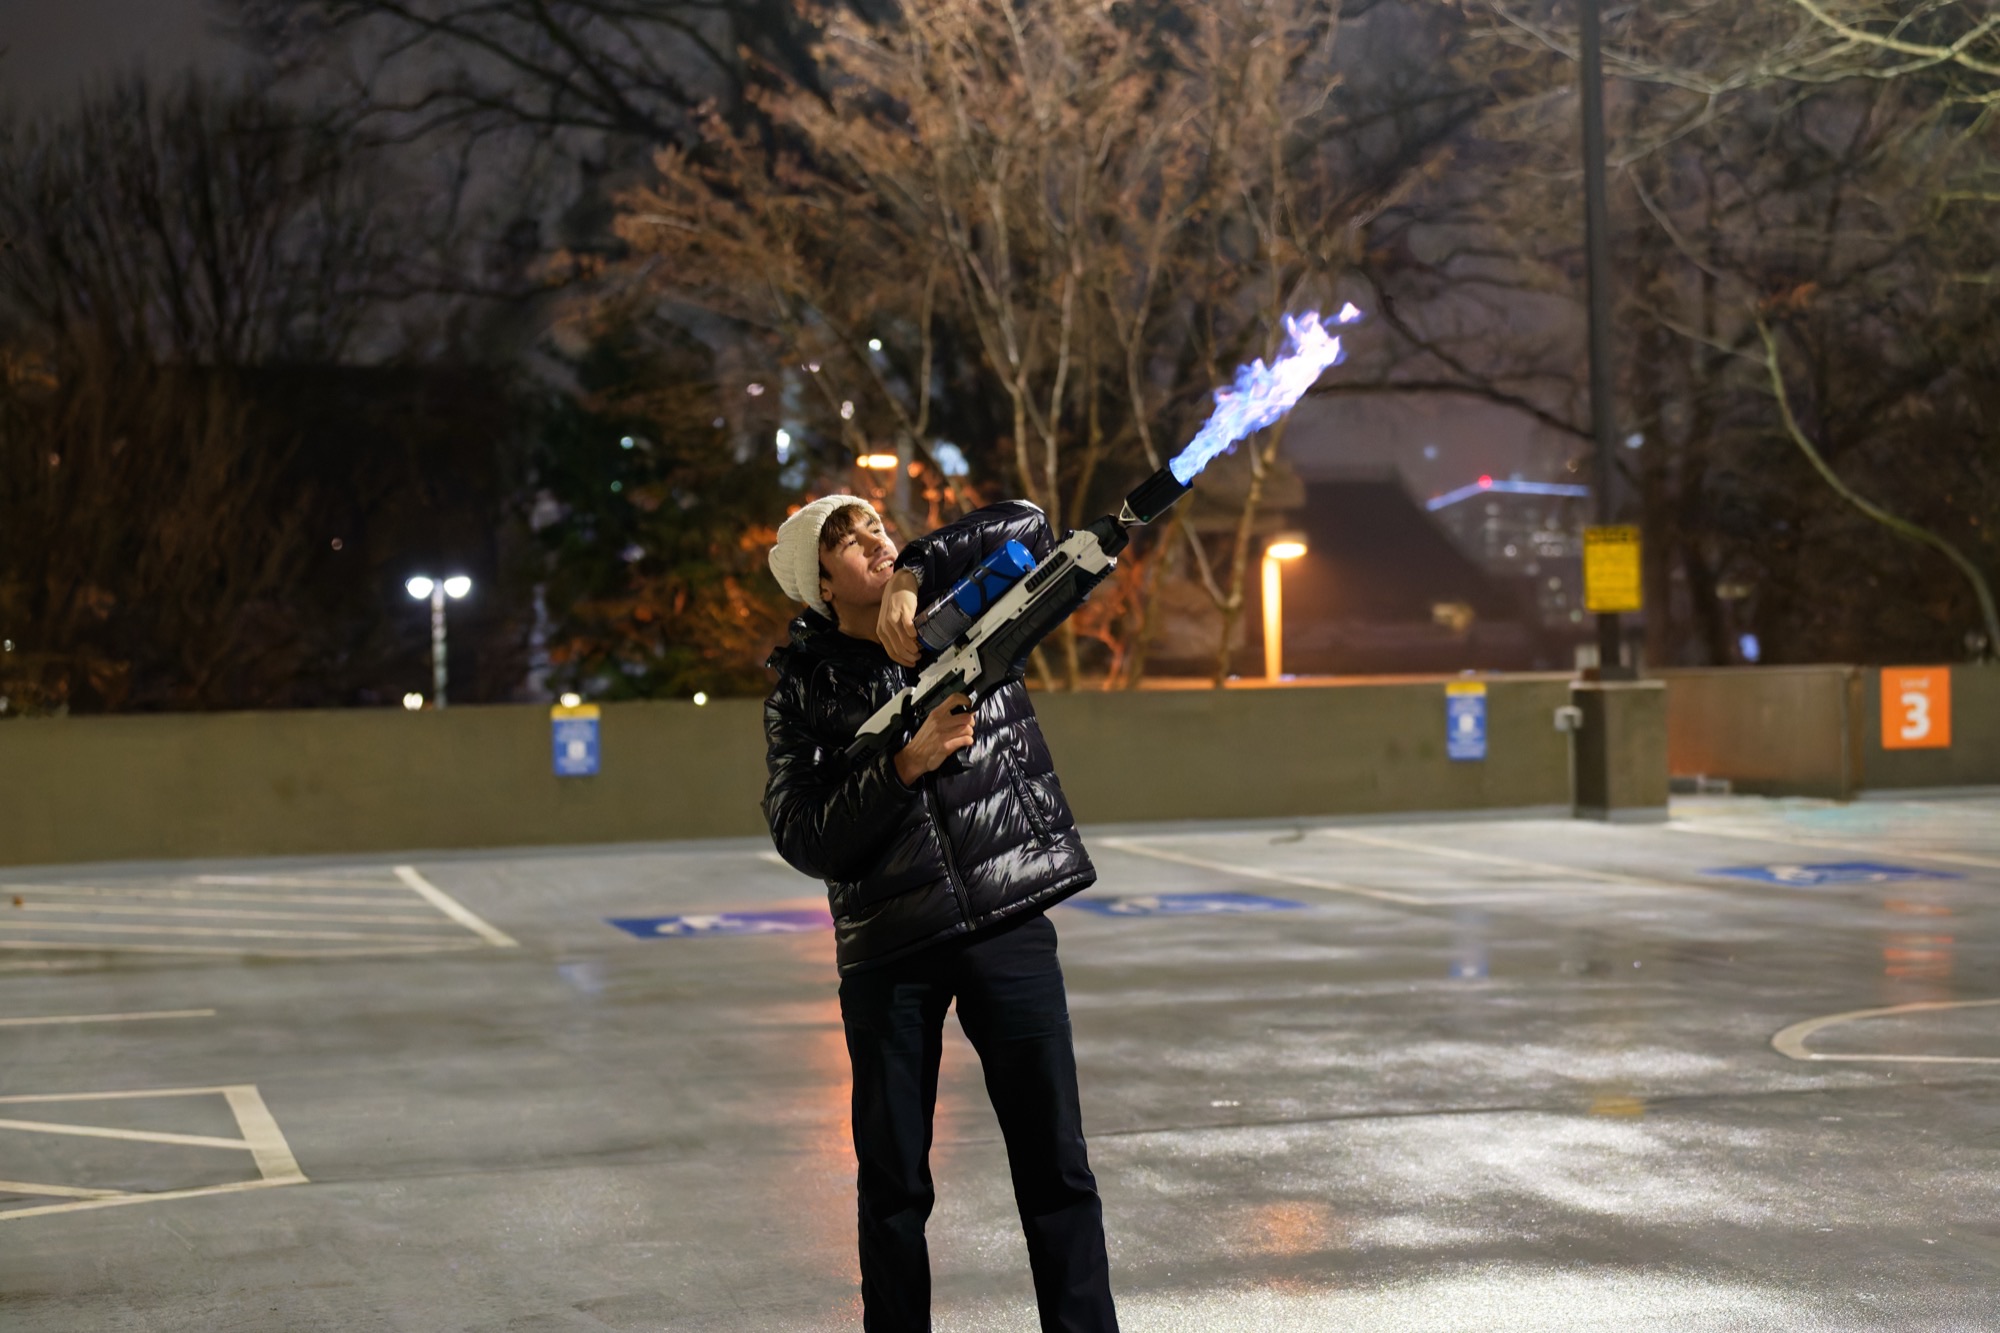
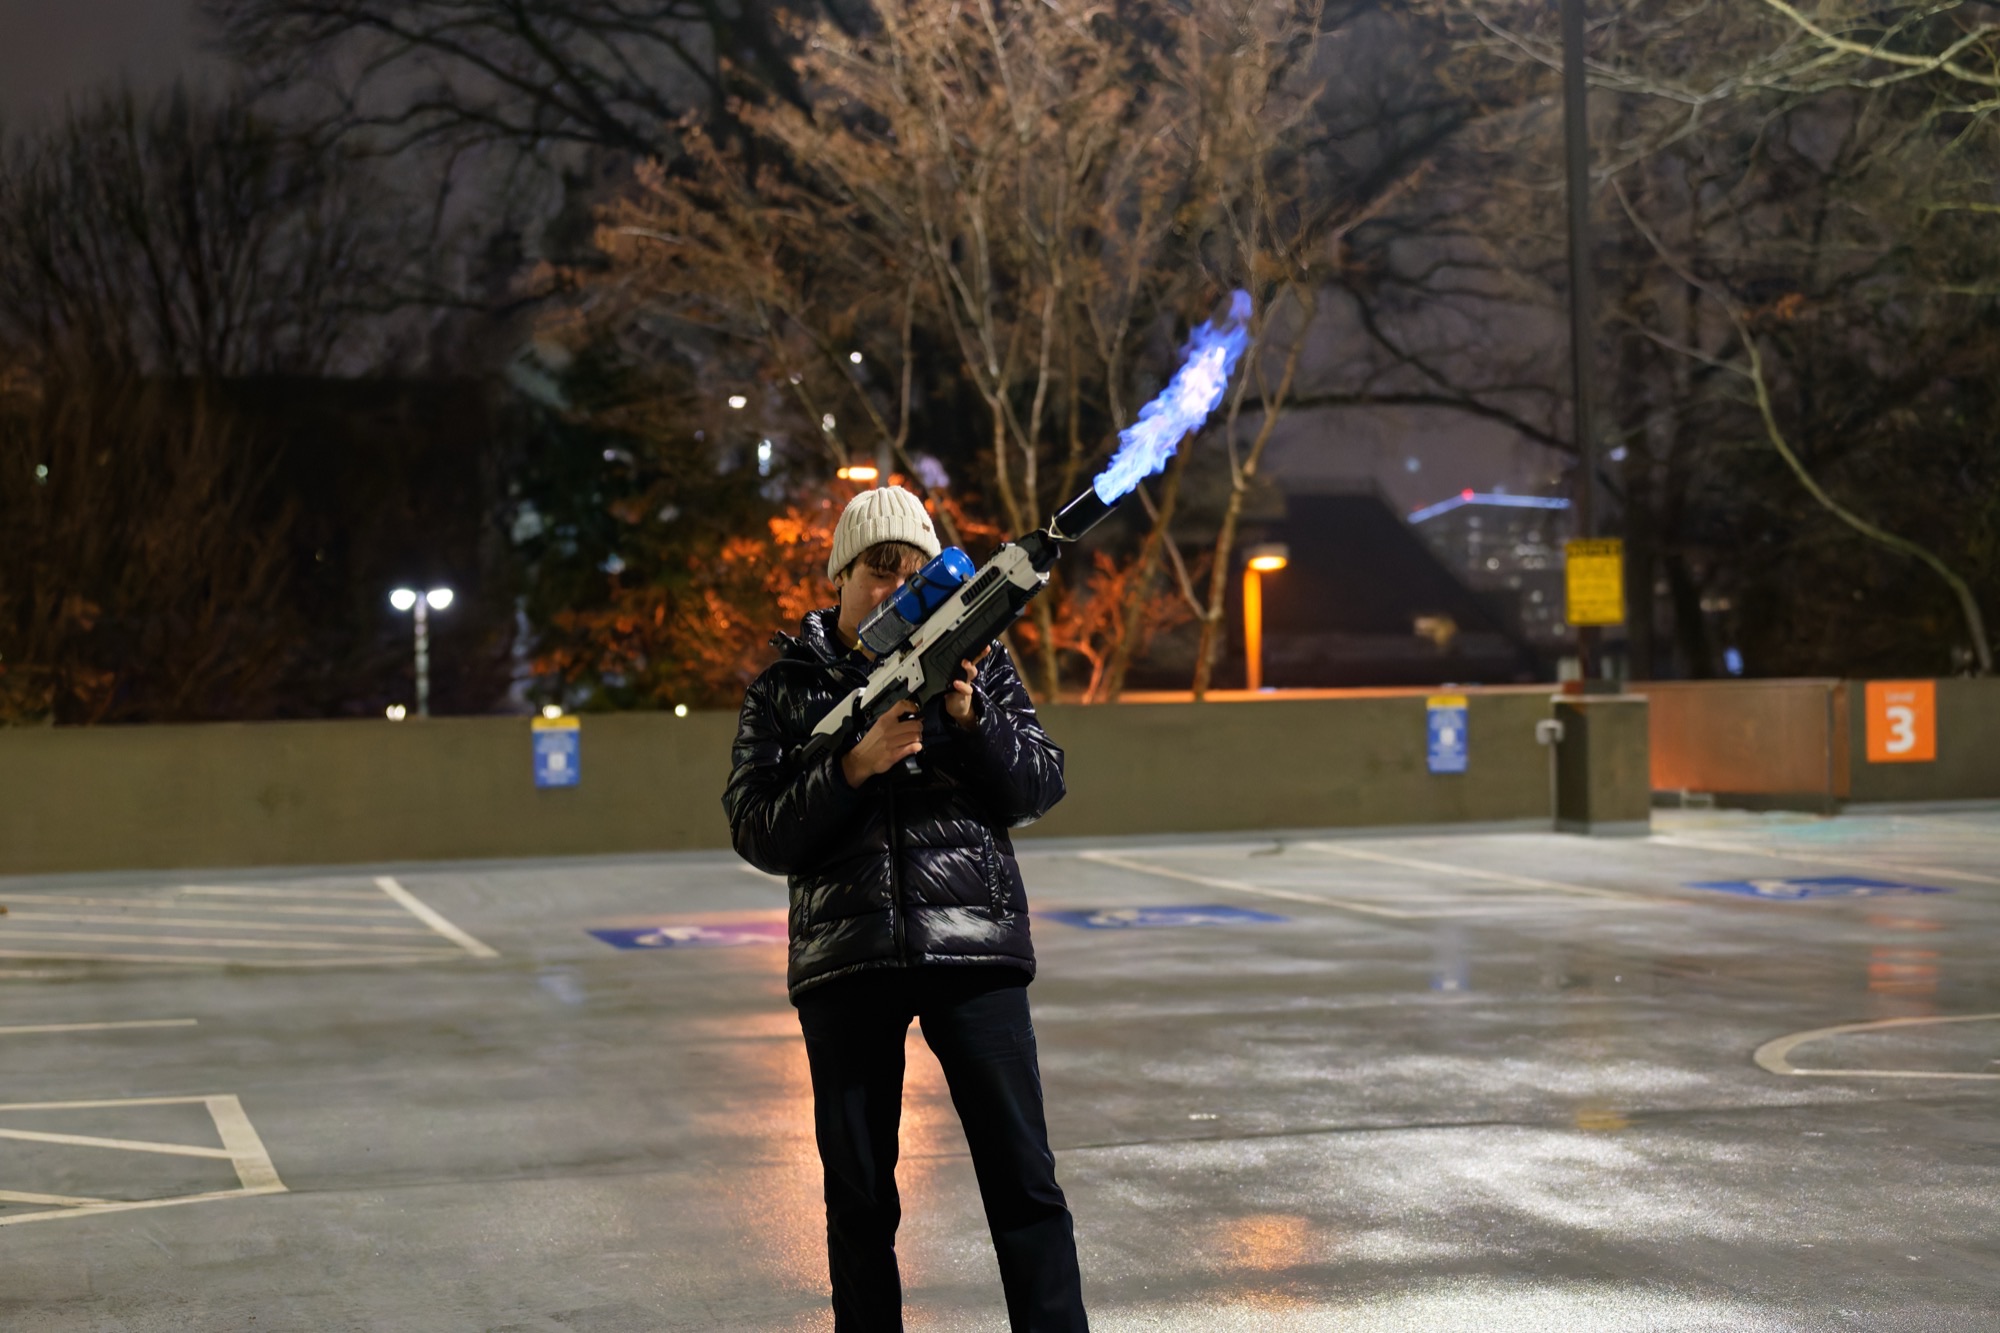
I built Elon Musk's Not-A-Flamethrower but I made it better.
So you might be wondering how did I get this crazy idea?
…
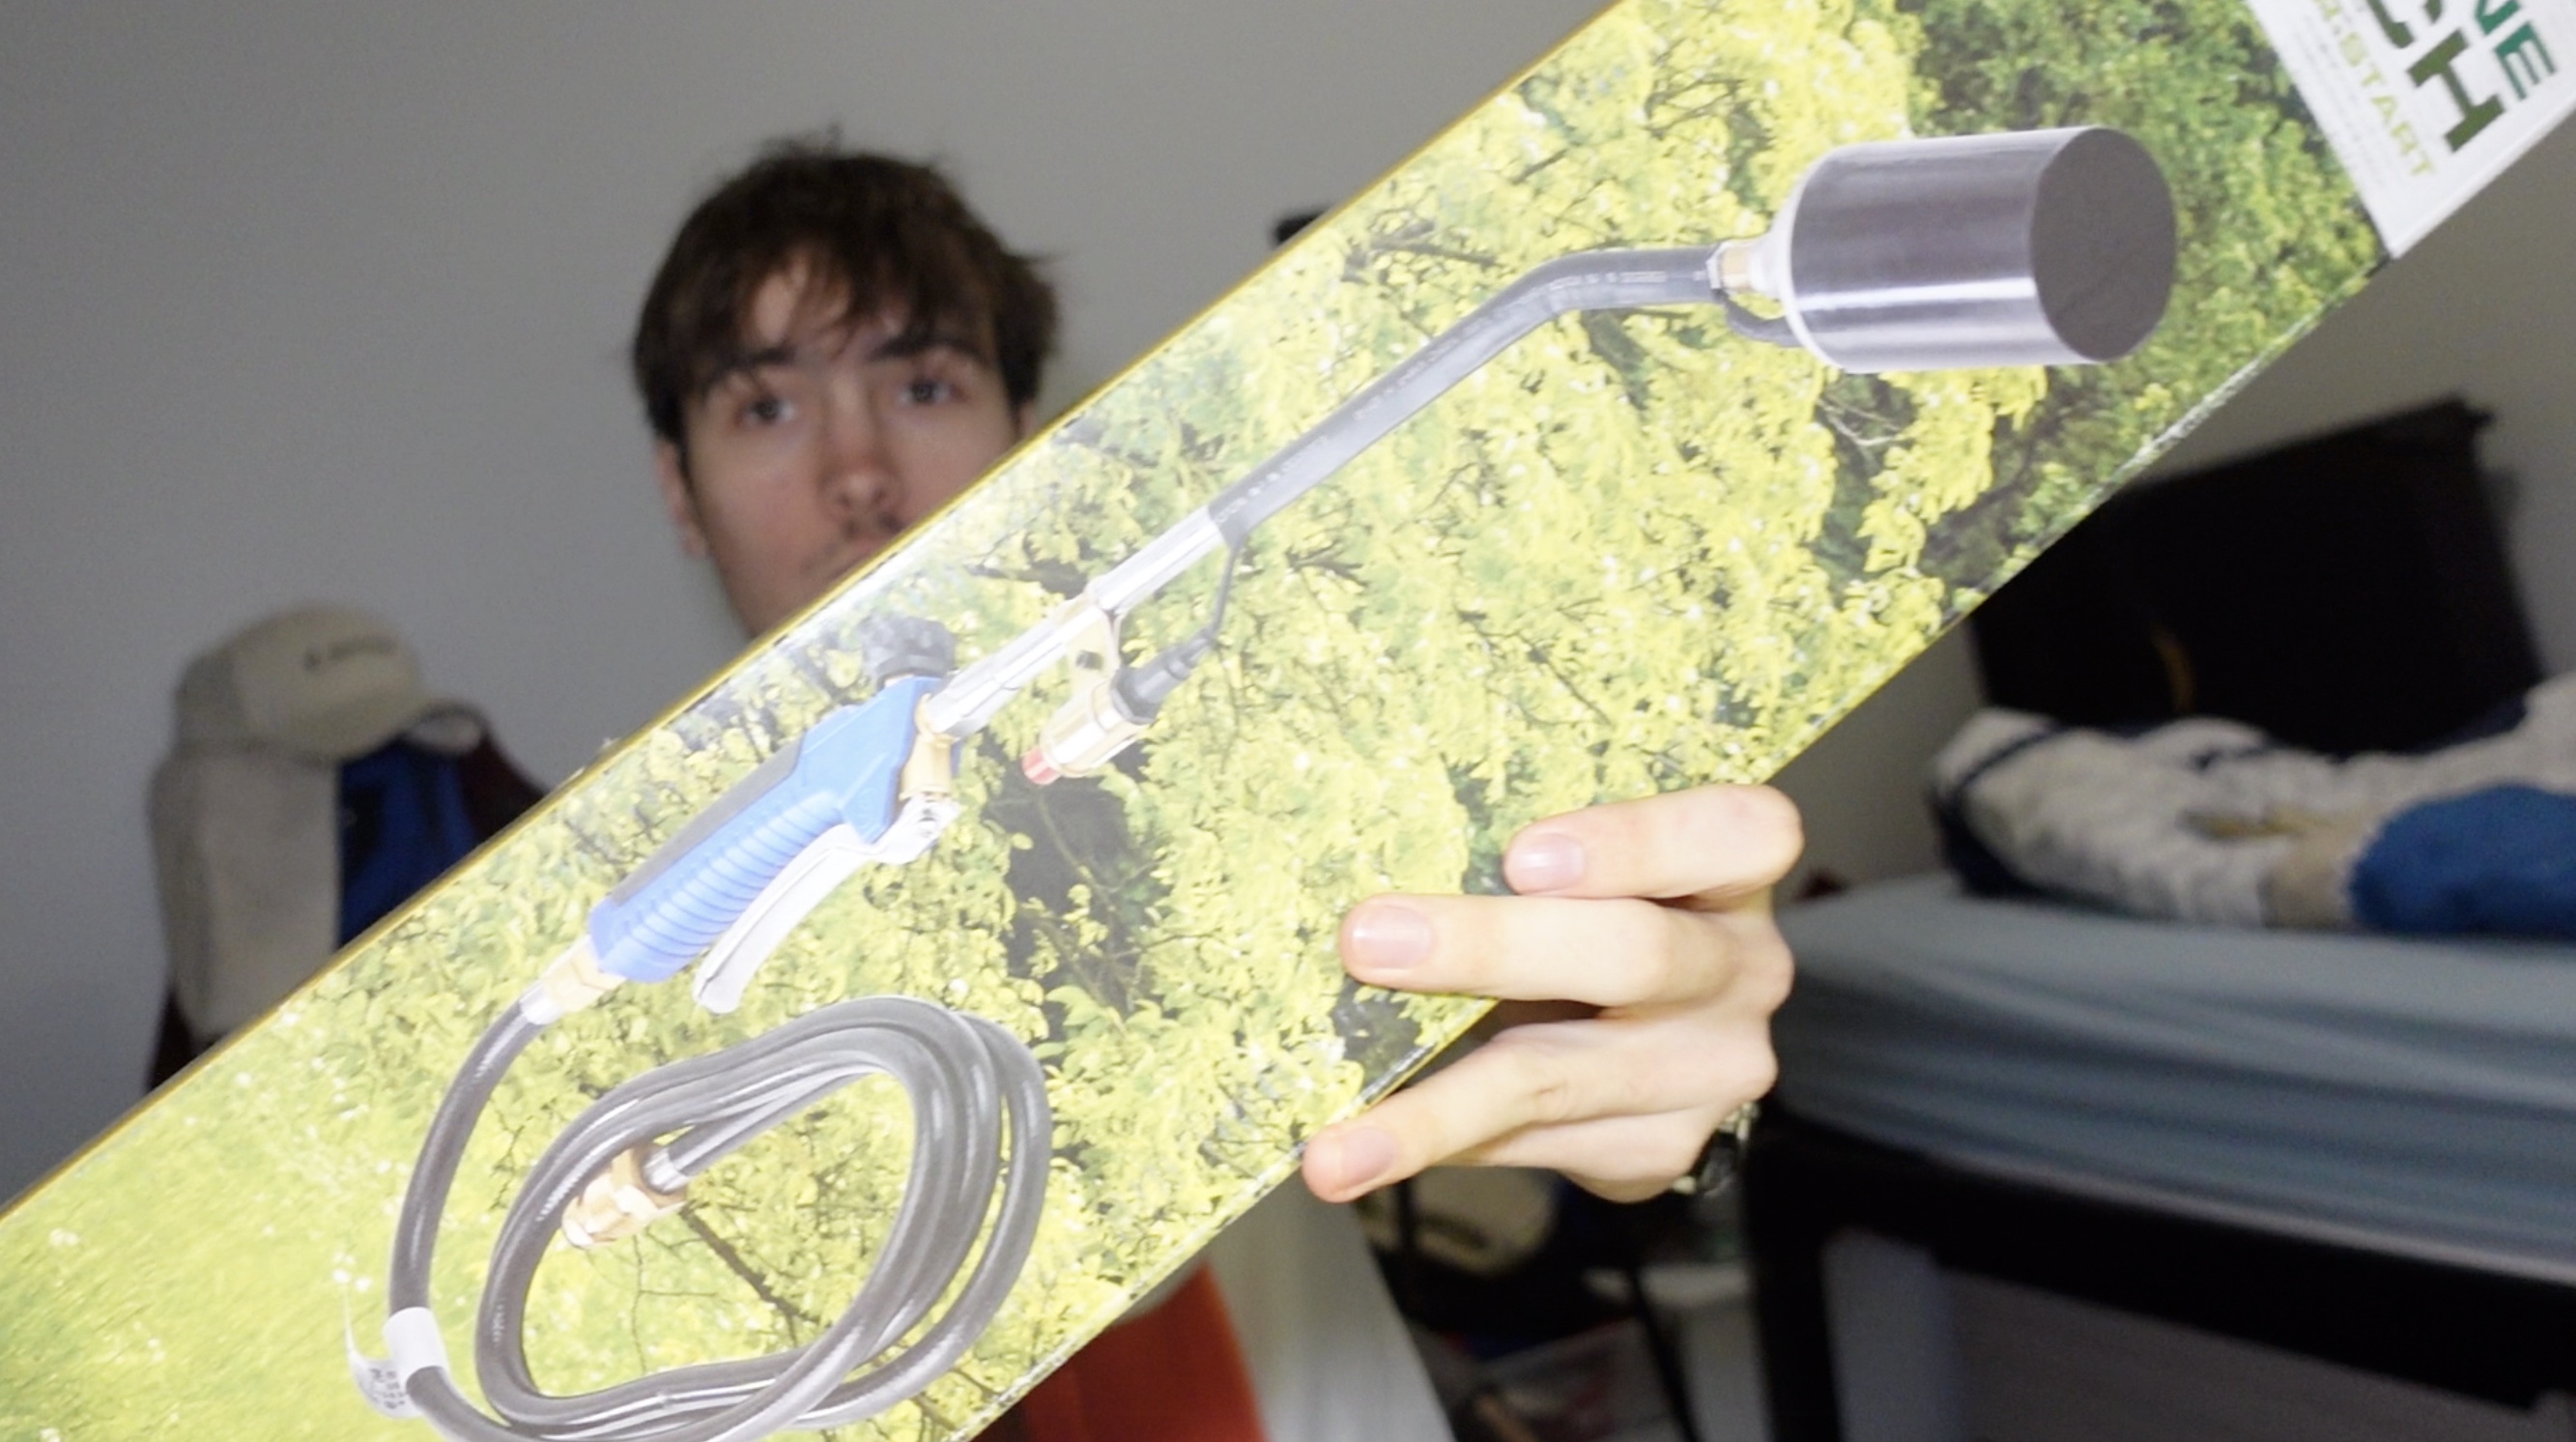
I've always thought flamethrowers were super cool and I've been building model ones since high school. My dream was to always own a Not-A-Flamethrower, a limited exclusive of Elon Musk's Boring company (link), but with current prices $1000+, they were simply too expensive for me.
So I decided to build my own, and ended up making an improvement to the design of the not-a-flamethrower.
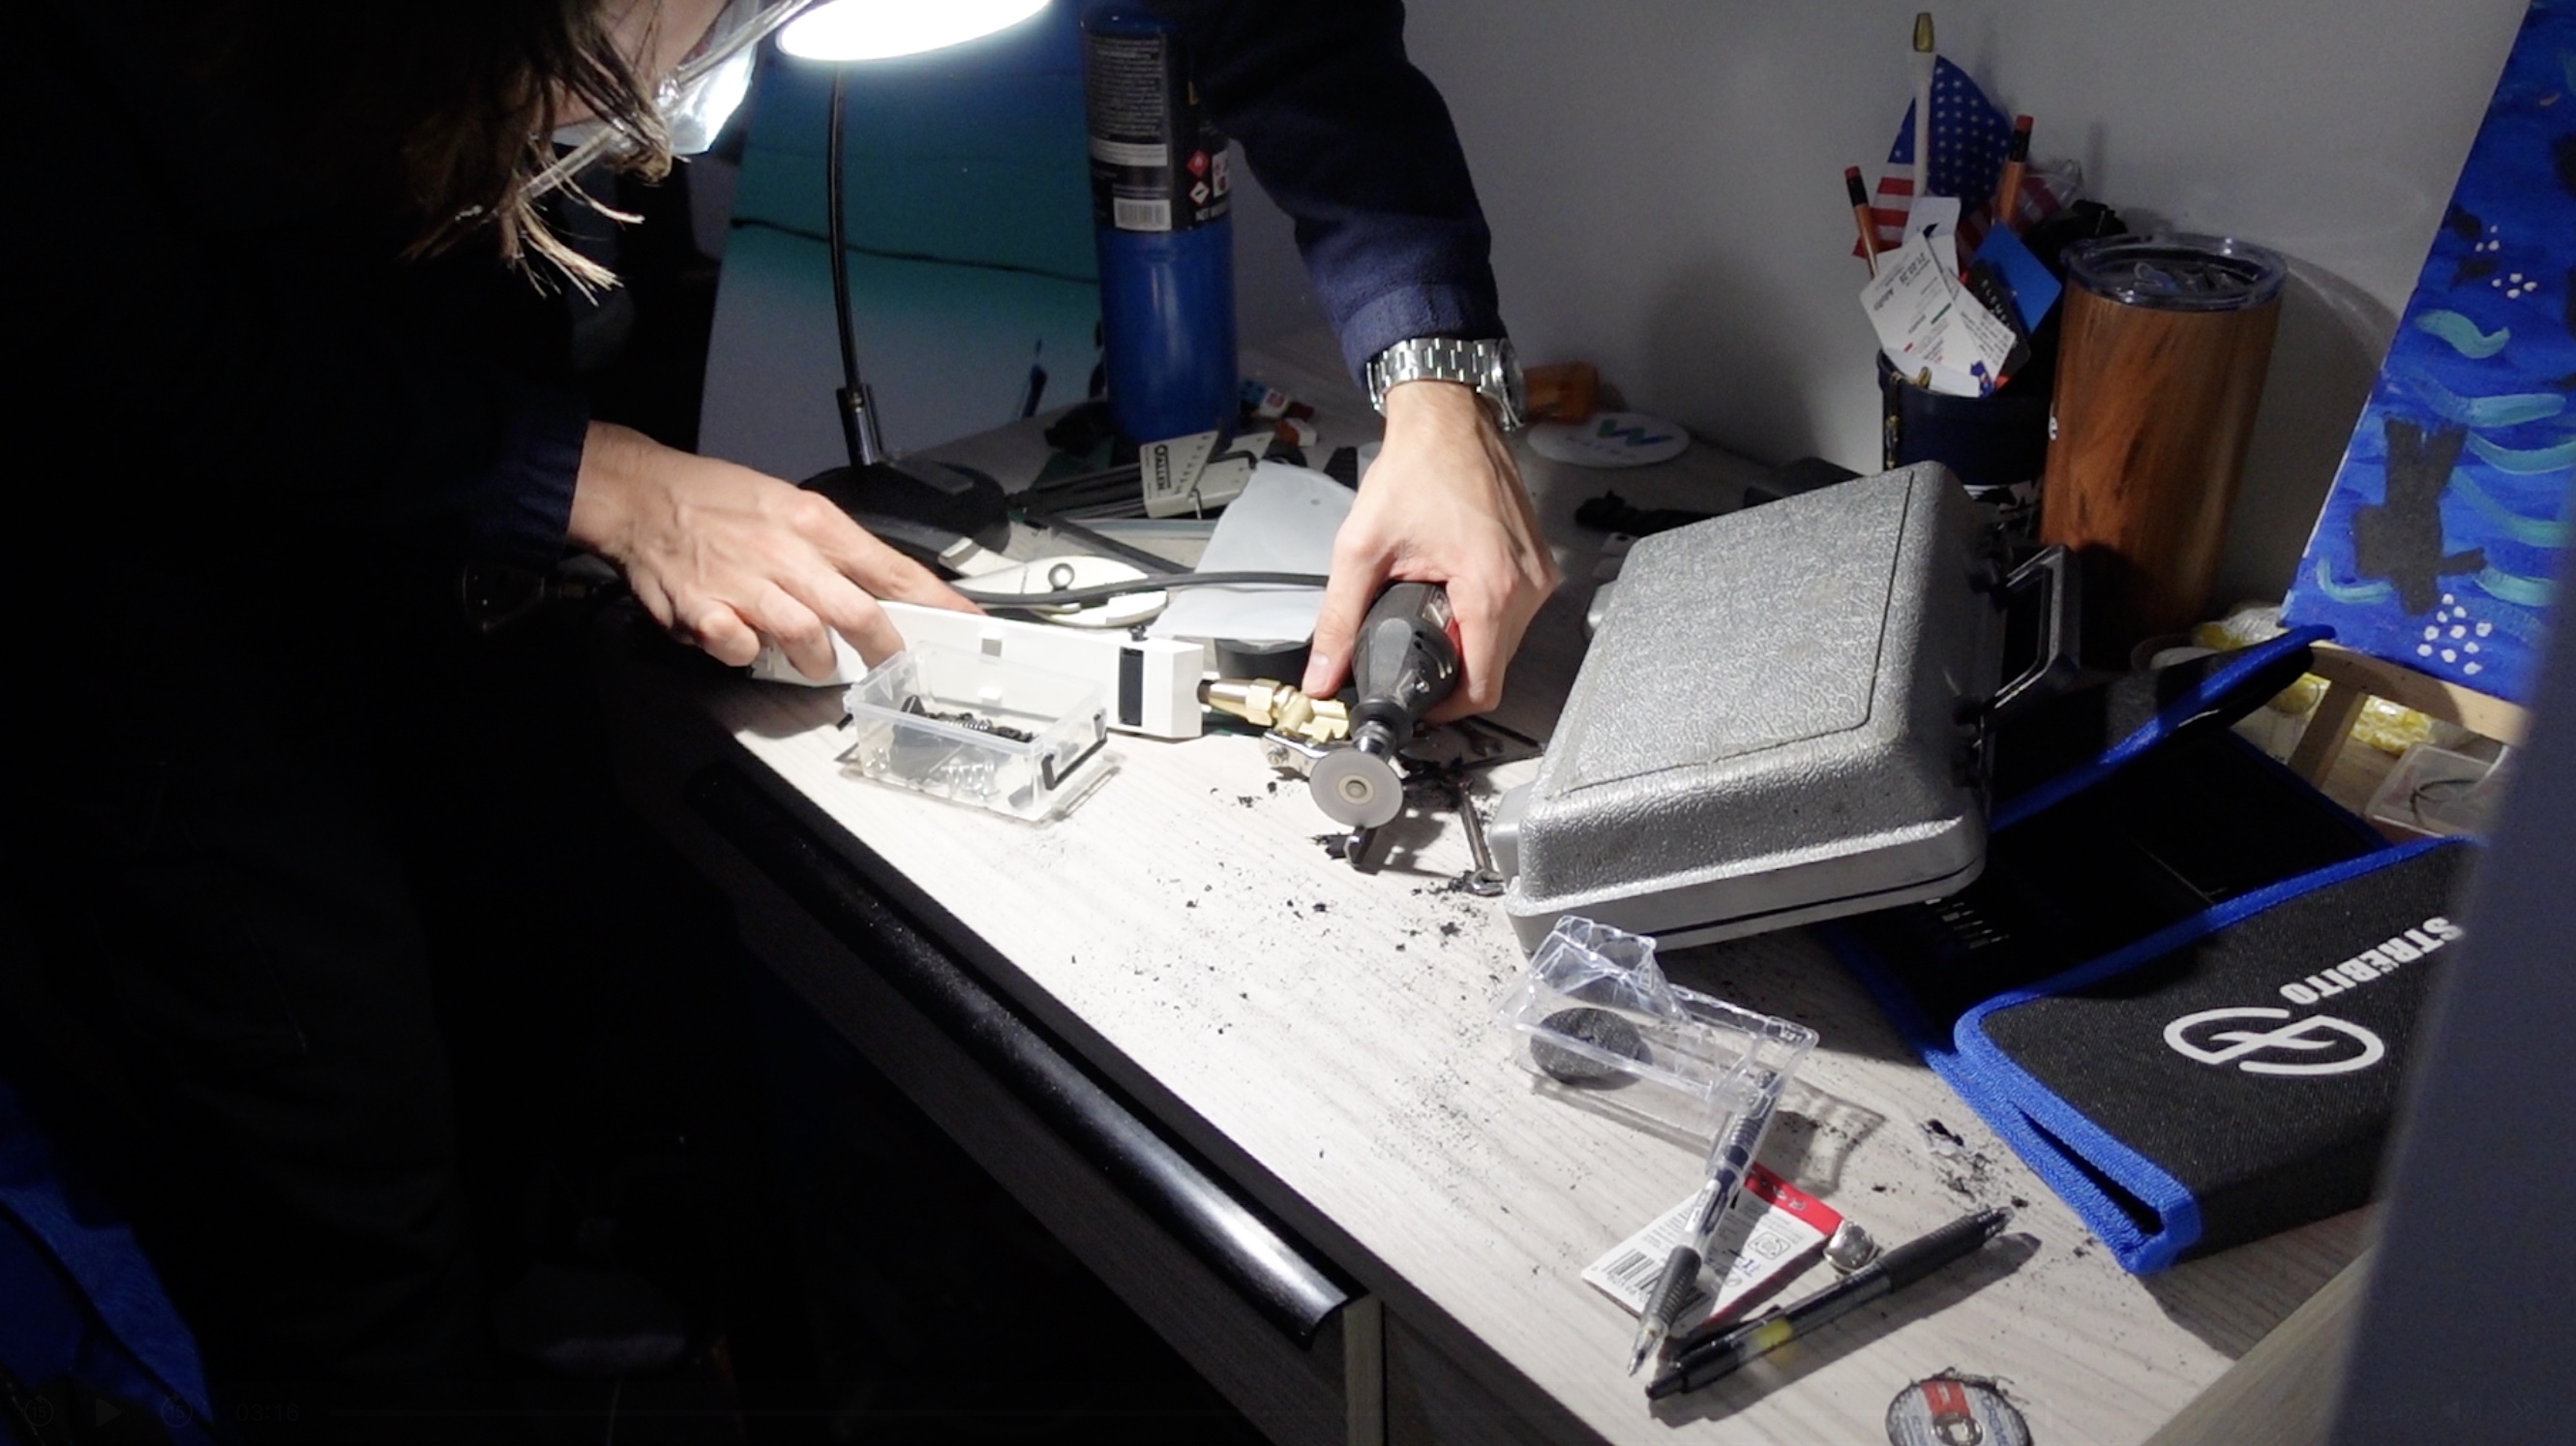
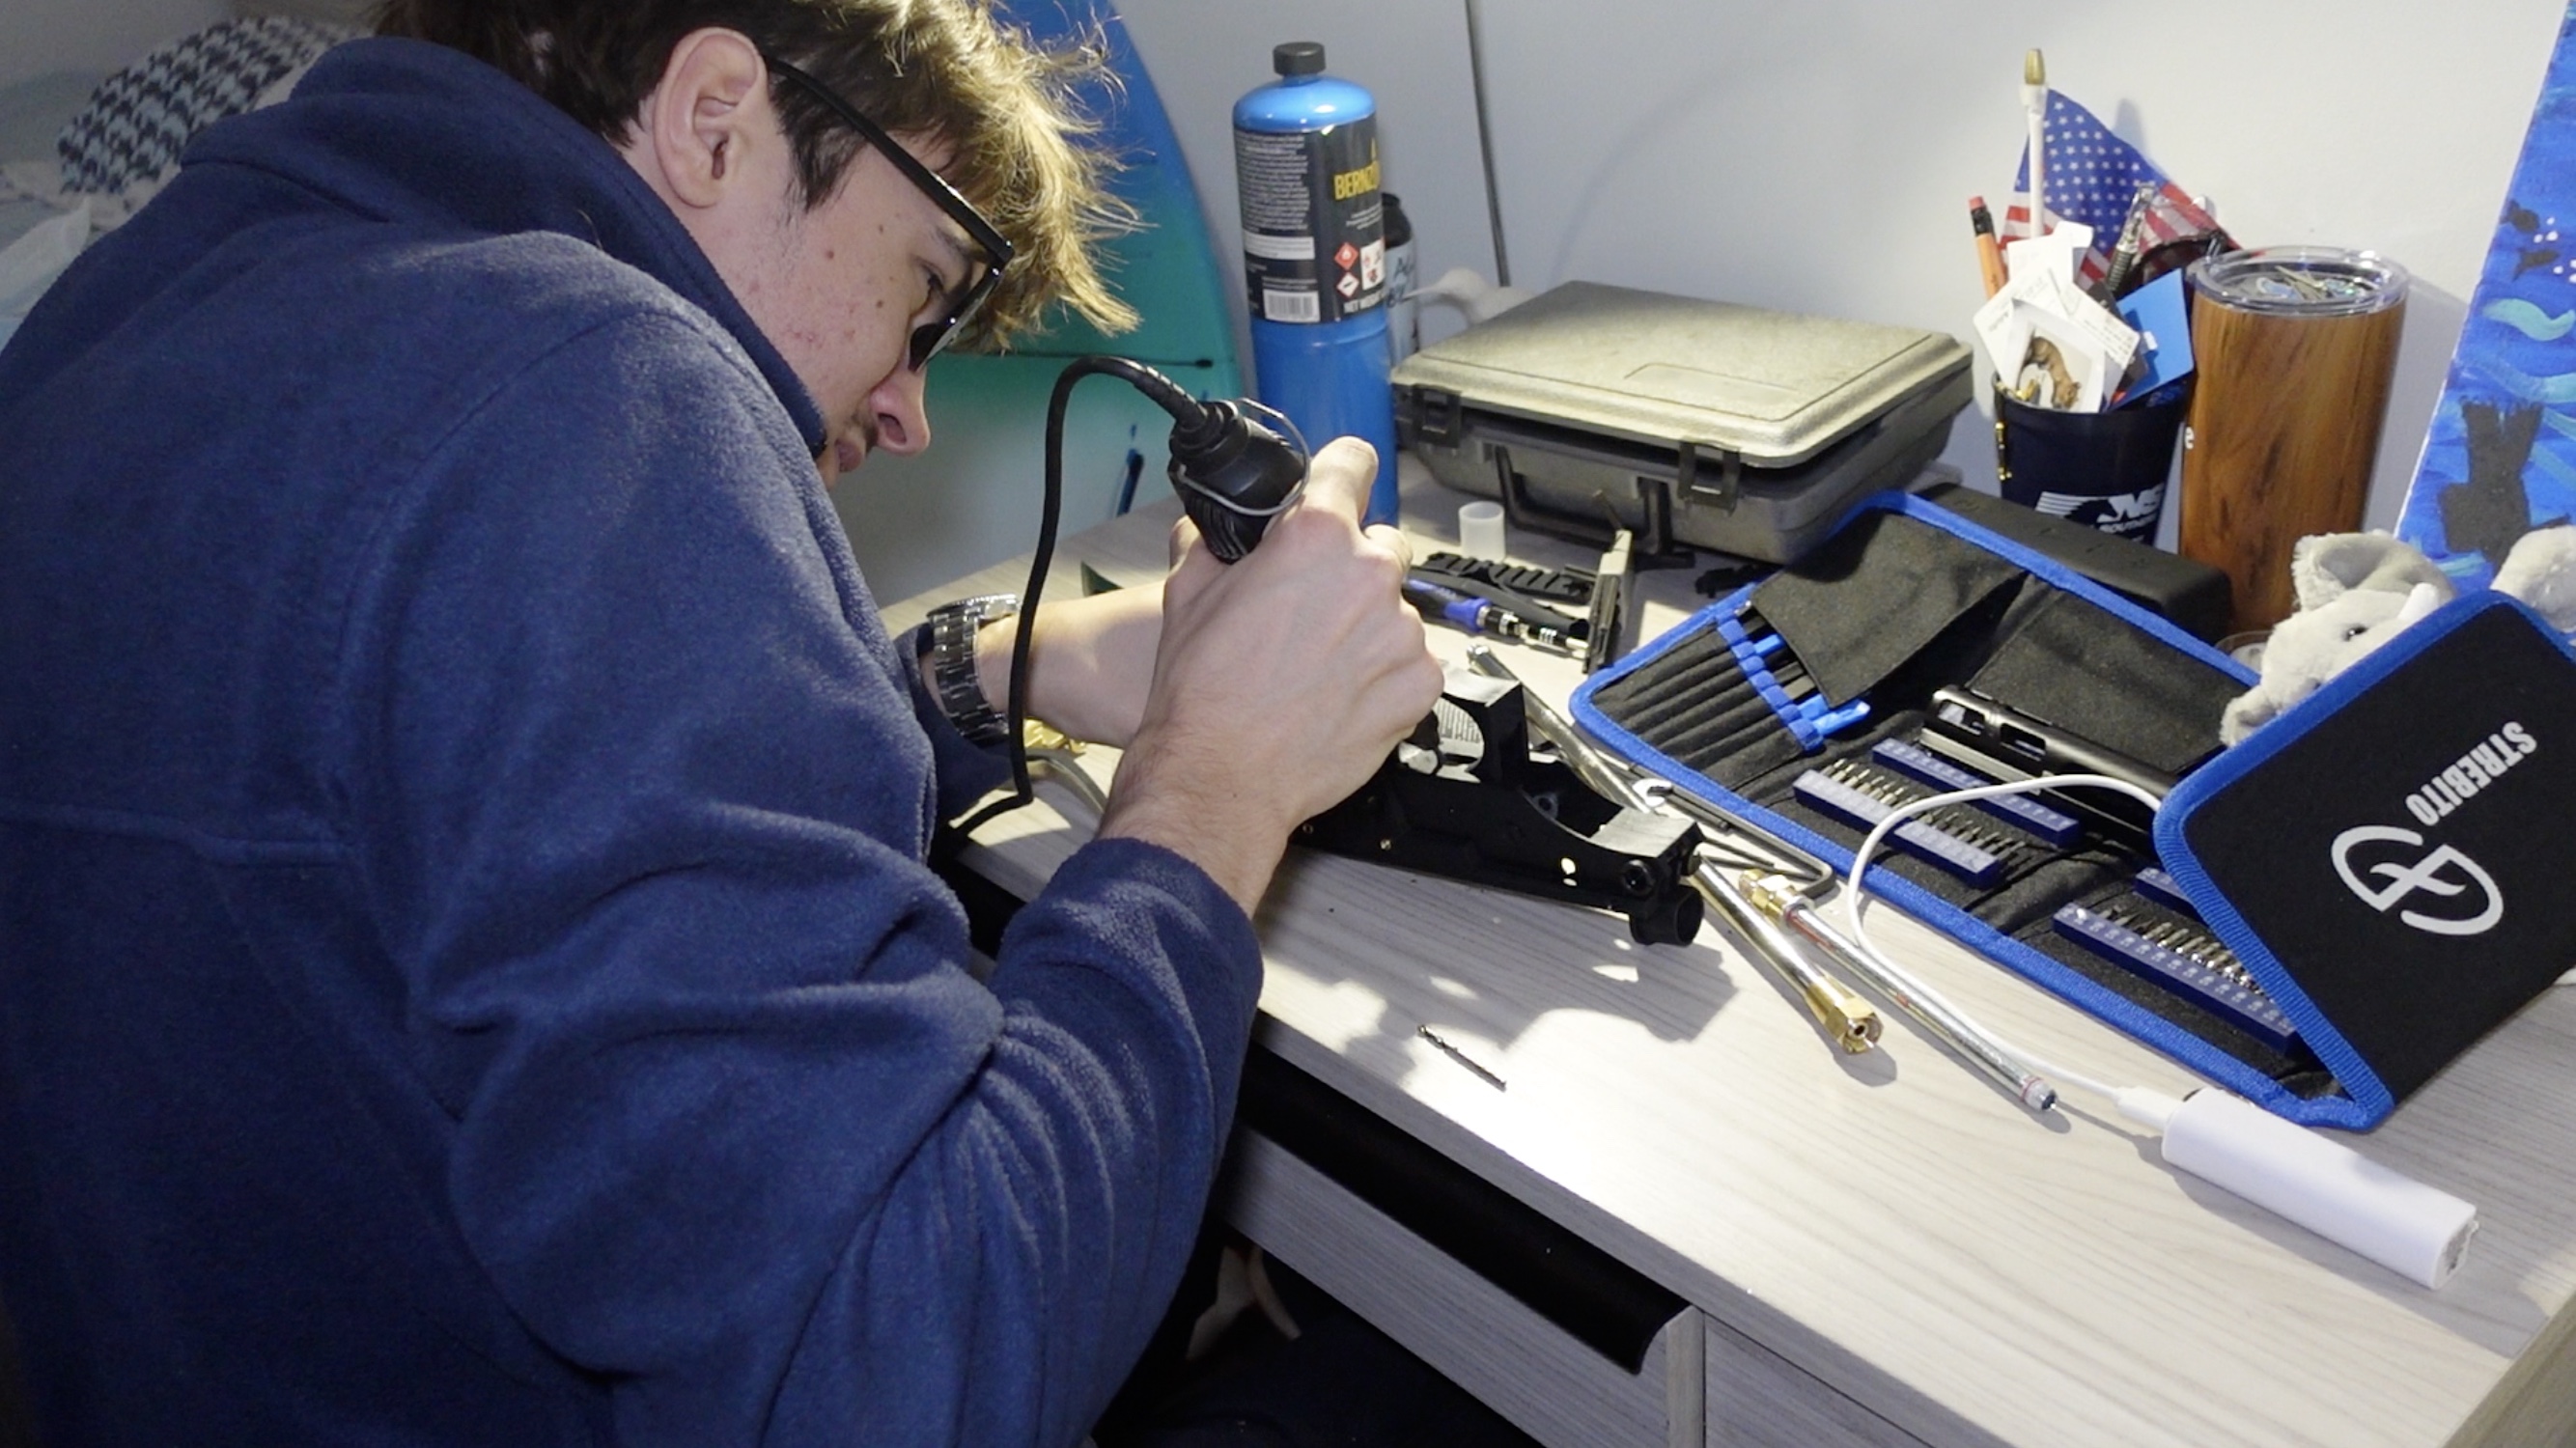
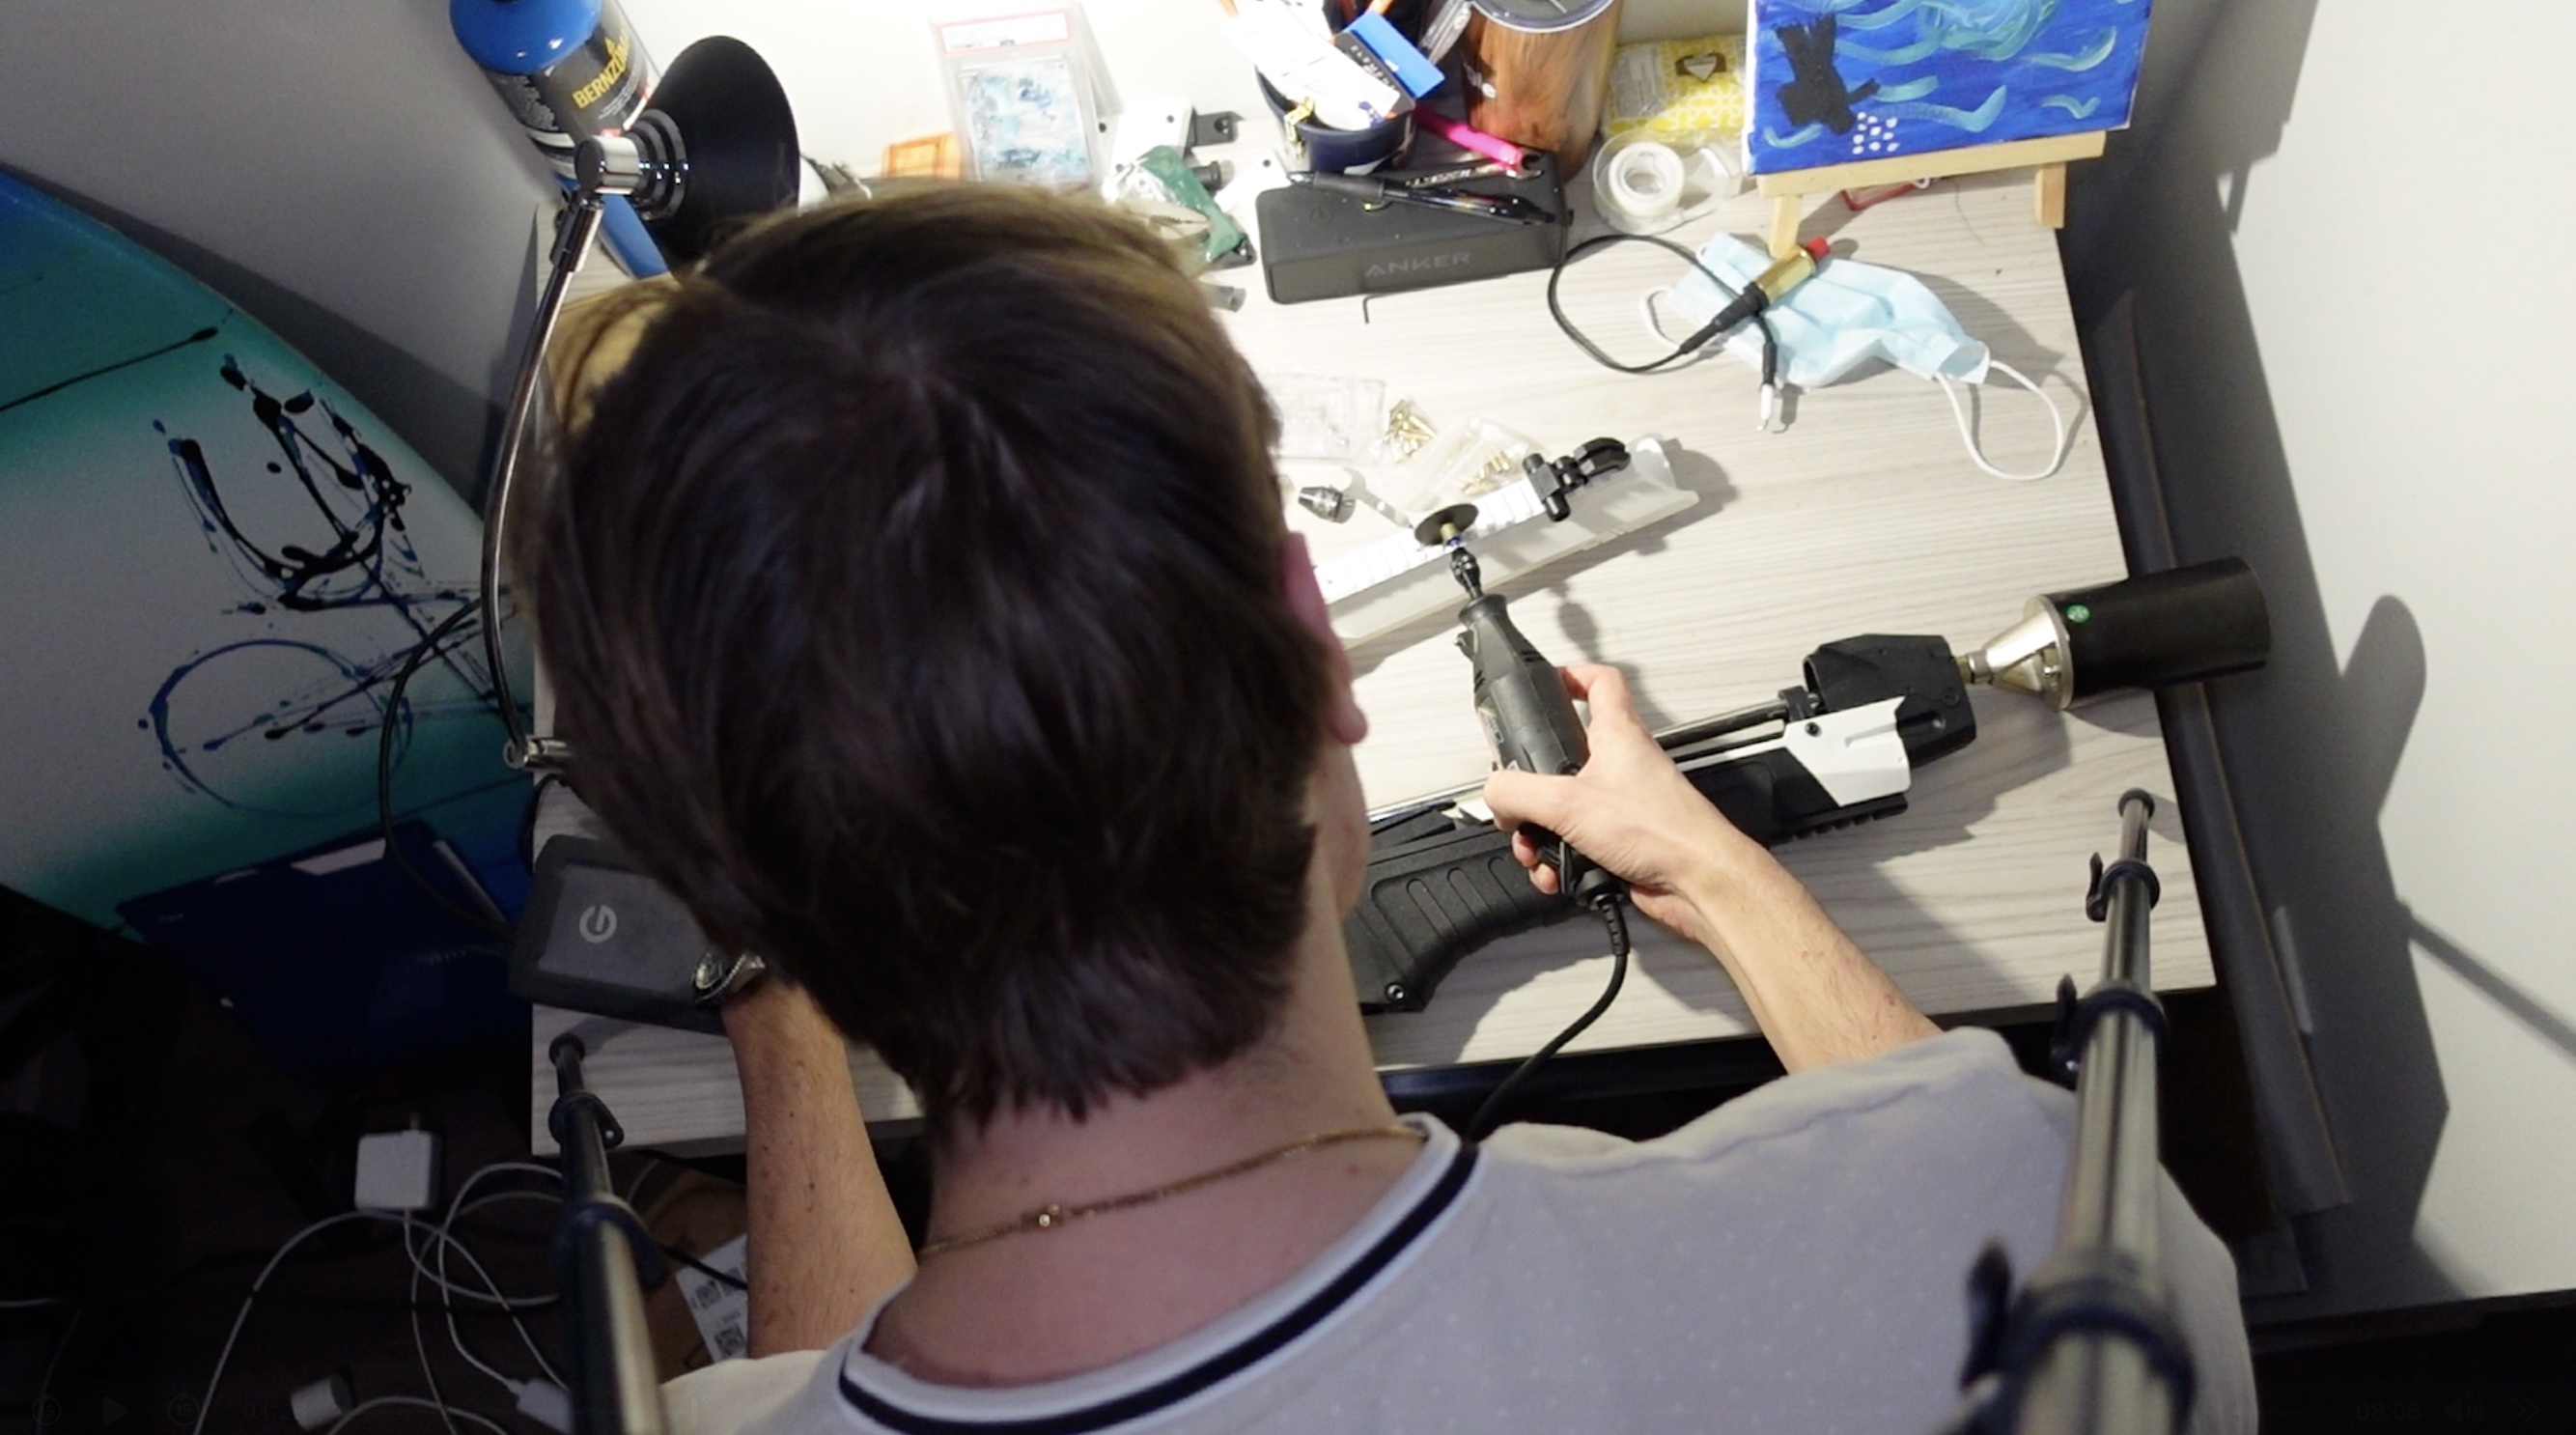
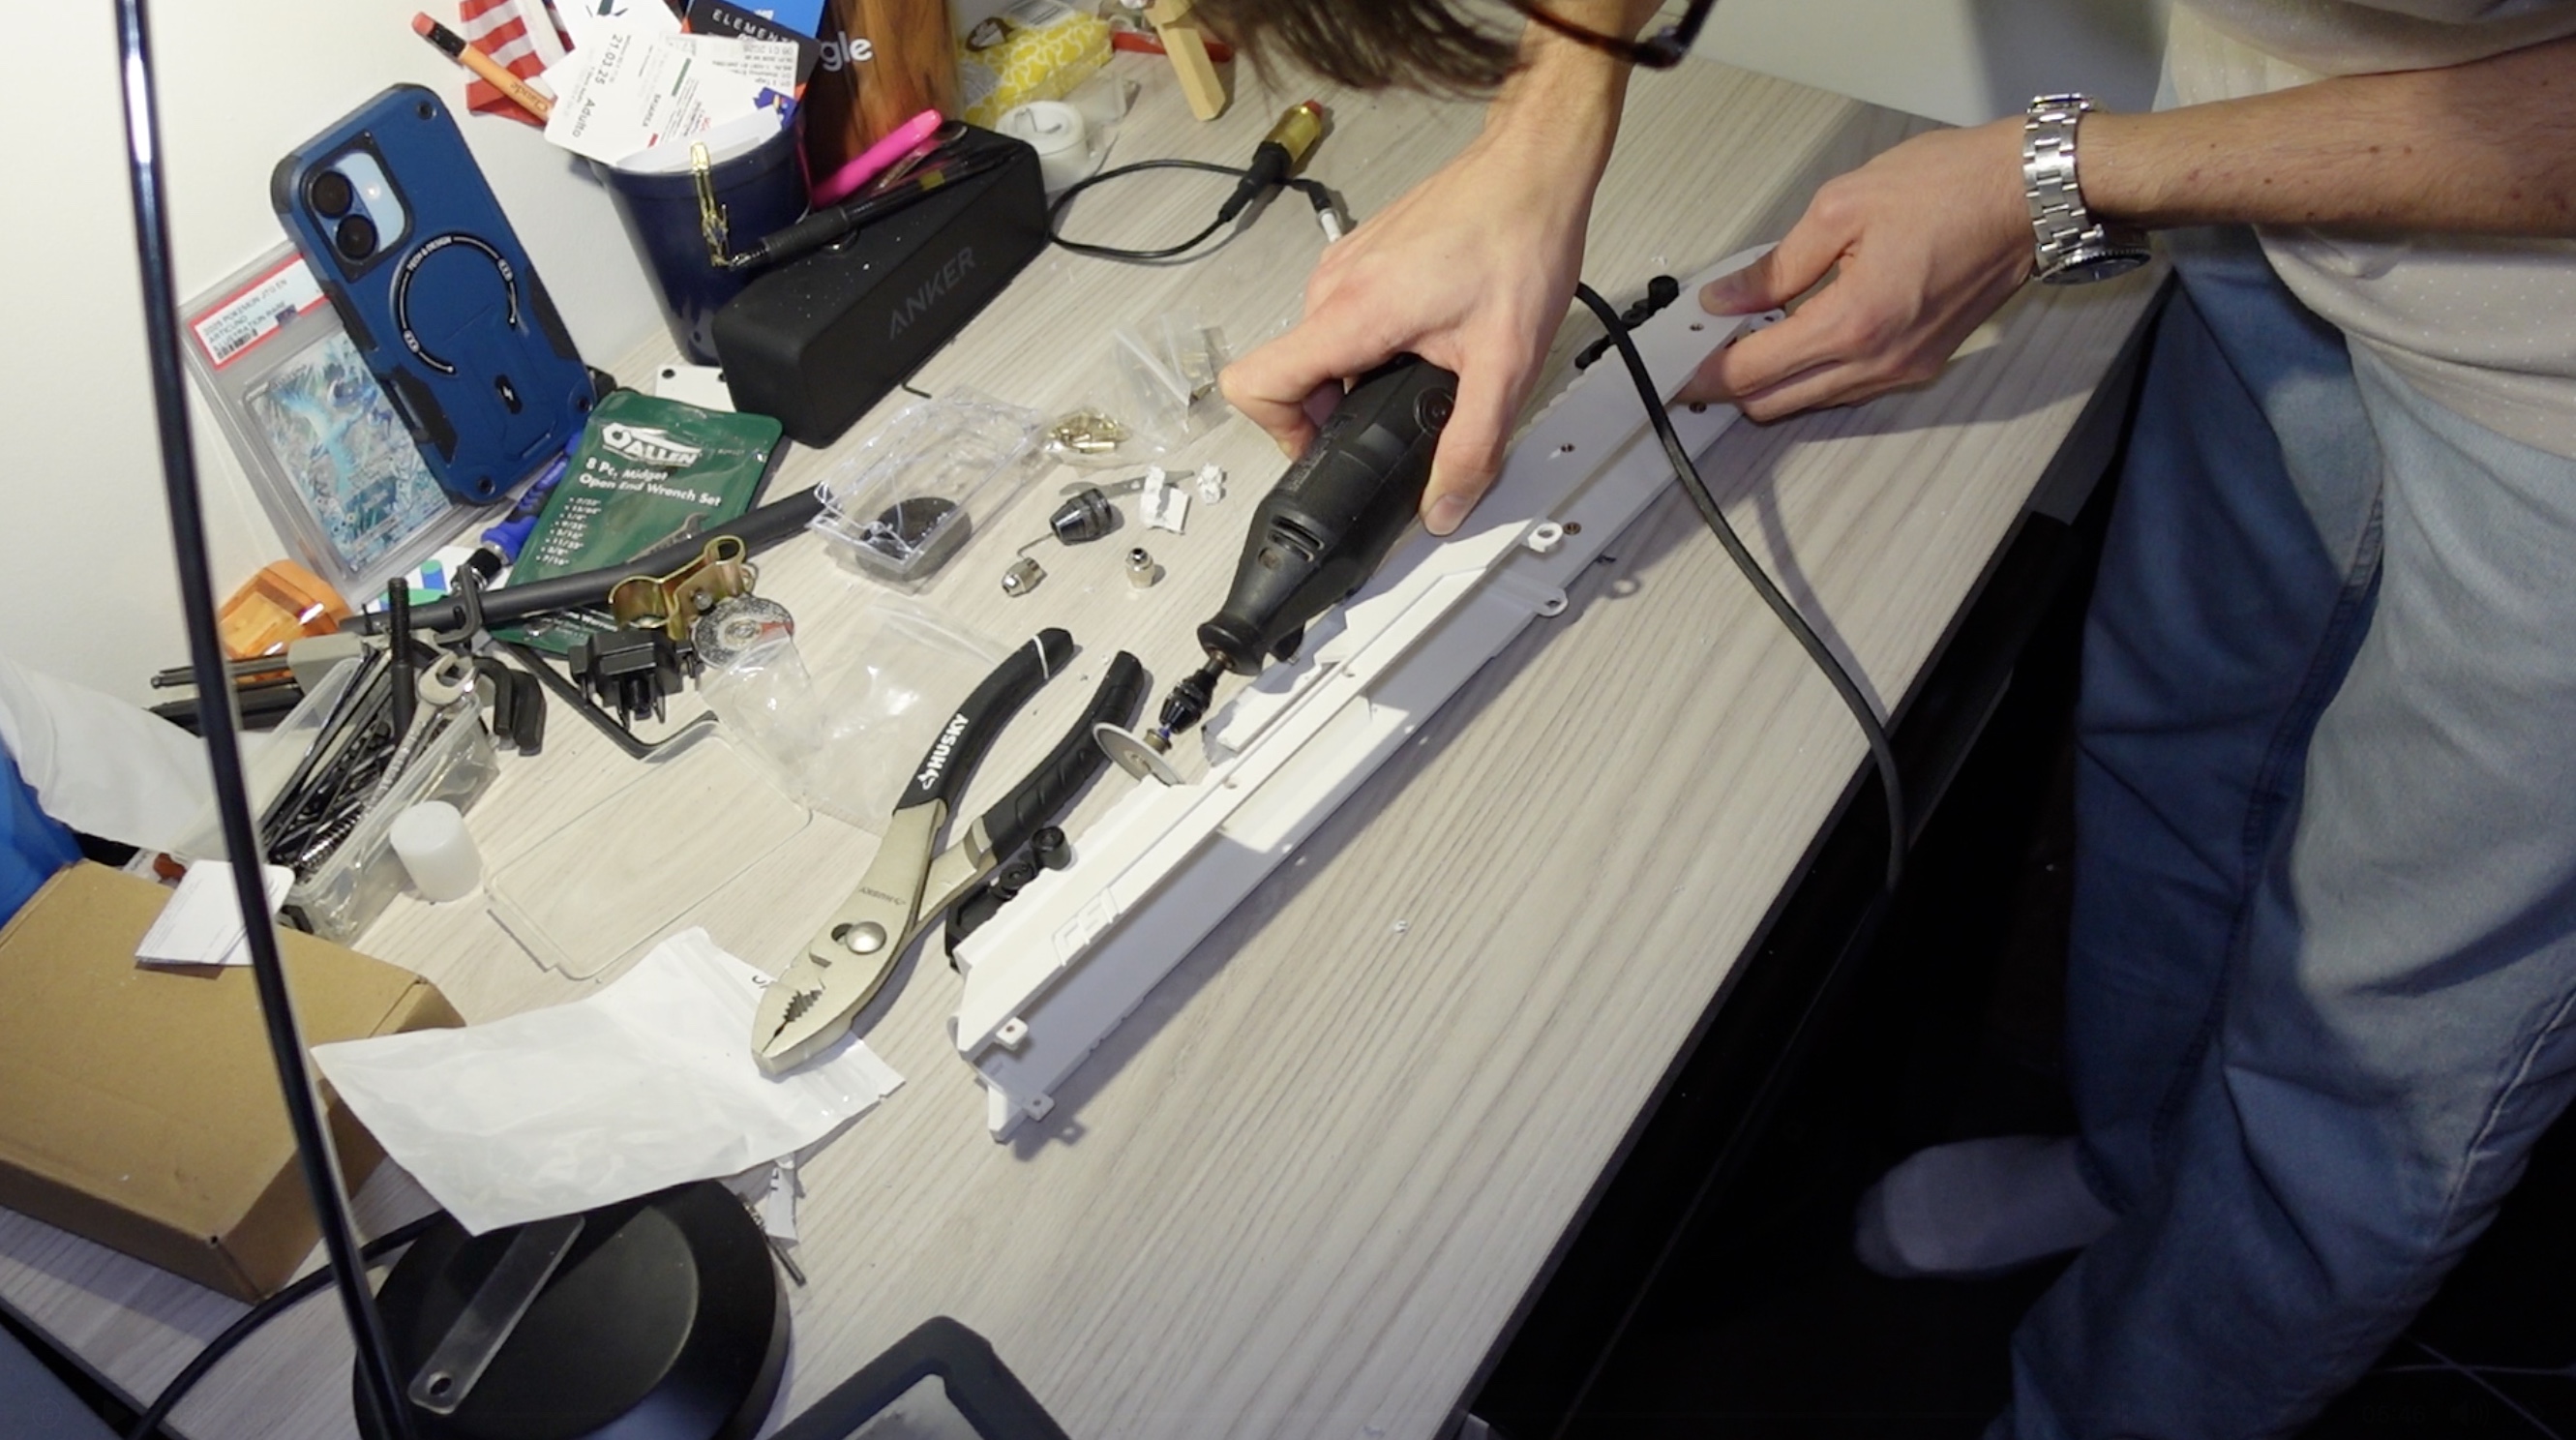
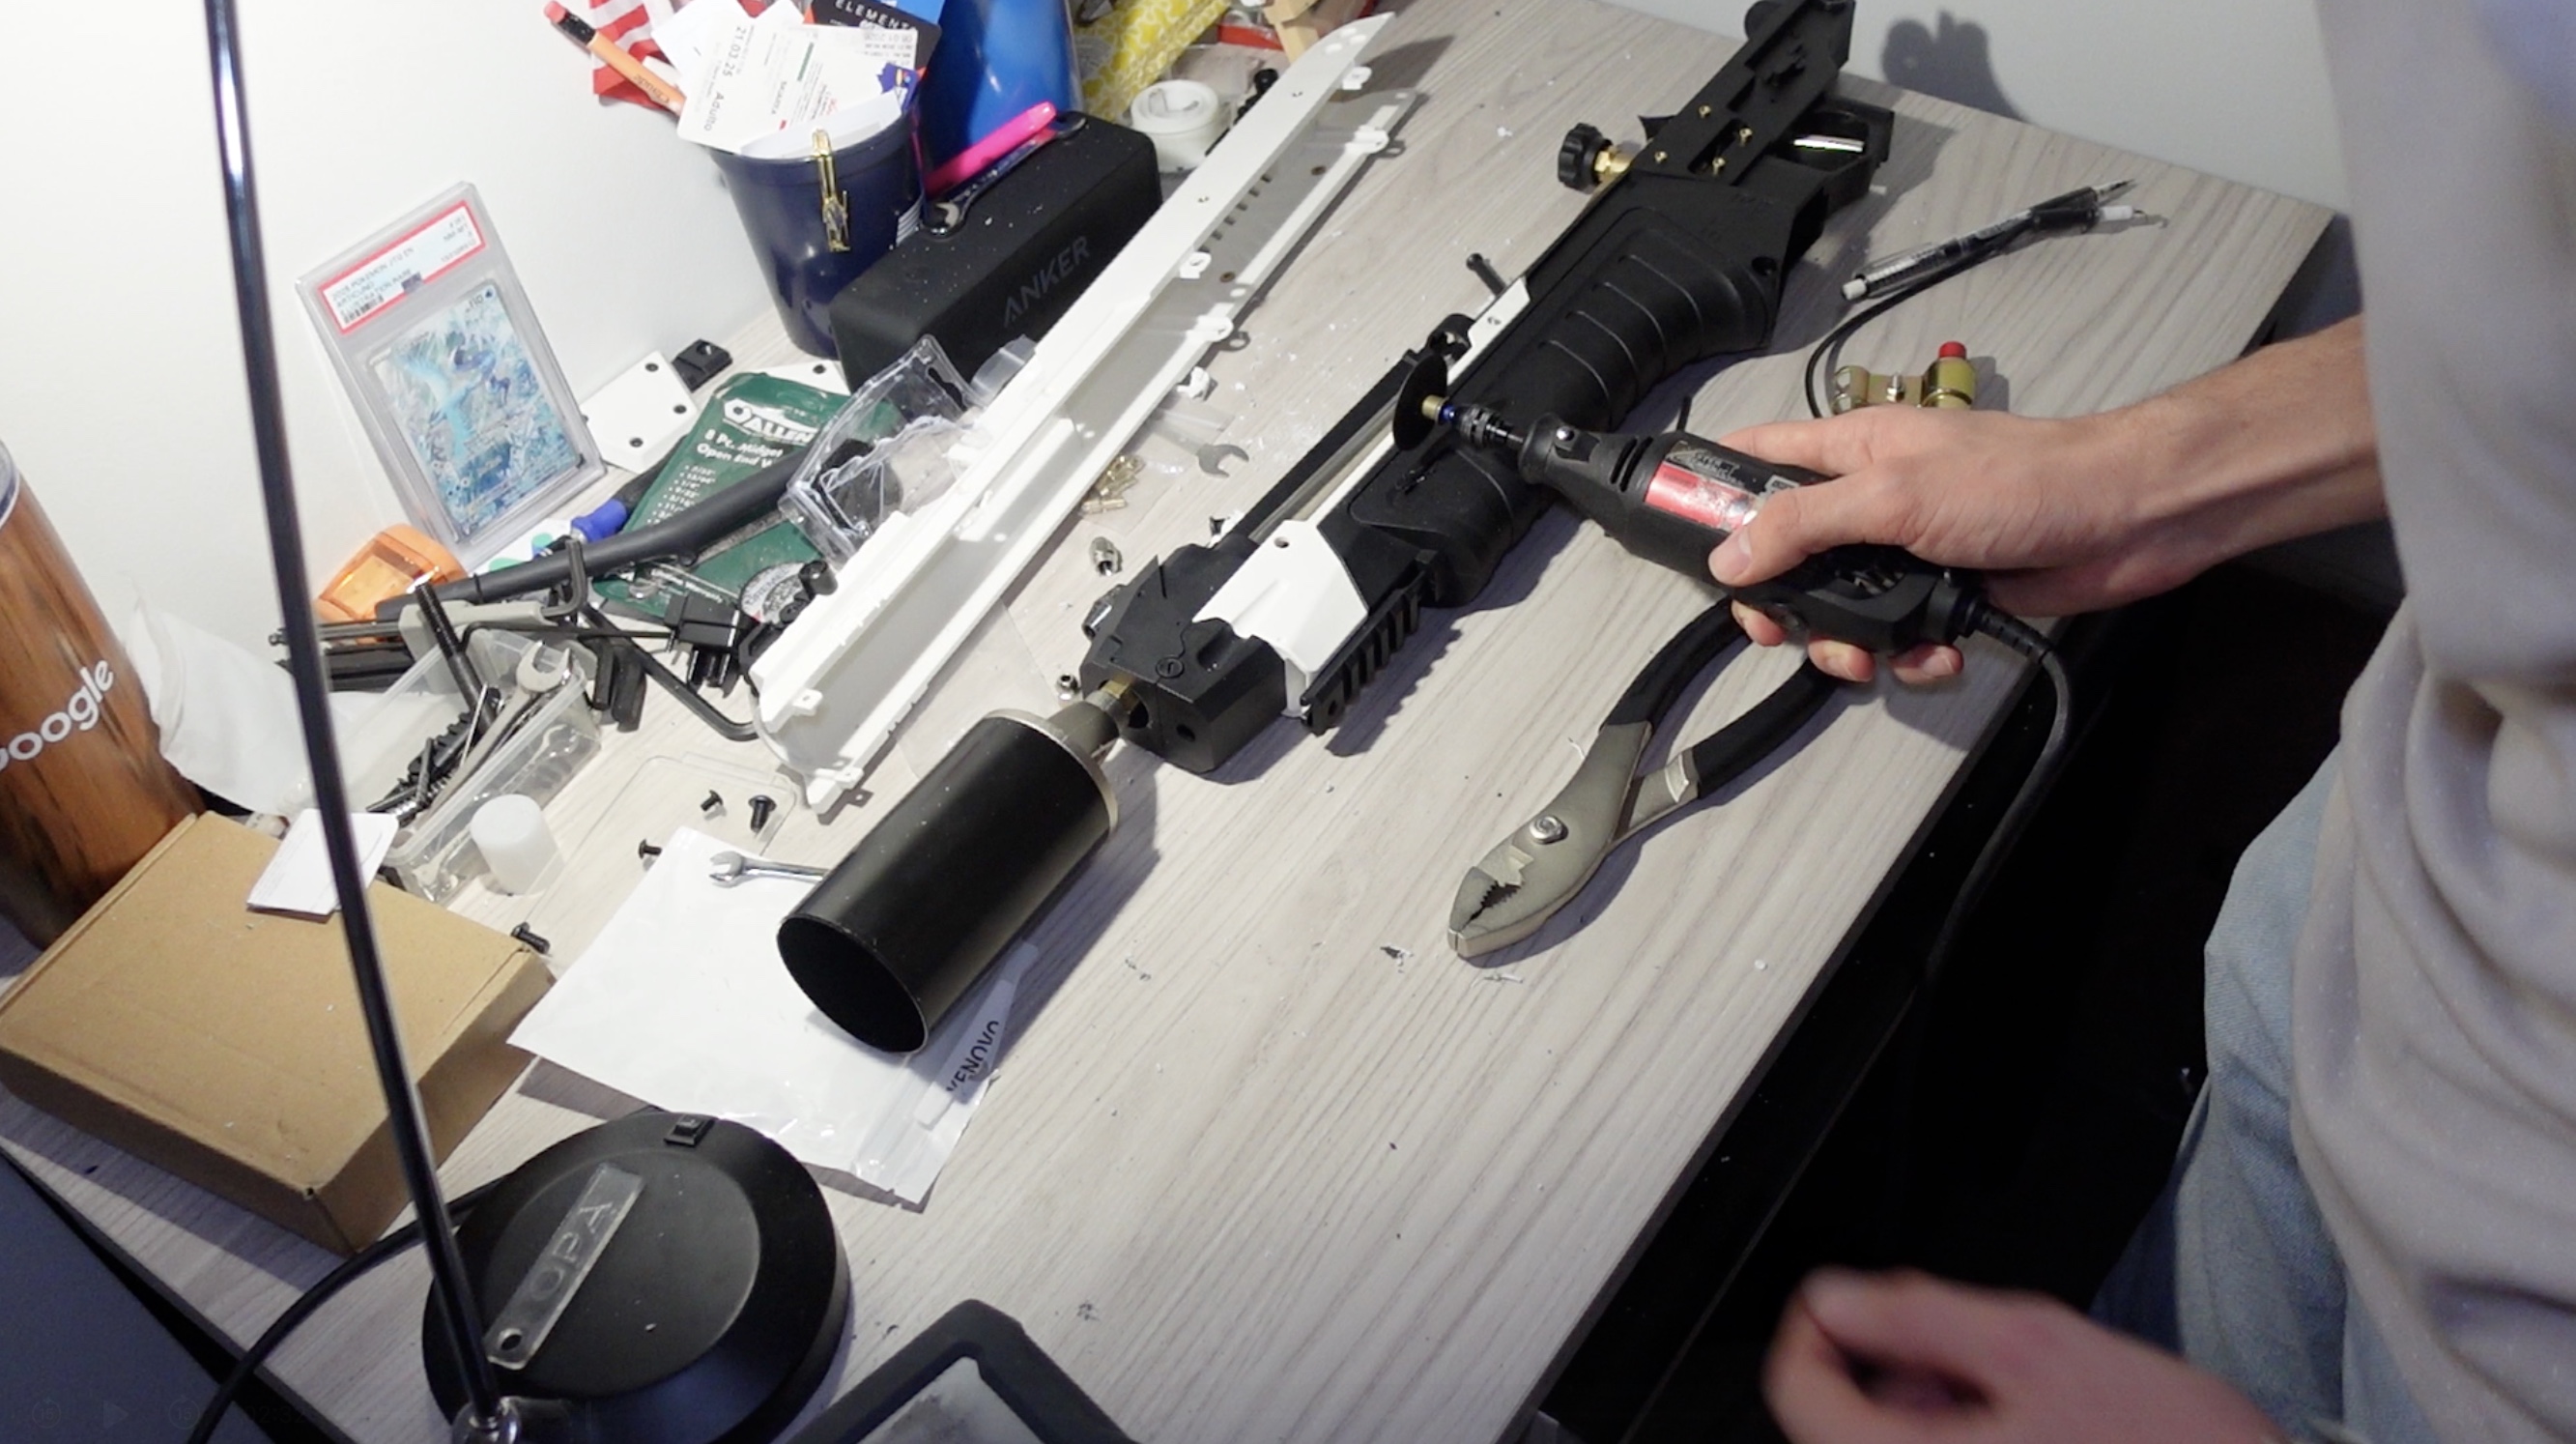
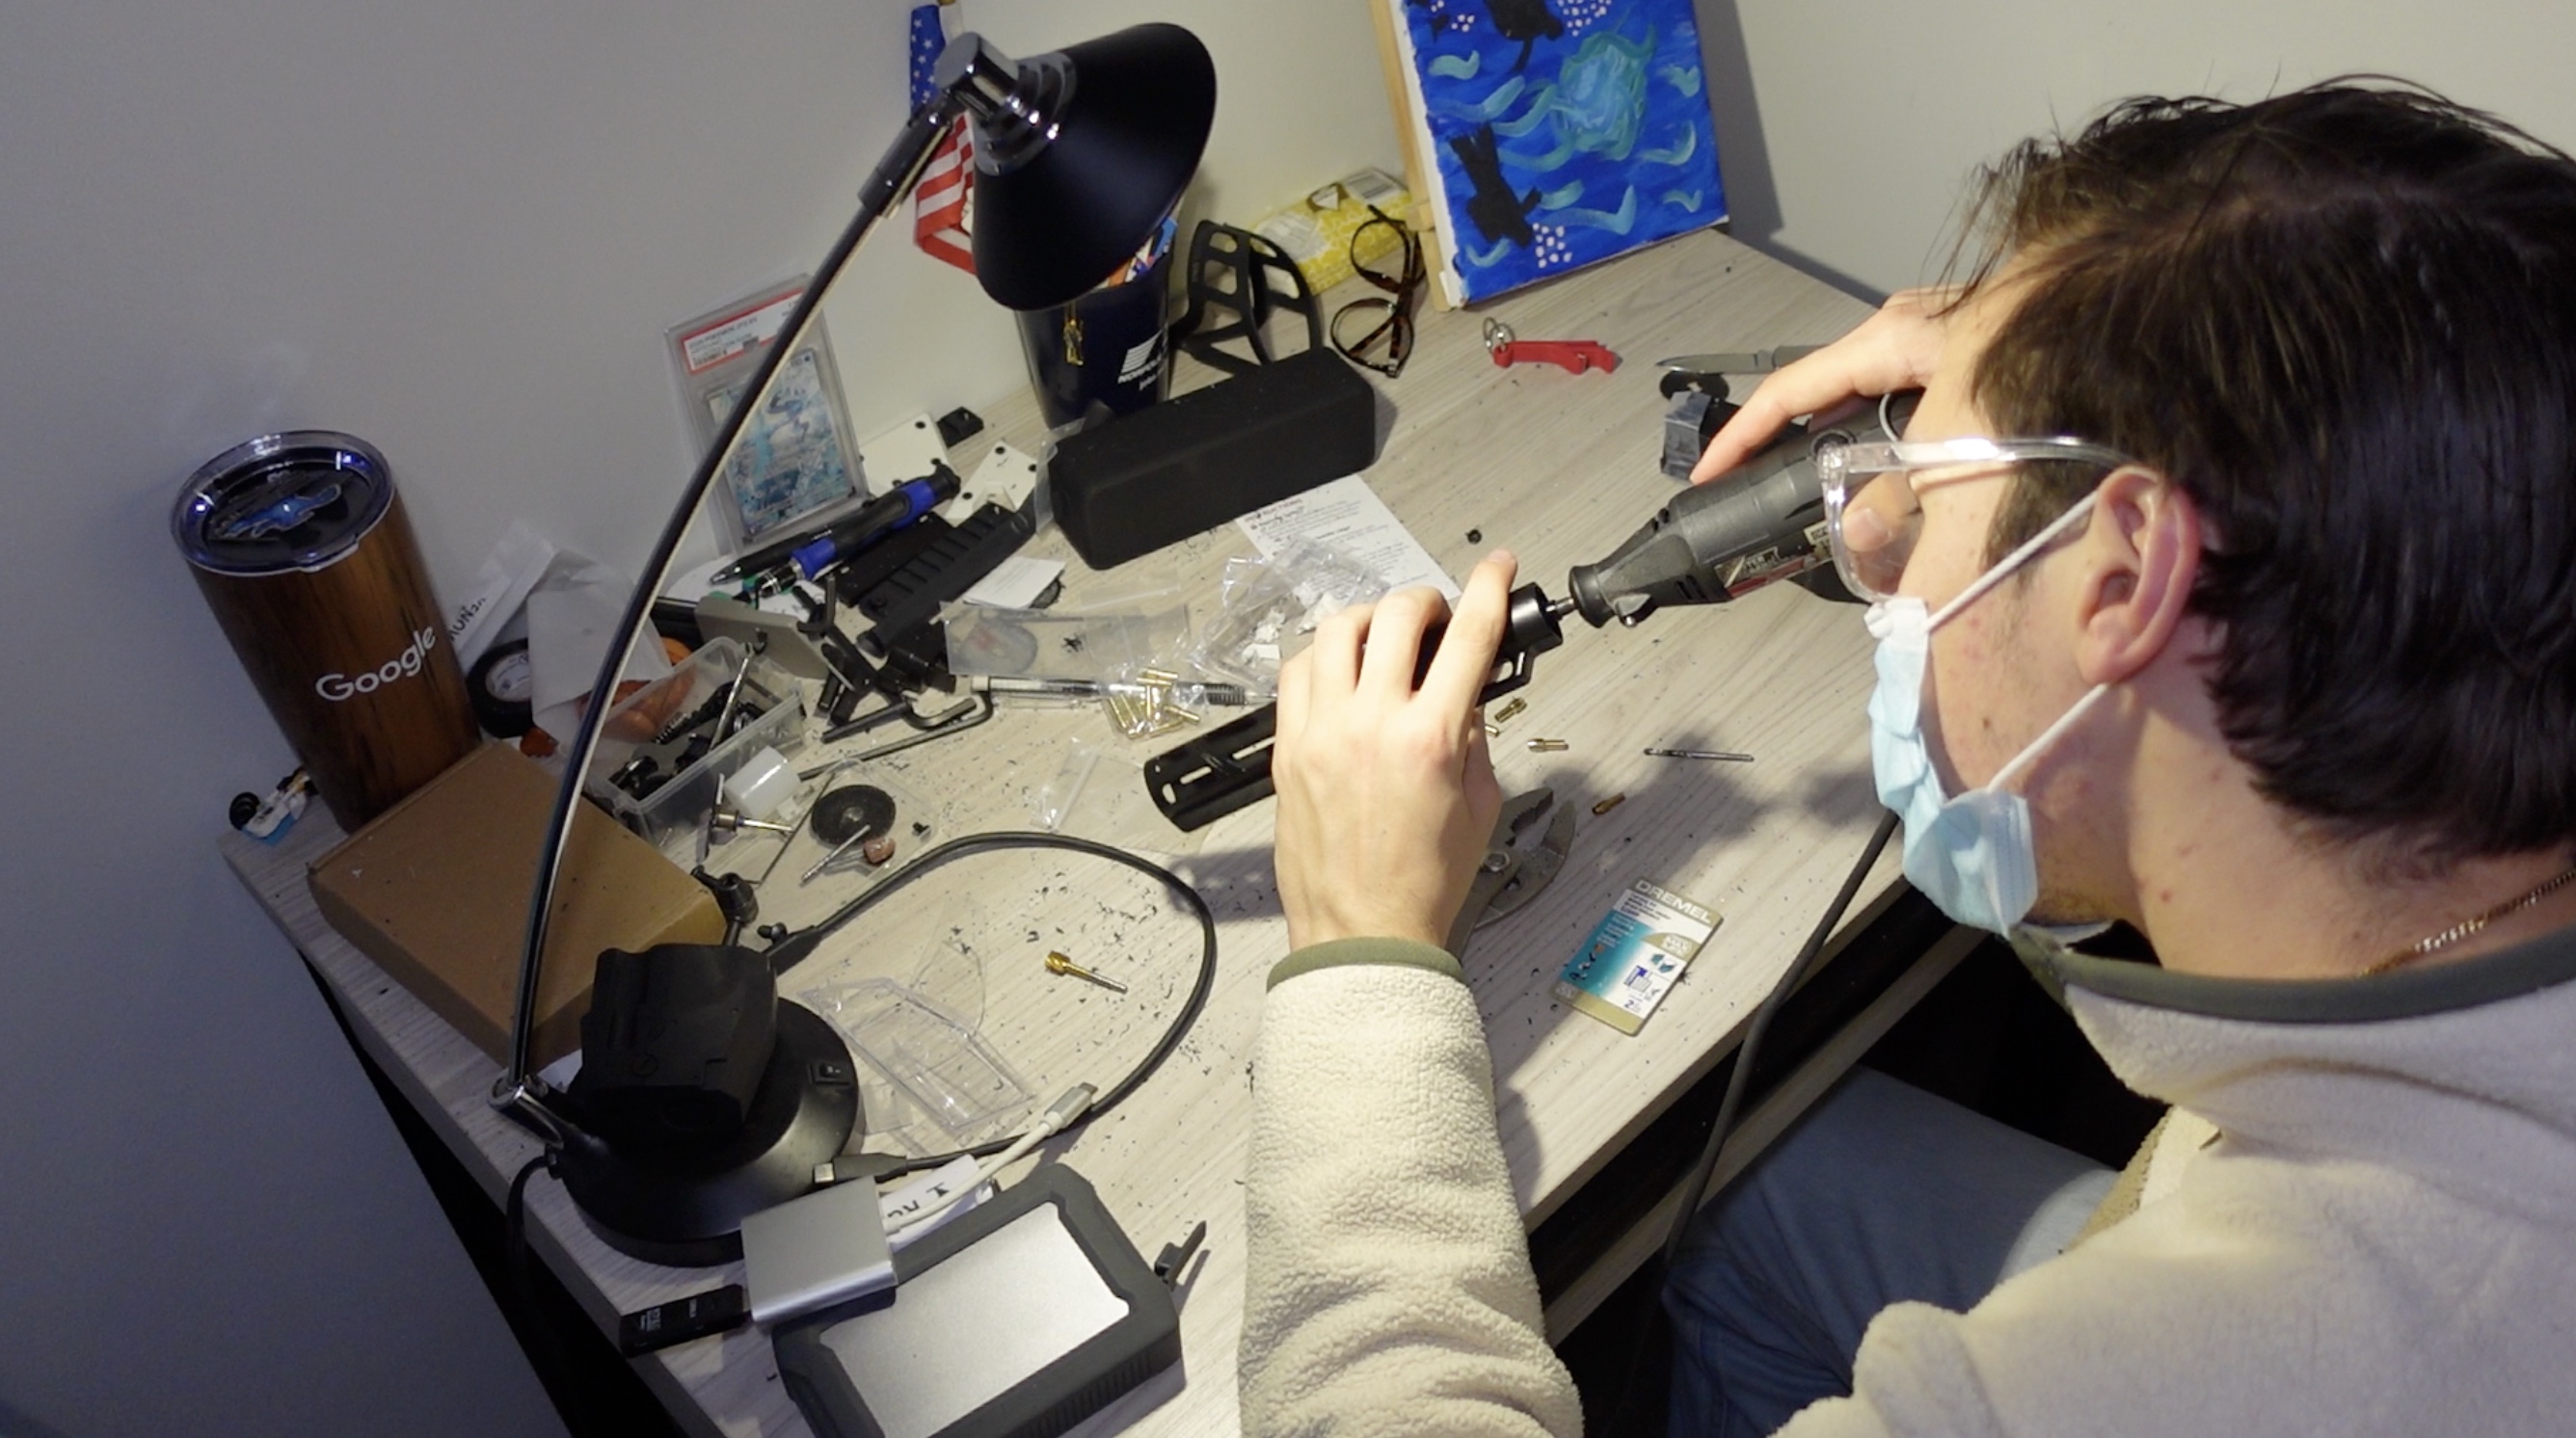
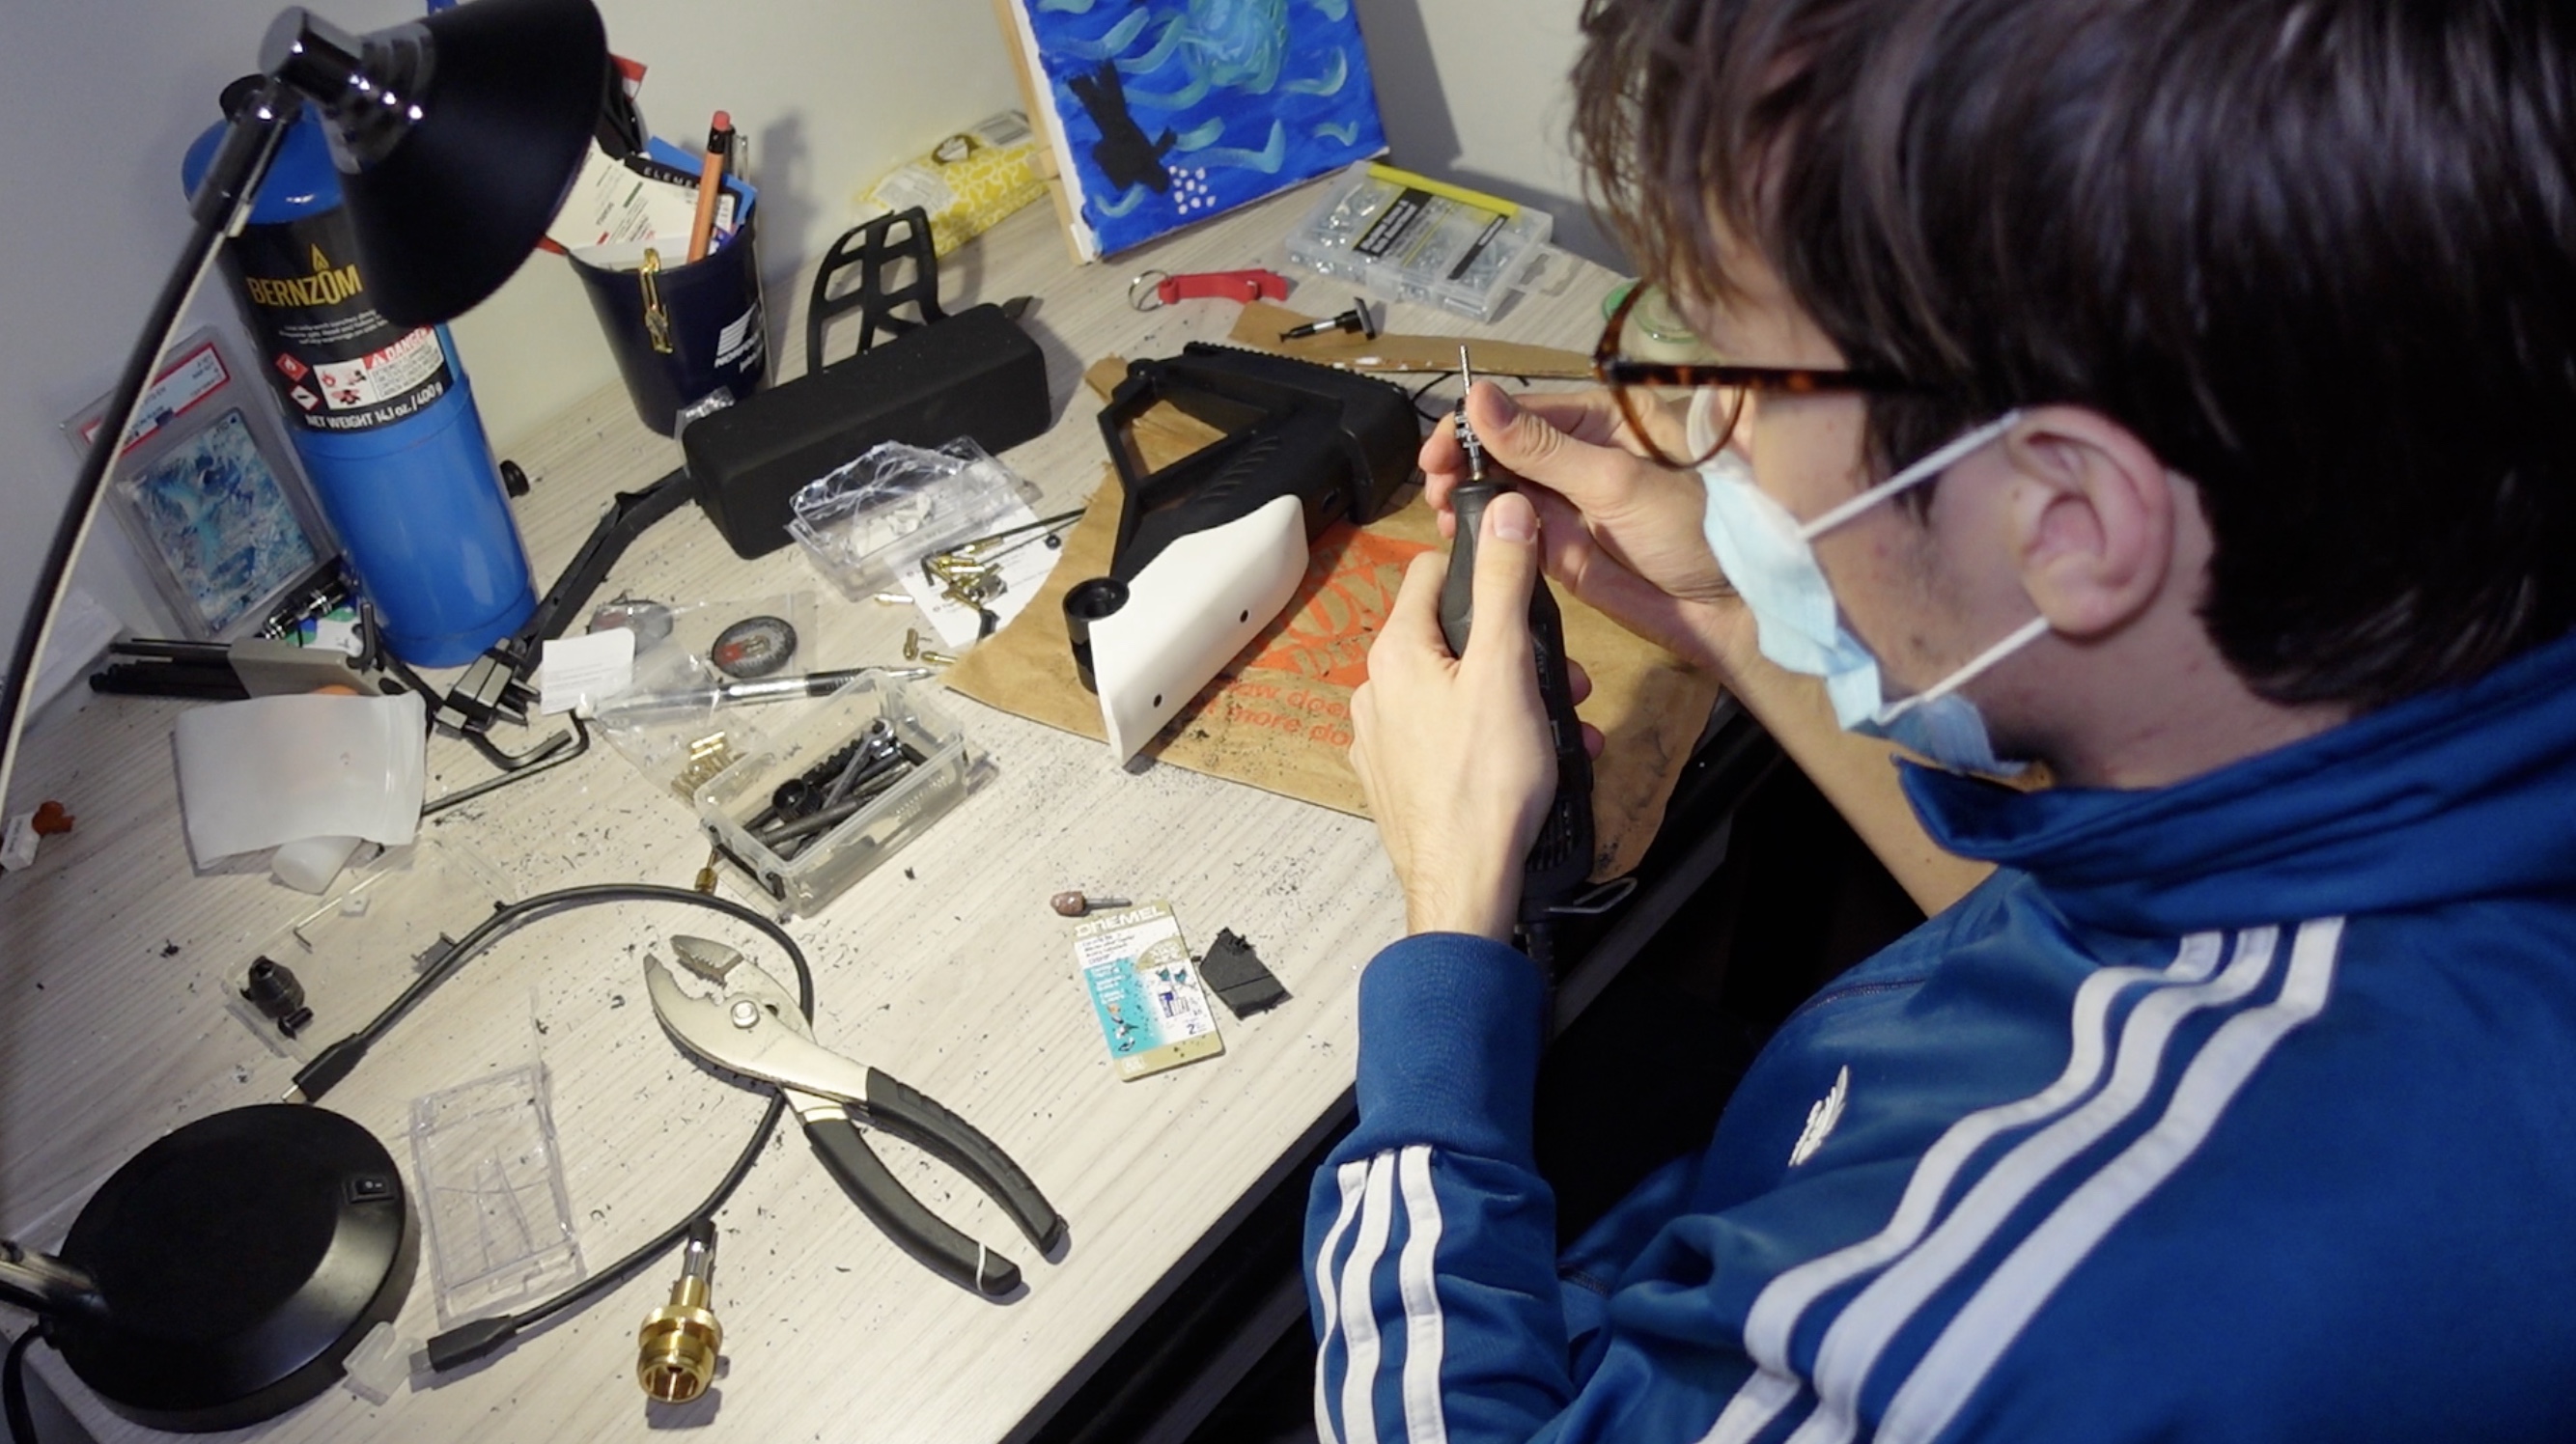
The process ended up taking way longer and being way more painful than I expected (more on that later). Armed with a Dremel, random screwdrivers from my friends, and all the parts (which I soon realized I was missing some), I began to build a flamethrower.
This project involves power tools, metal cutting, and drilling. Always be careful when using these tools to avoid personal injury.
1. Parts
| Item | Price |
|---|---|
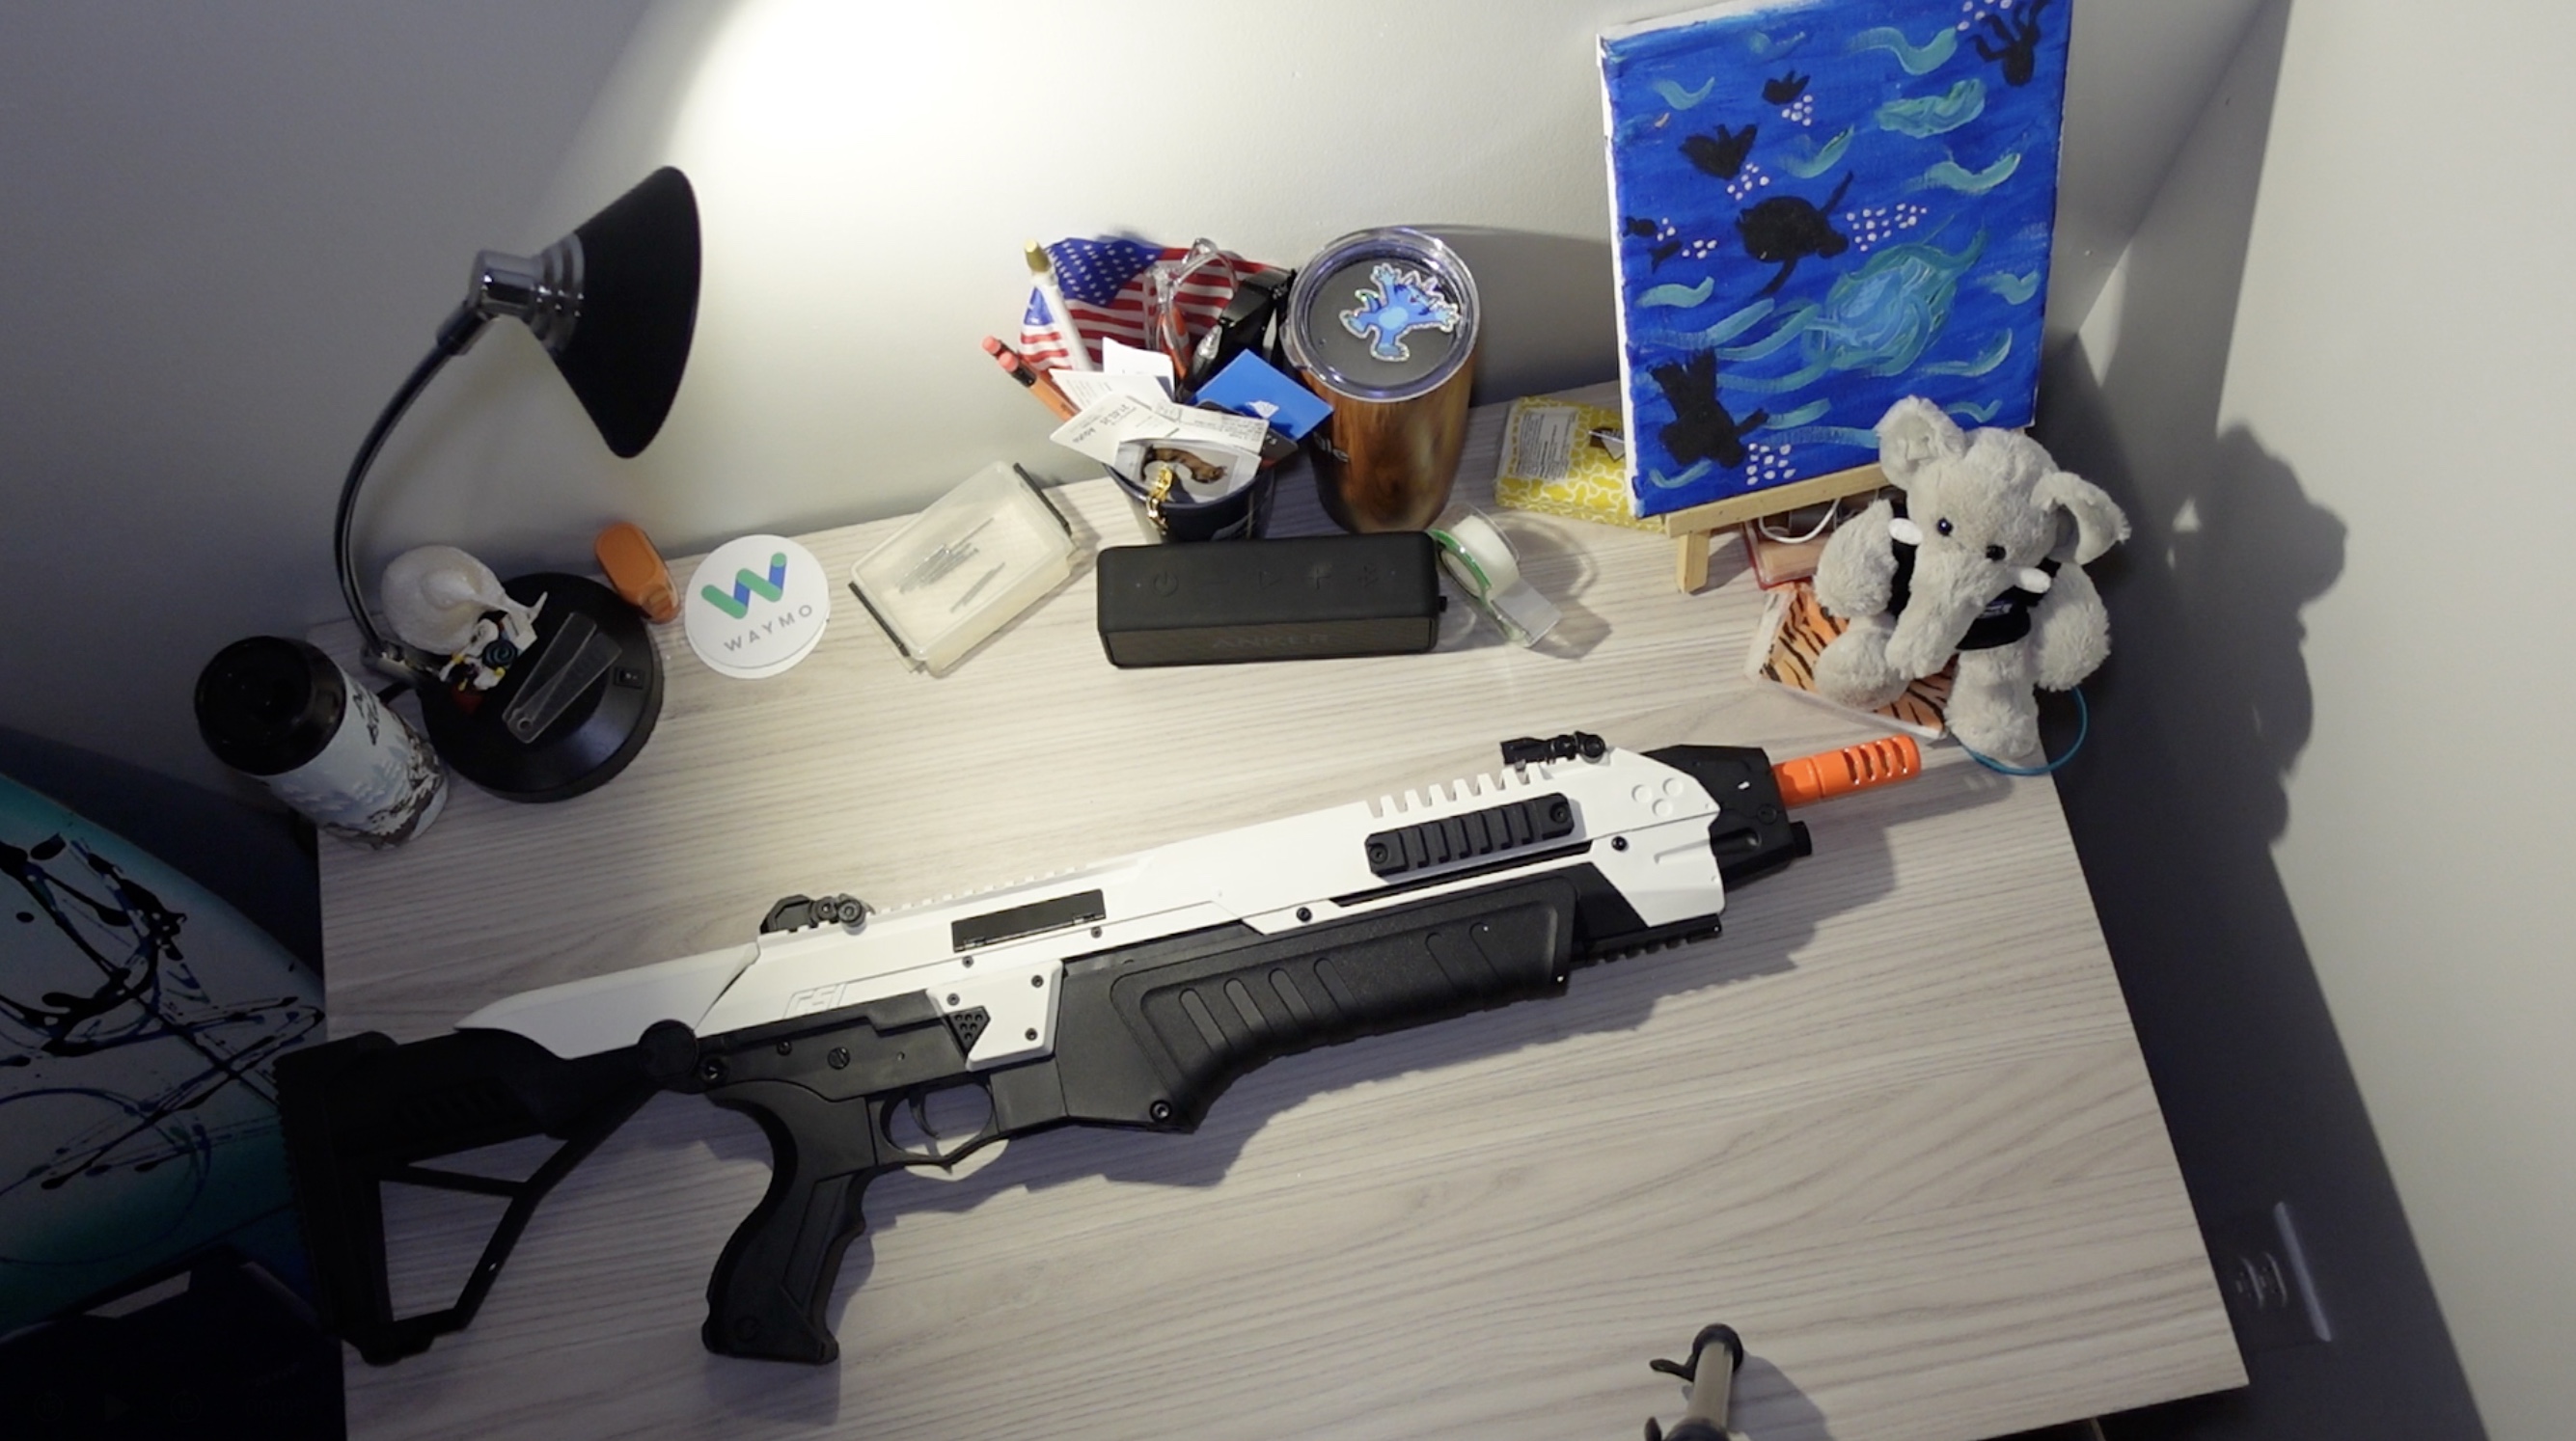
| Evike CSI S.T.A.R. XR-5 FG-1508 Advanced Airsoft Battle Rifle (Color: Trooper White) | $159 |
| WORTHINGTON CYLINDER 309336 Series Extension Hose Kit for MapPro & Propane Torches | $26 |
| Push Button Igniter Propane Torch | $67 |
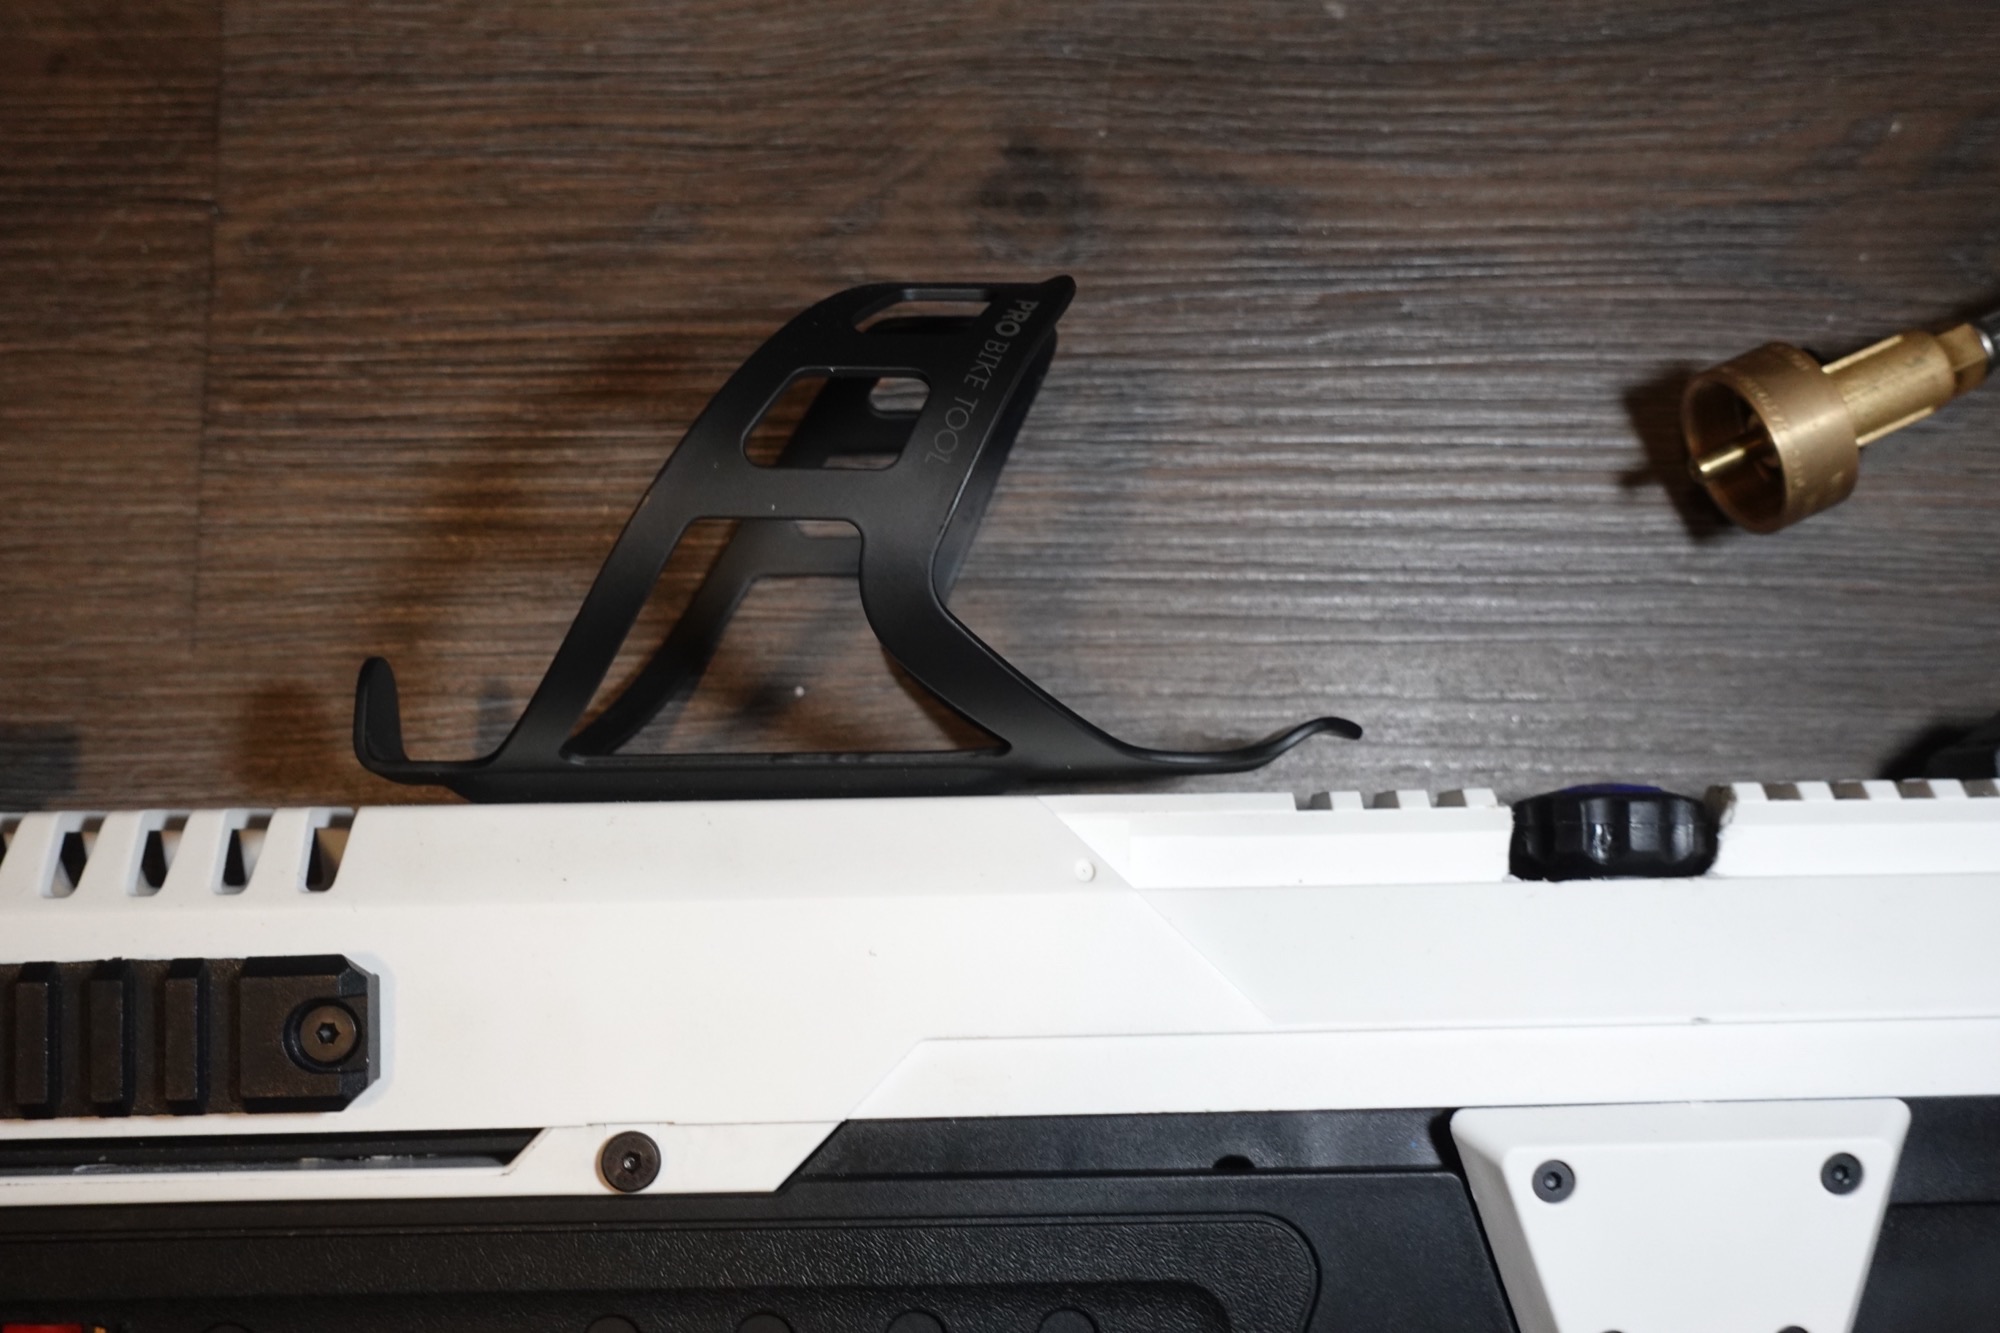
| Matte Black Bike Water Bottle Cage | $12 |
| Bernzomatic 14.1 oz Propane Cylinder Steel 1 pc Propane | $6 |
| 1/8" Hose ID / Hose Barb to 1/8" Male NPT MIP MPT Straight Brass Fitting | $4 |
| Koehler Enterprises KE4BX 10 Piece Hose Clamp Box (Micro Size 4), silver | $10 |
| Mill-Rose 70885 Blue Monster PTFE Pipe Thread Sealant Tape | $10 |
| Dremel 3000-2/28 Variable Speed Rotary Tool Kit (with disk and metal cutting tools) | $40-100 |
| Drill and Drill Bits | $40-100 |
| Total (assuming you have Dremel & Drill) | $294 |
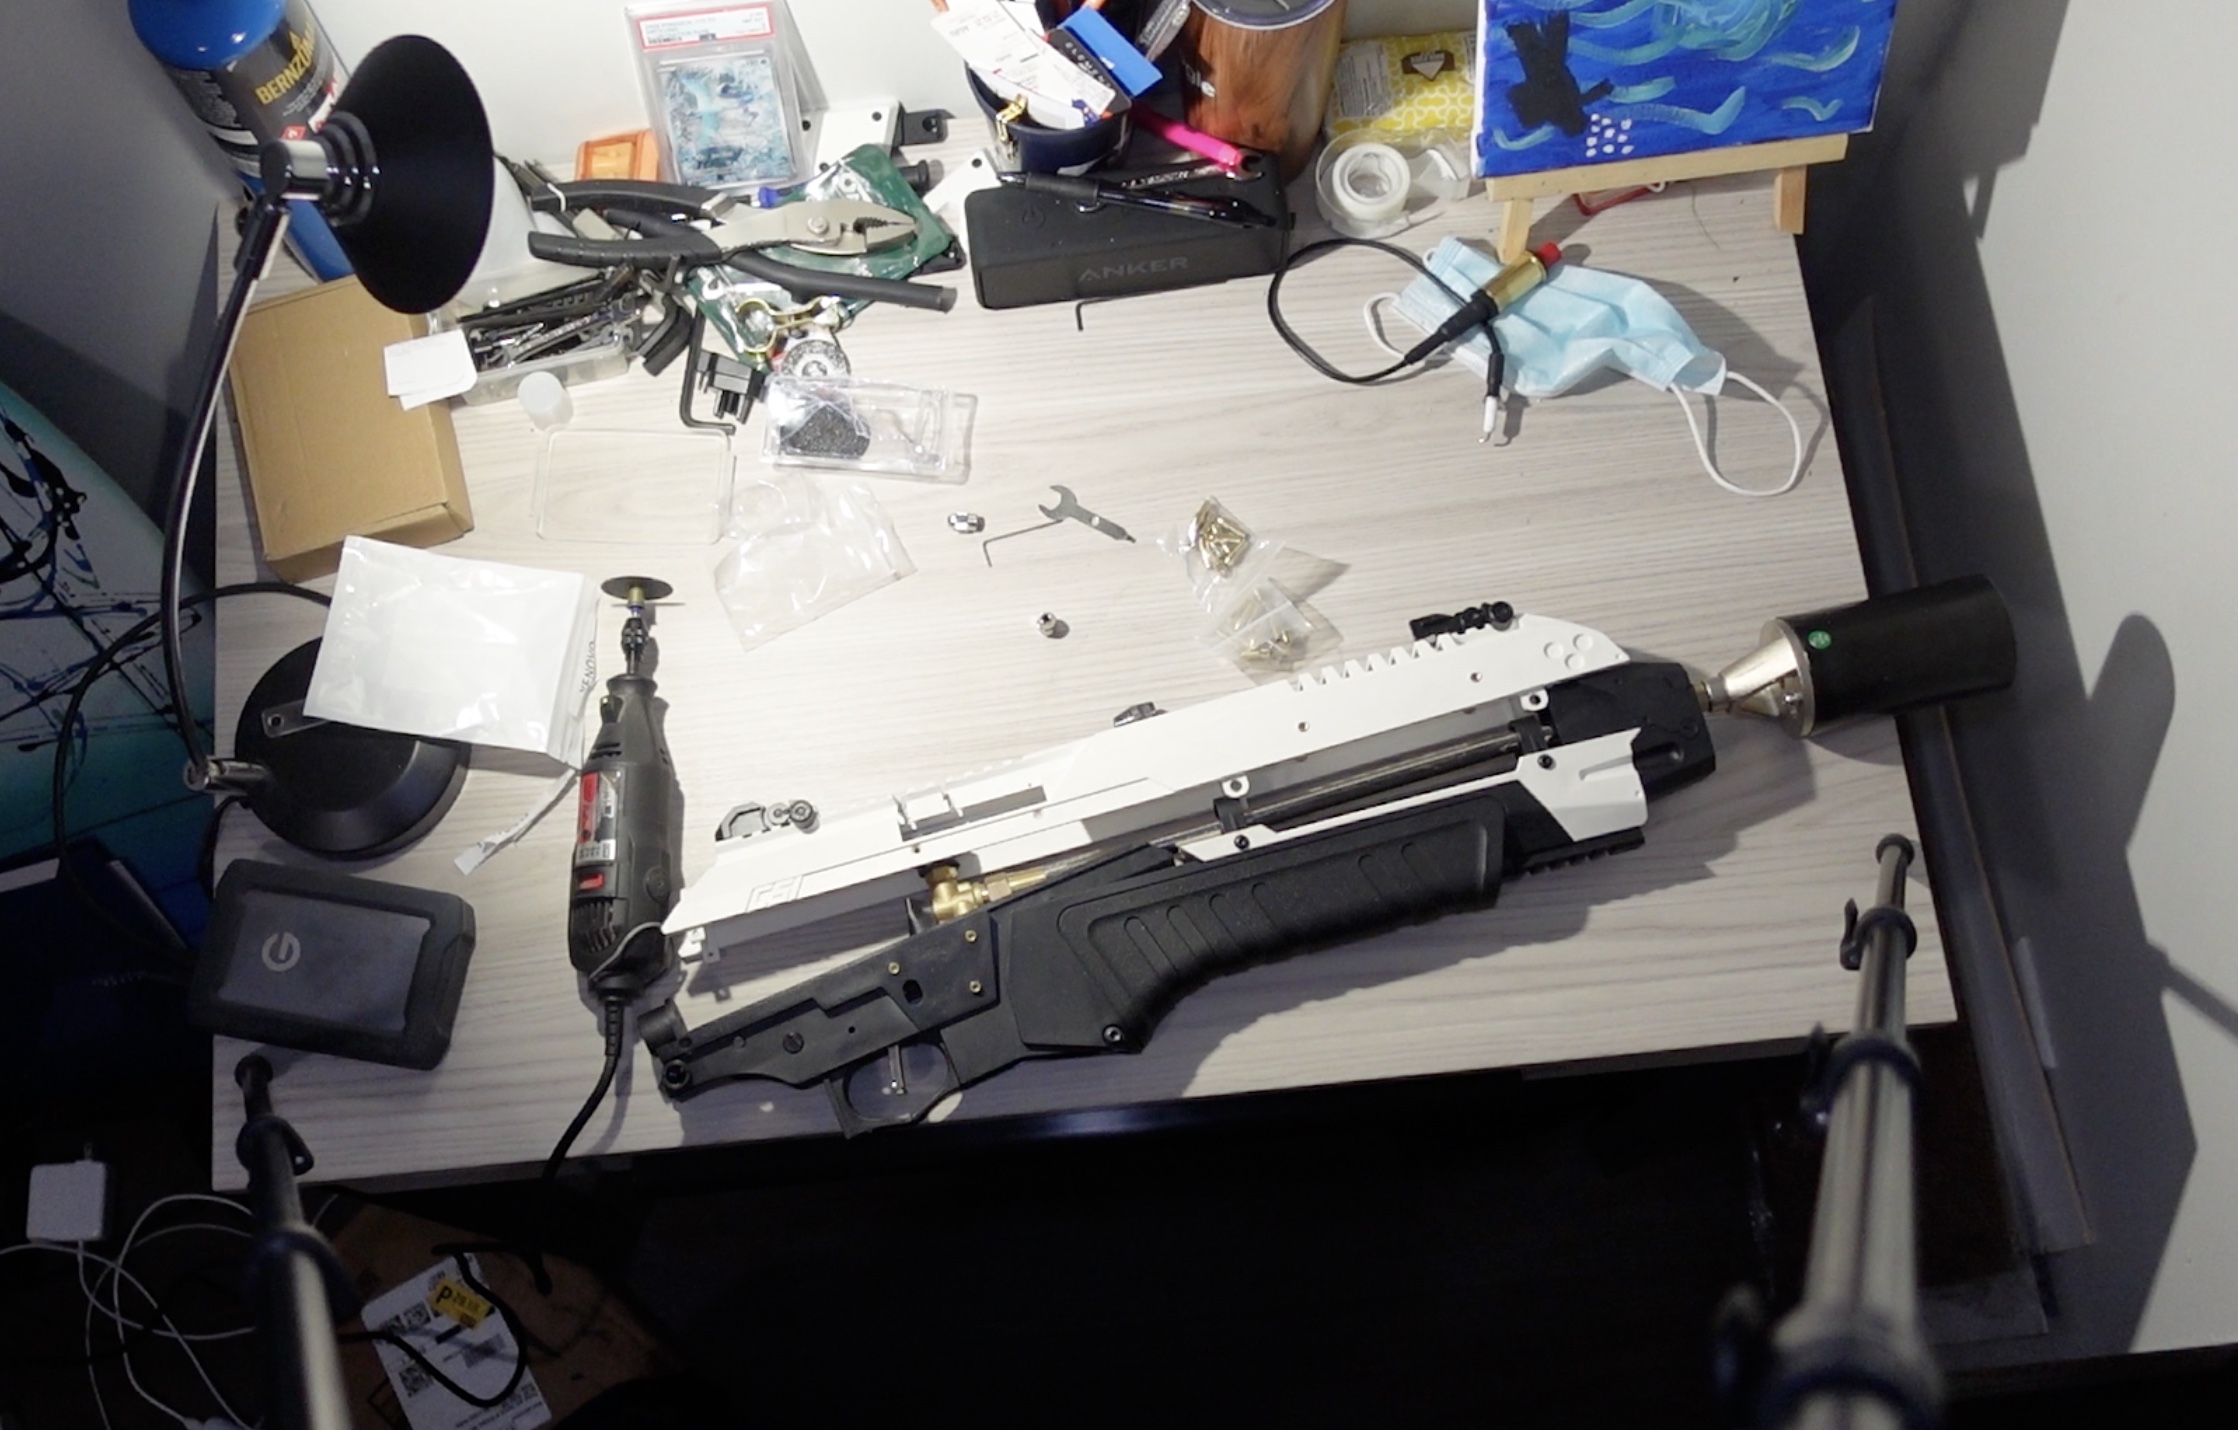
2. Build
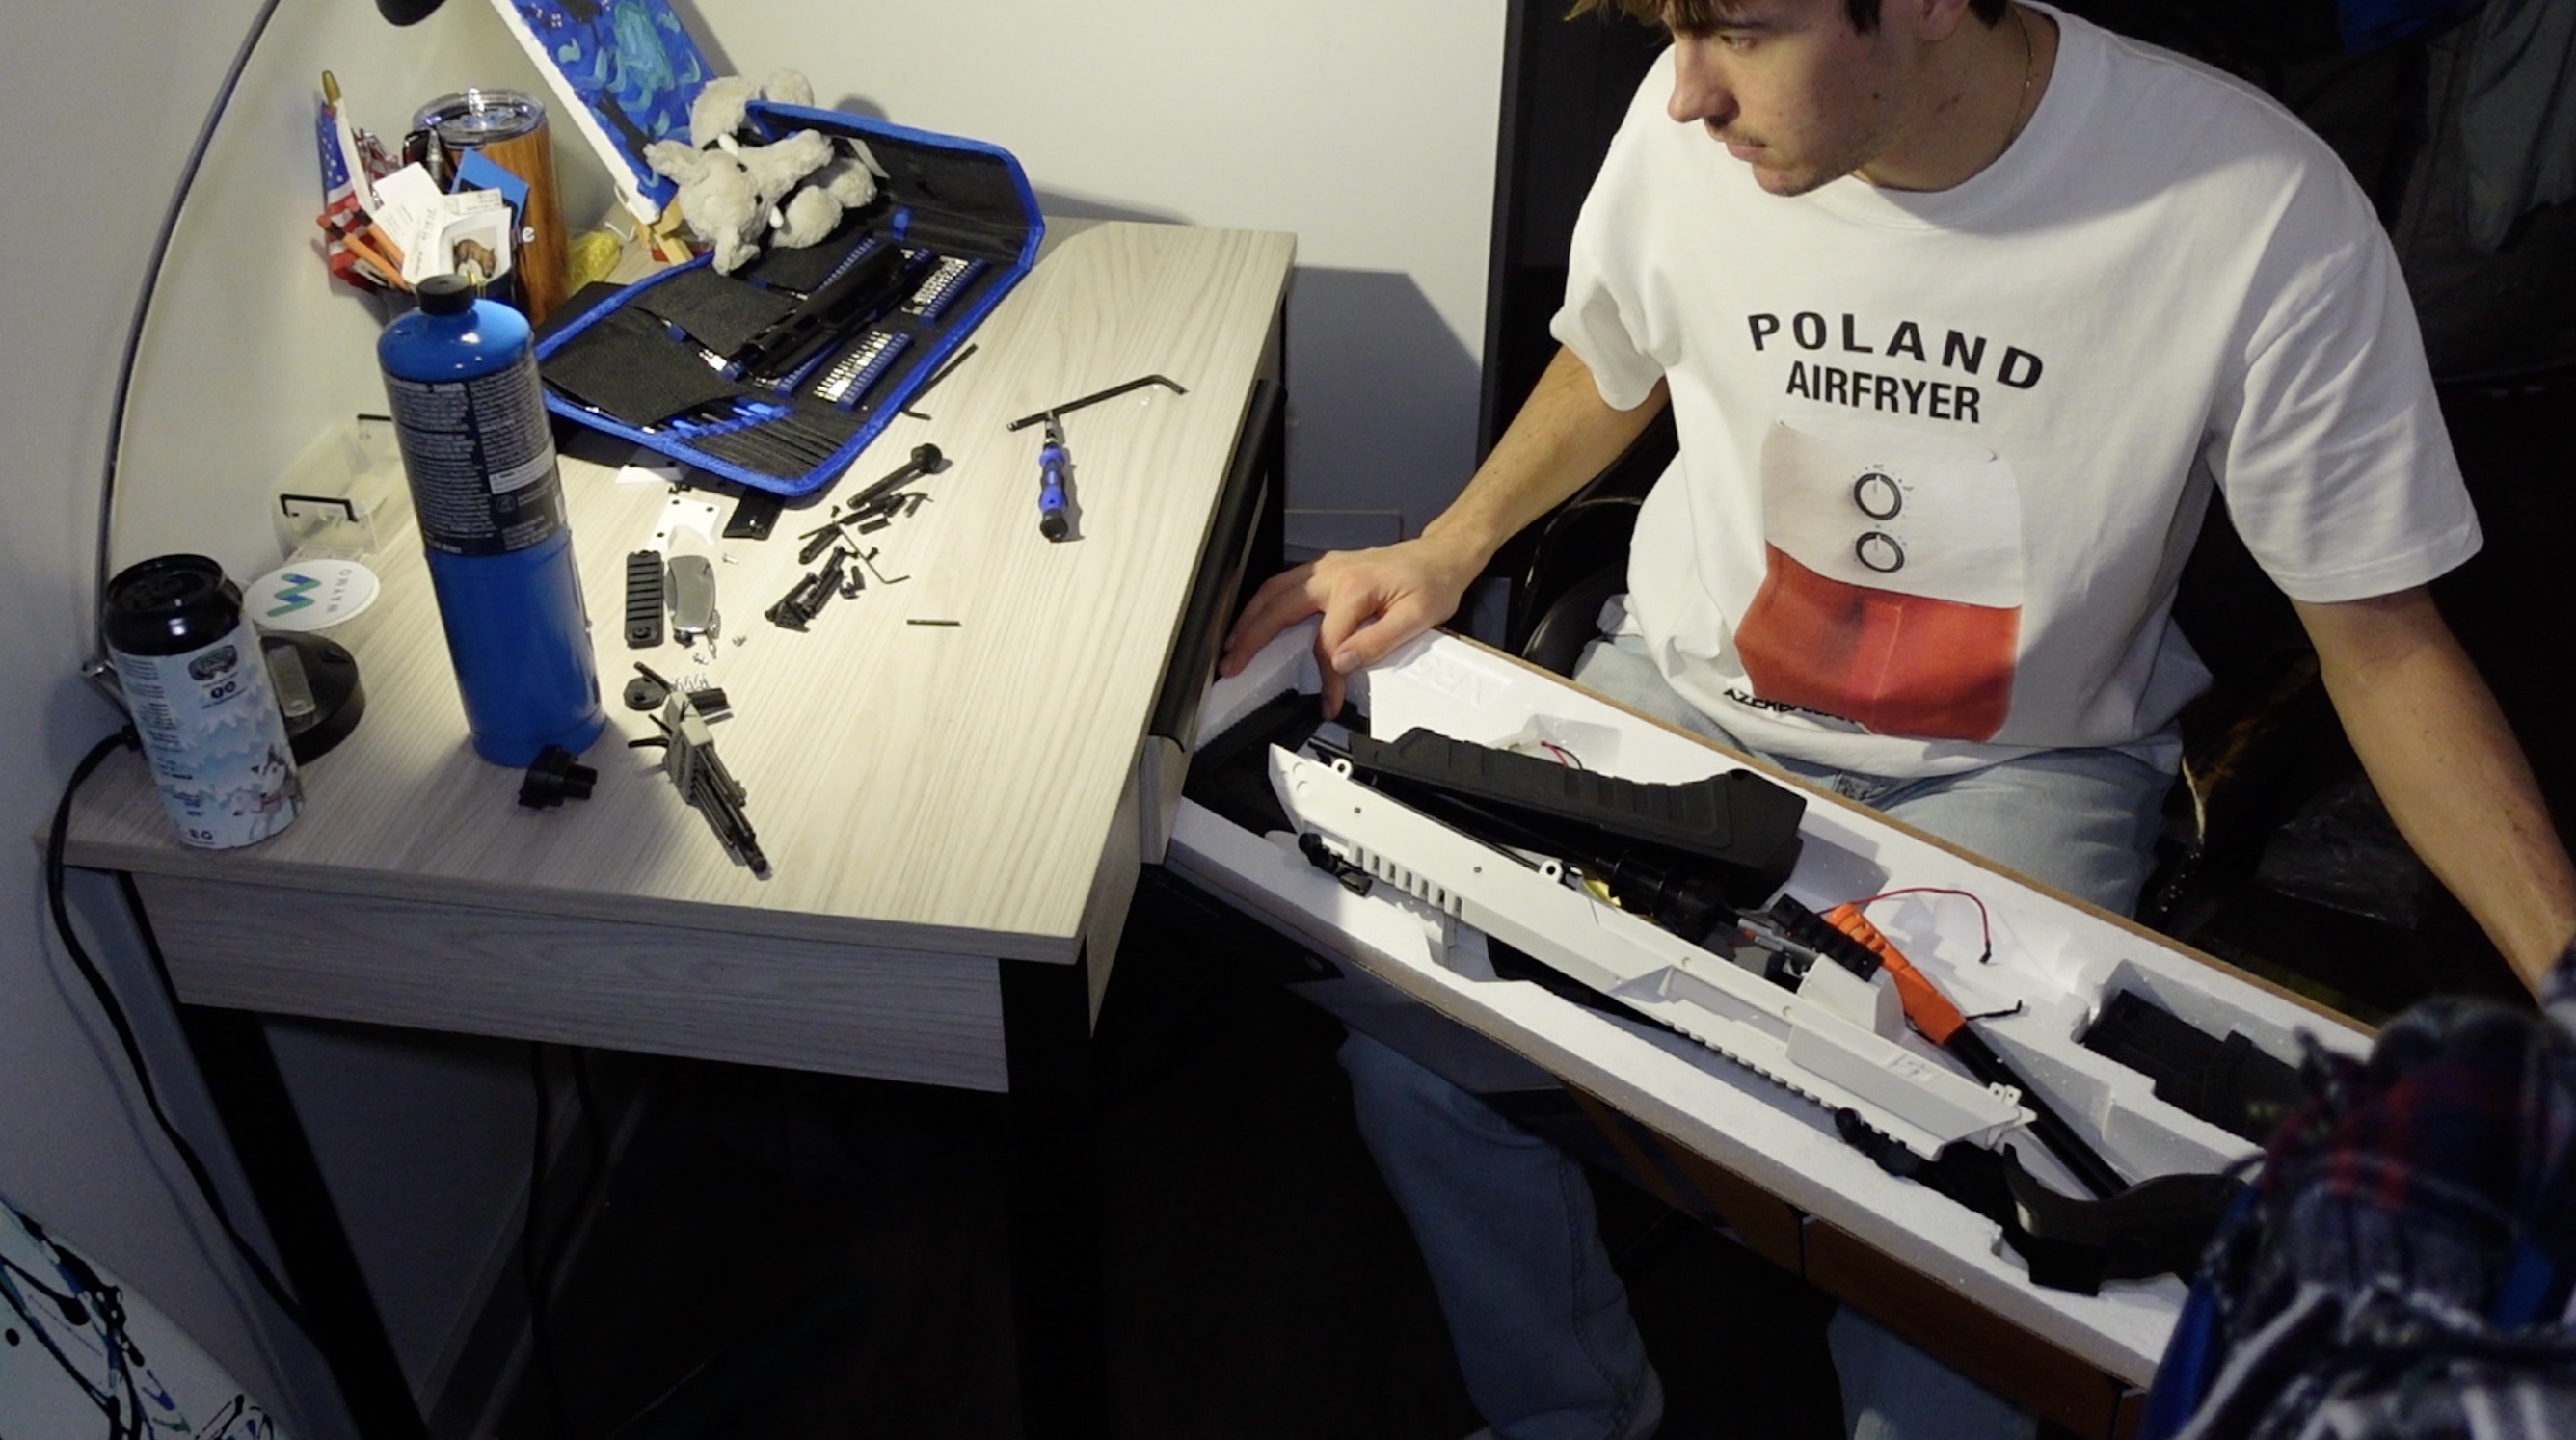
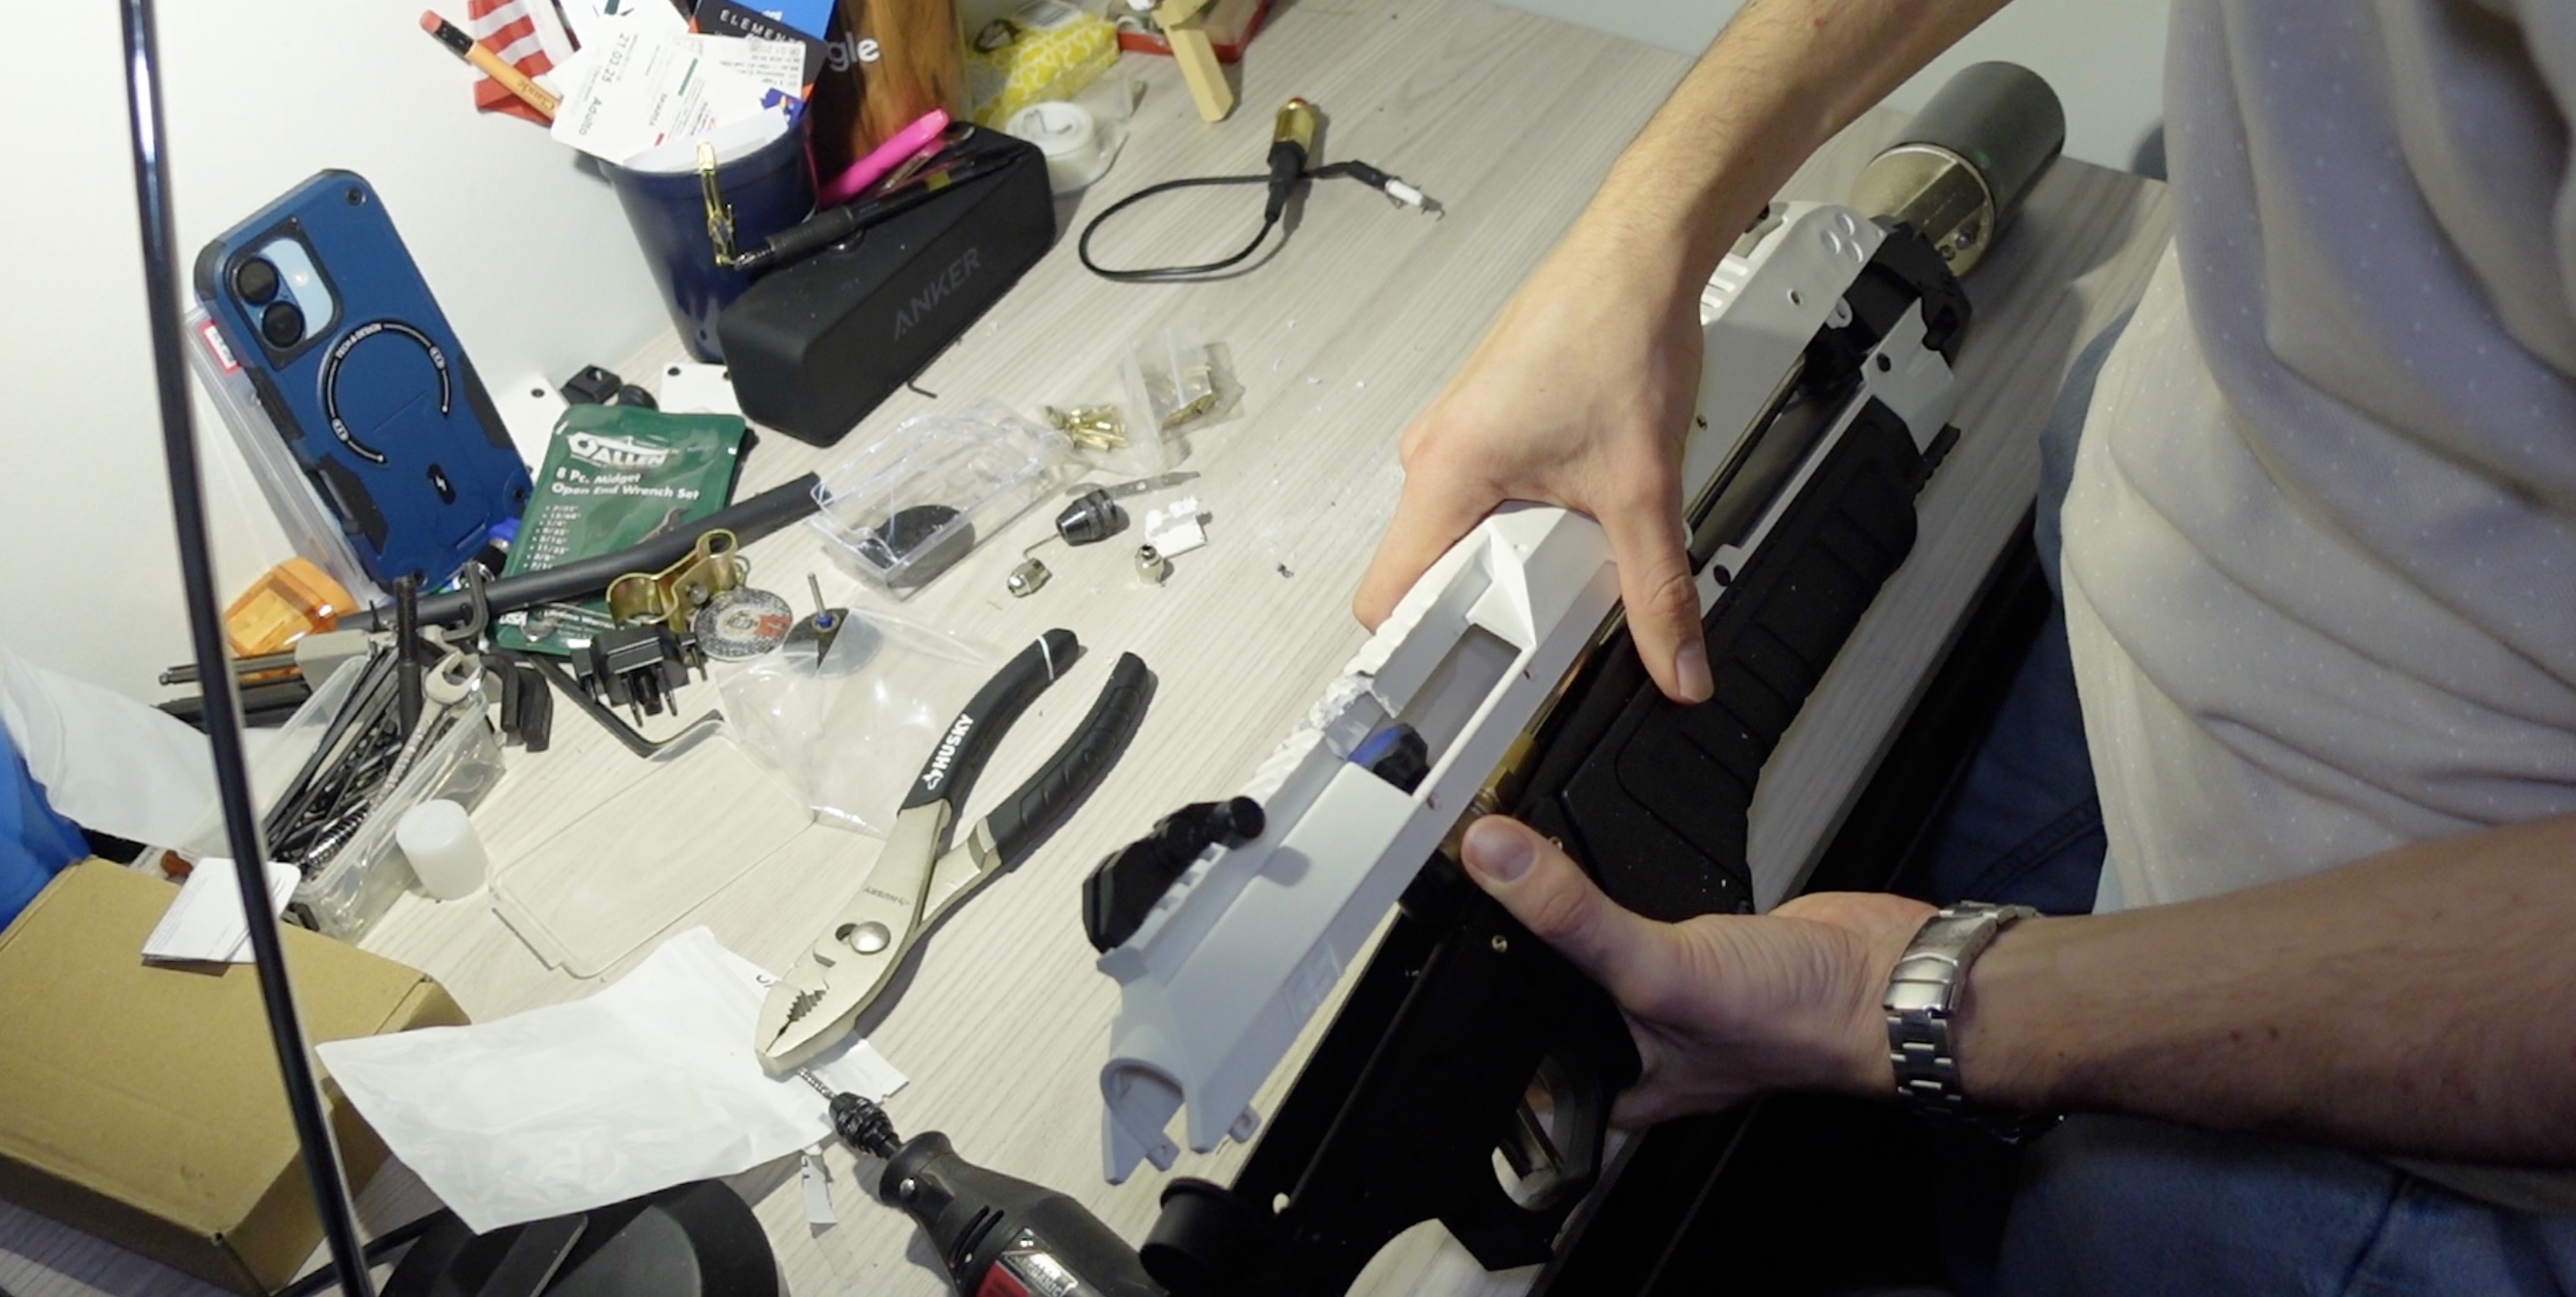
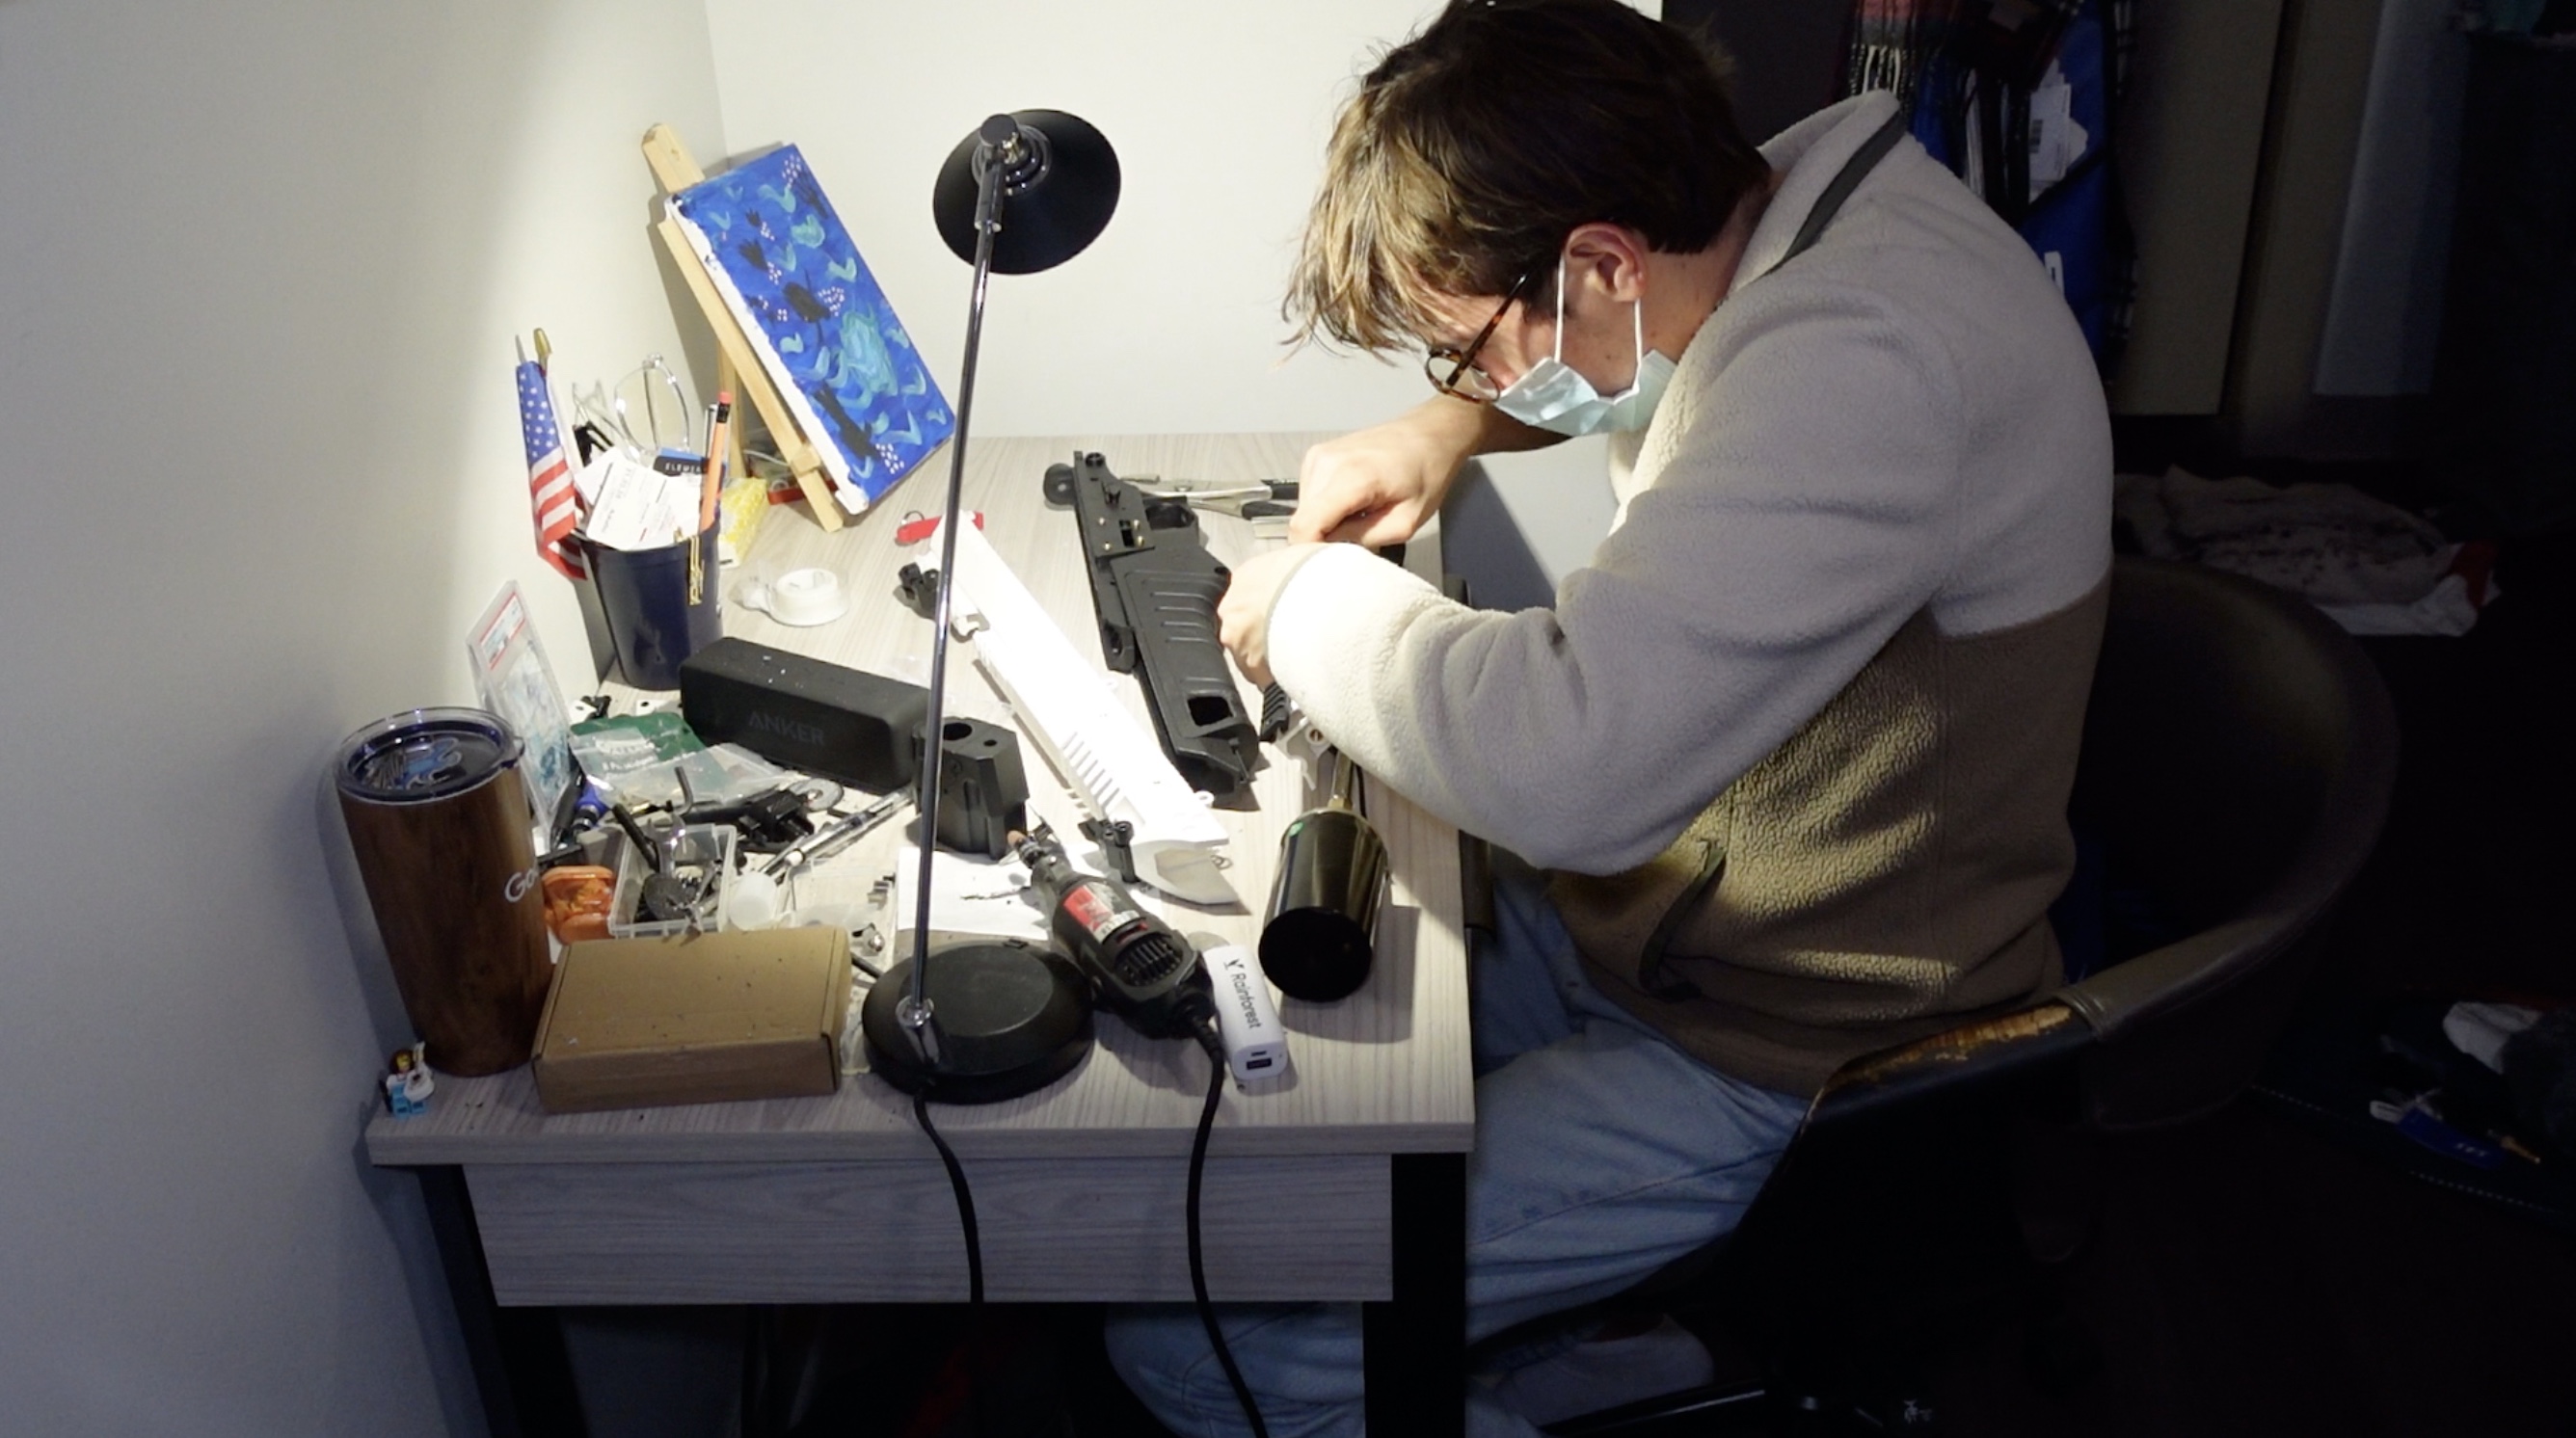
Step 1: Disassemble the Airsoft Shell
I mean take EVERYTHING apart. Every screw, every small part. You might need several wrenches and screwdrivers so a kit is really good for this step.

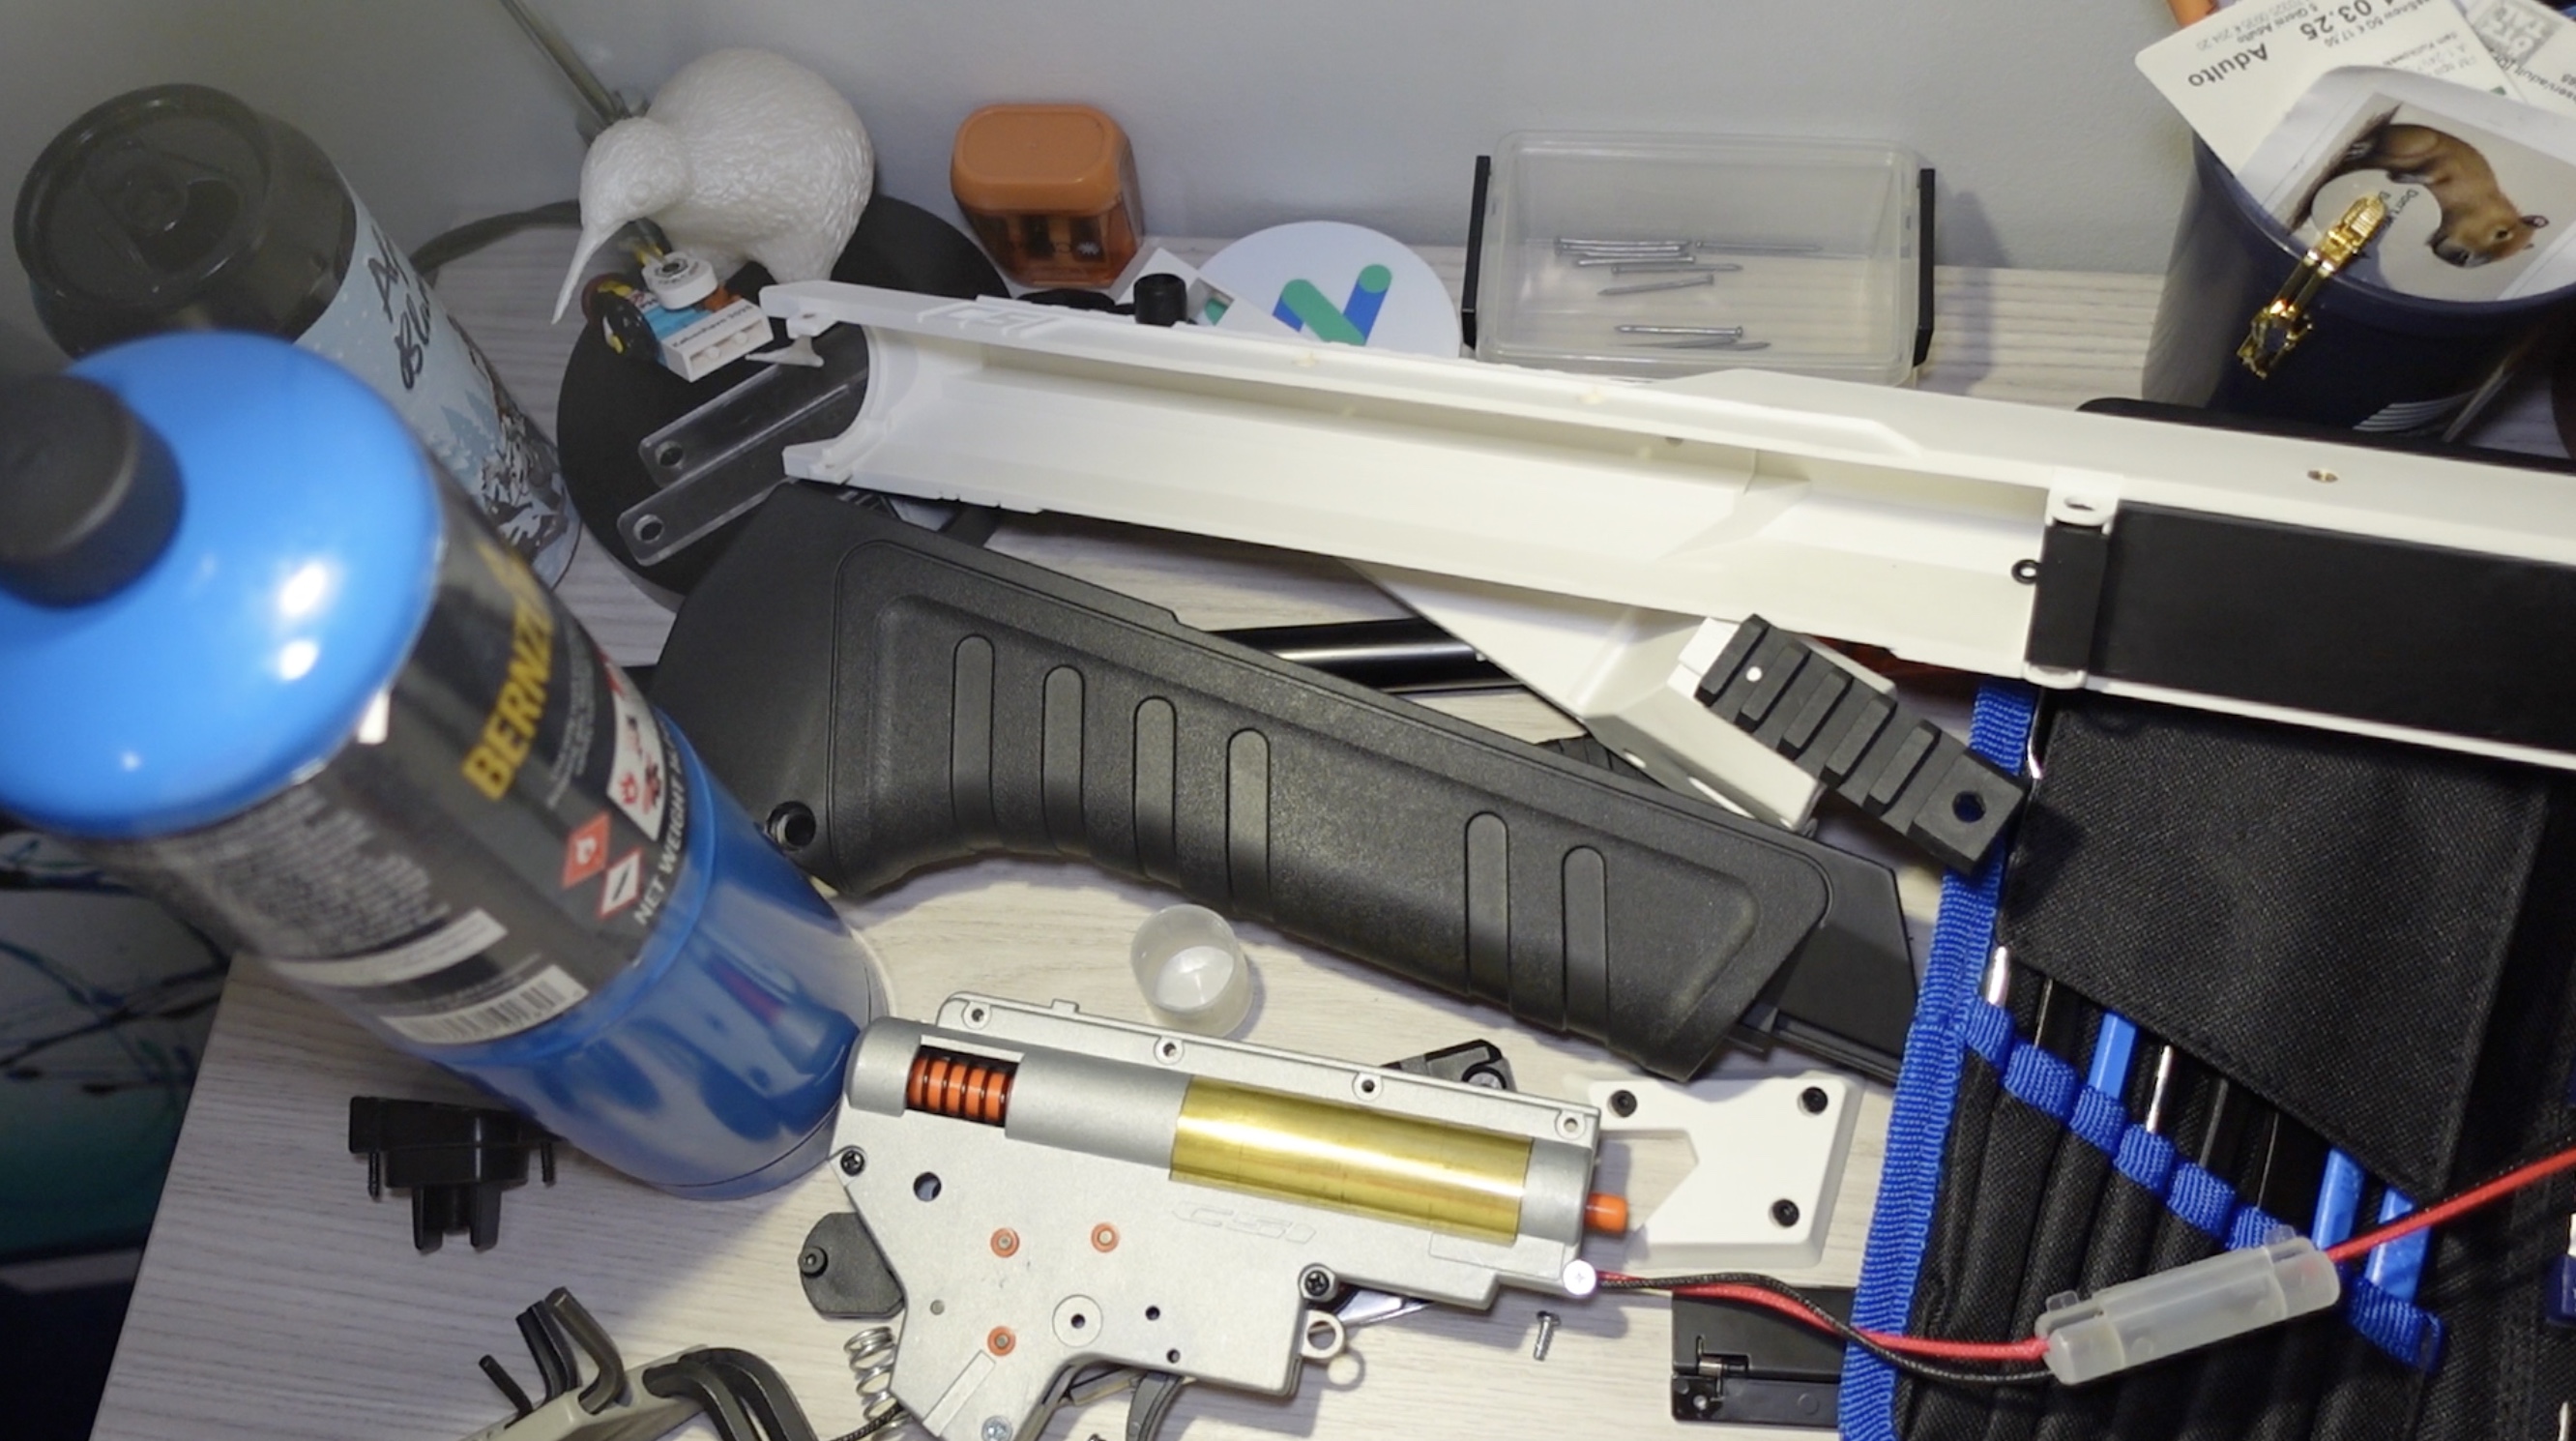
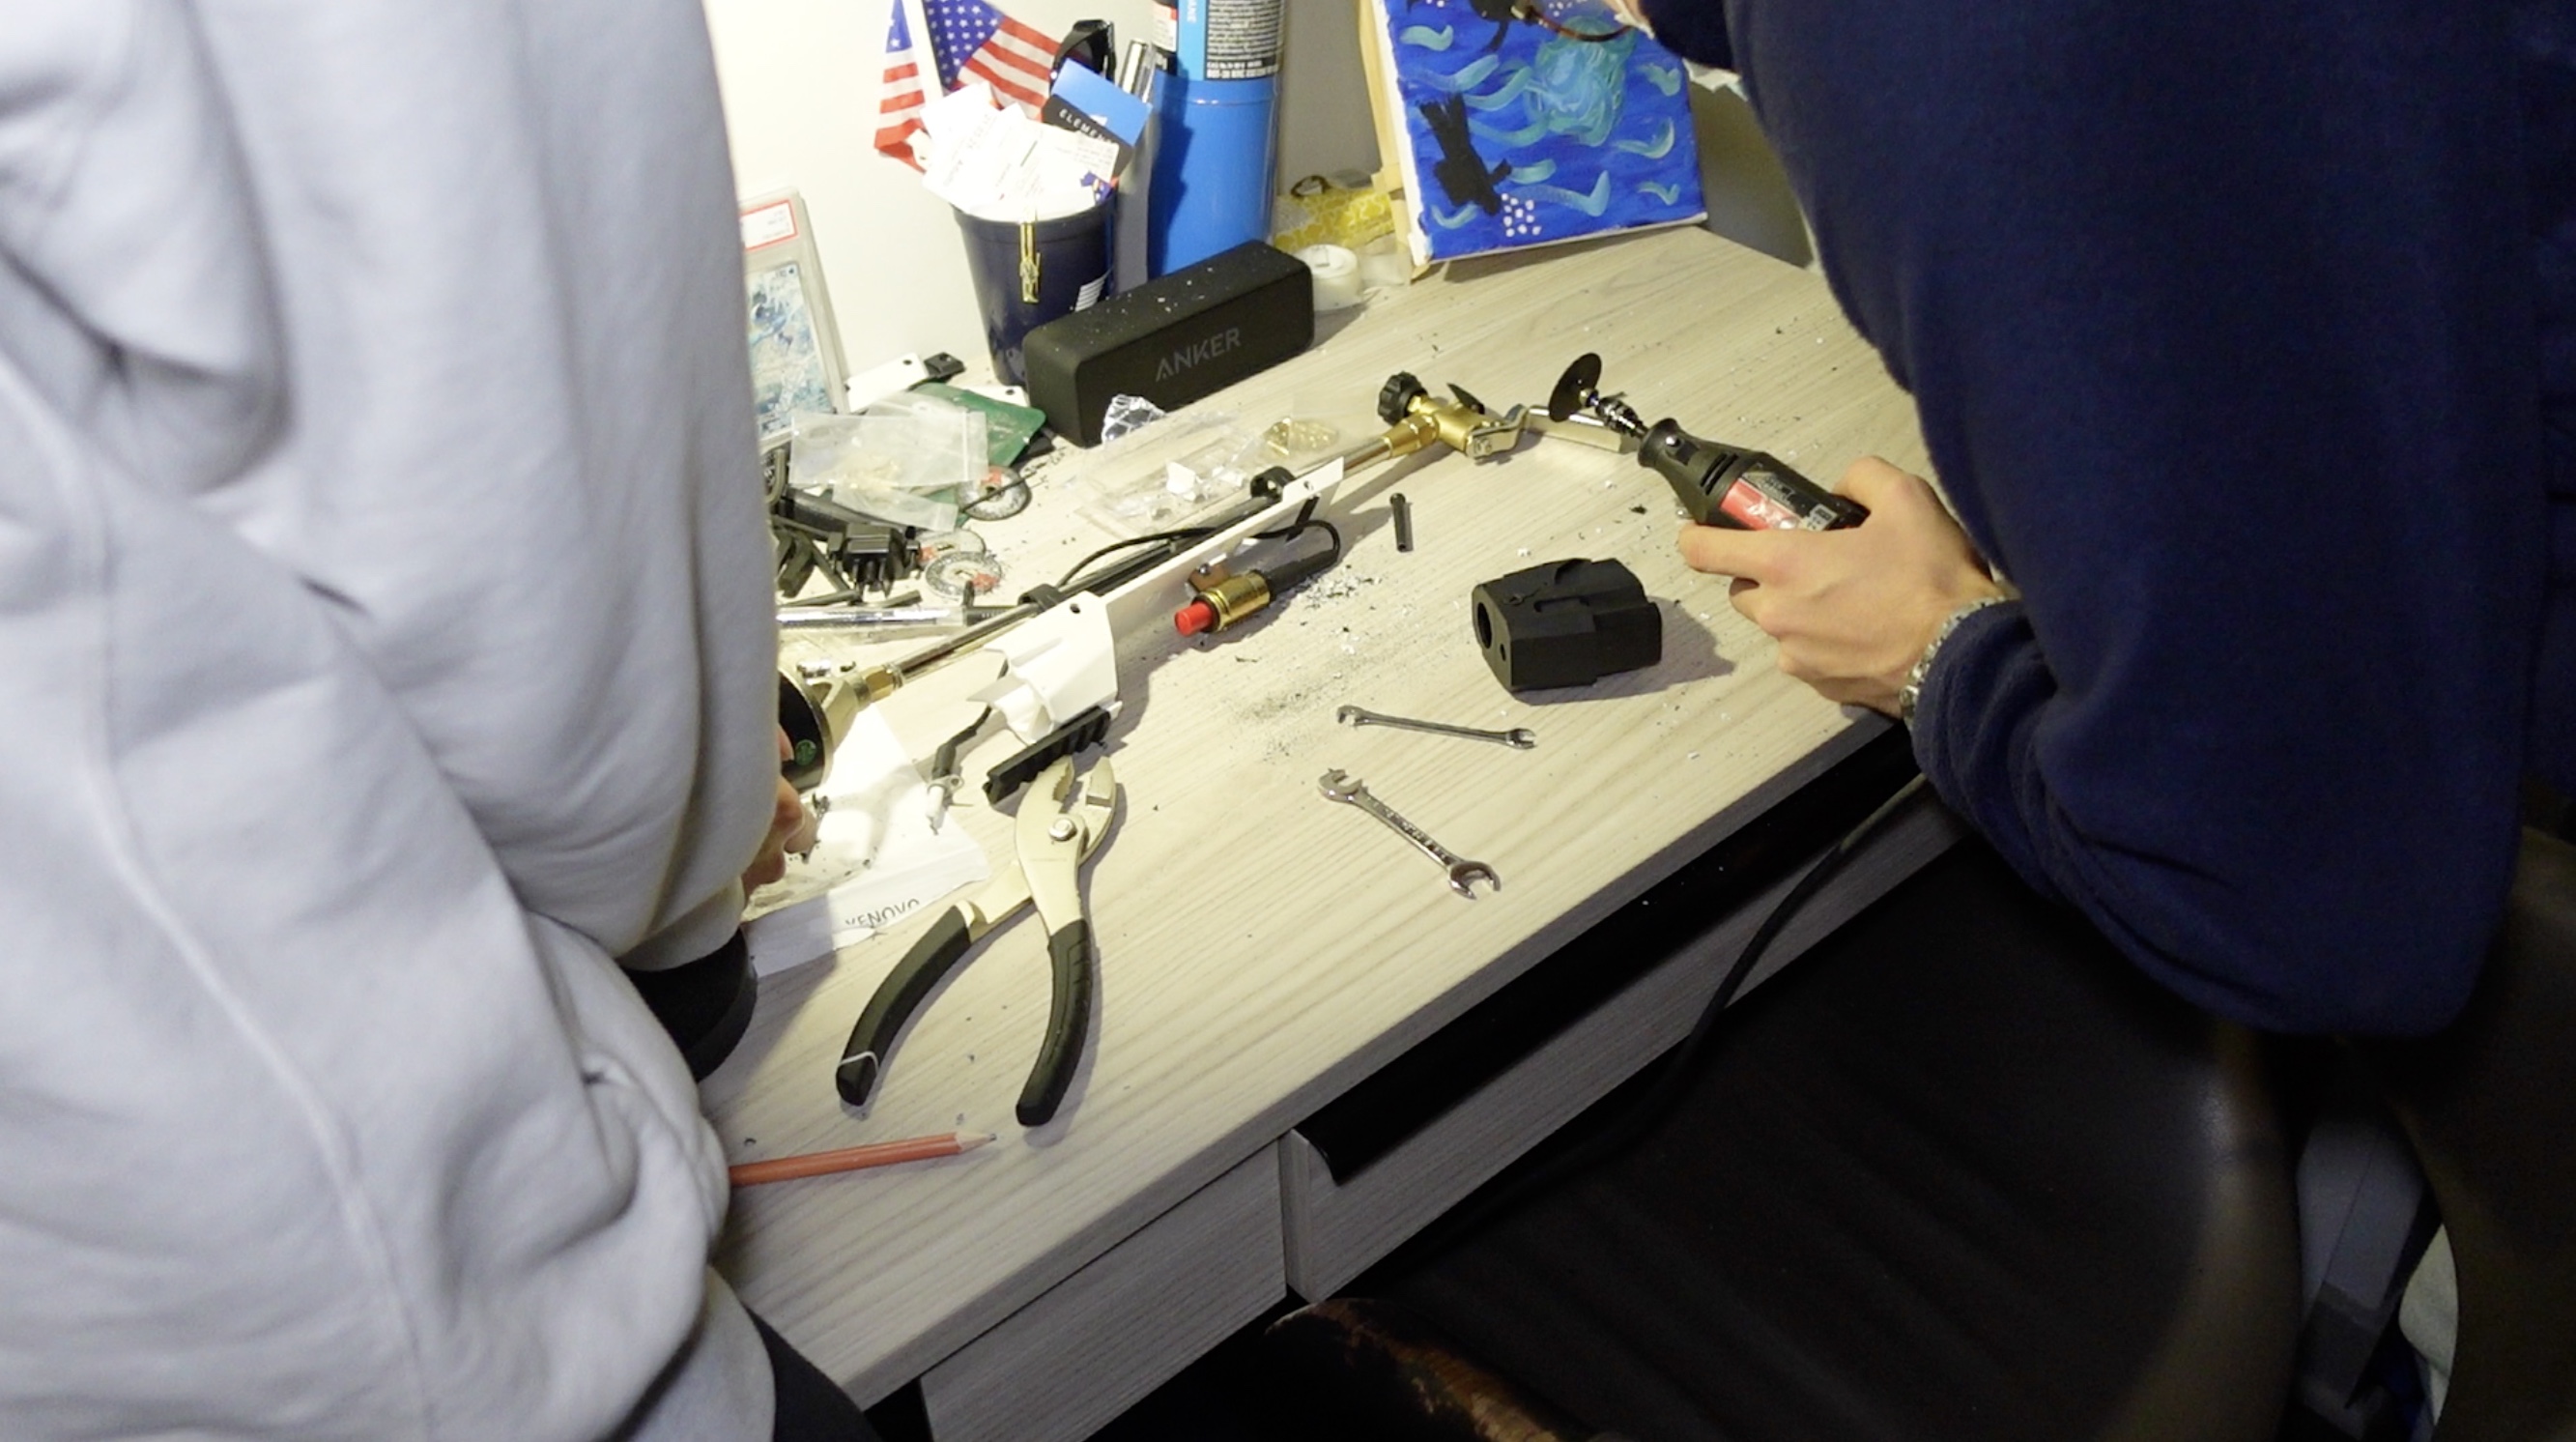
Step 2: Take Apart the Propane Torch
This part ended up being super challenging. For some reason the manufacturer of this propane torch tried to make this thing impossible to disassemble. It took the full force of me and my friend who hits the gym daily to get this disassembled. I suspect this difficulty came from the sealant tape used on all the seals which often becomes really hard to take off.
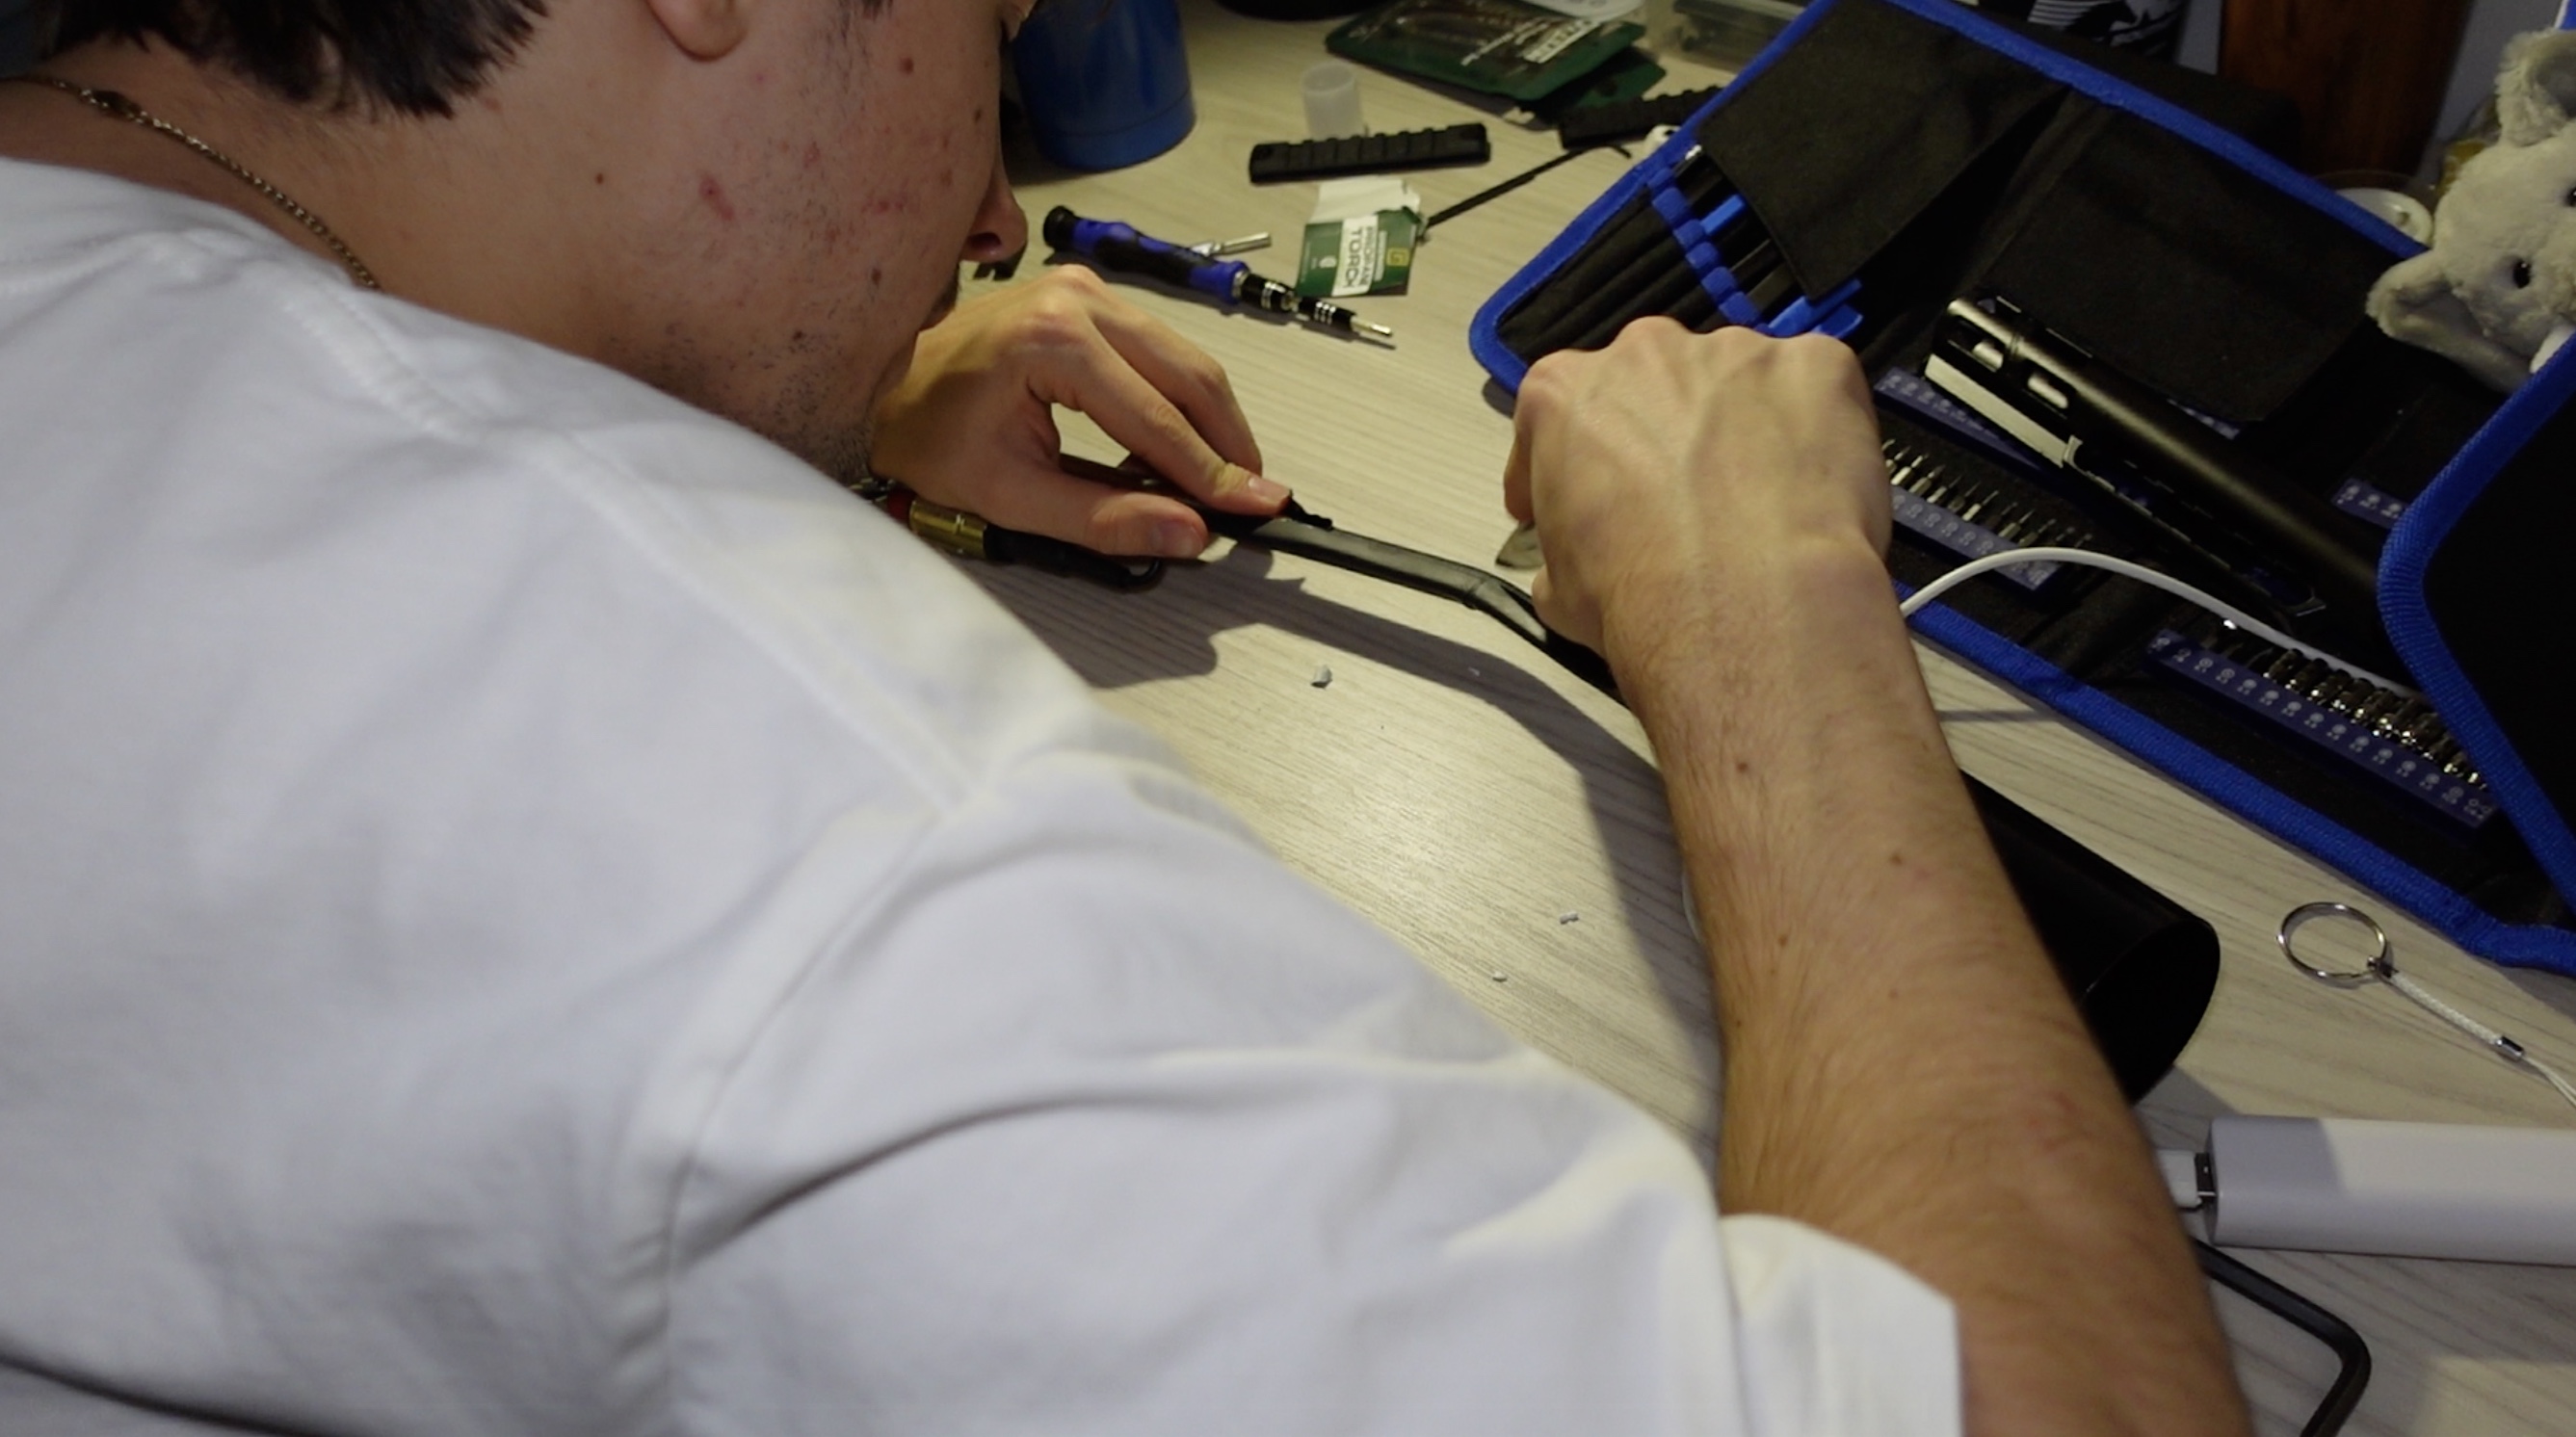
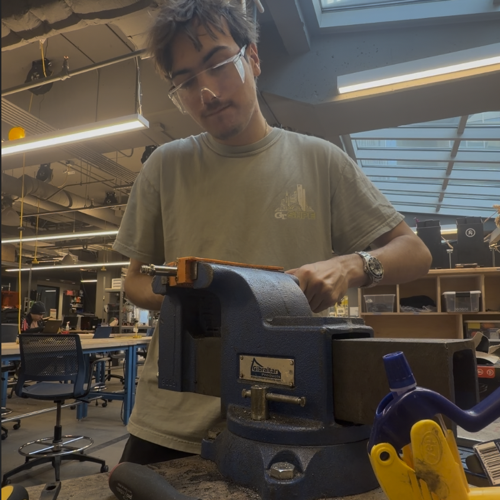
Step 3: Straighten the Pipe of the Propane Torch
The inner pipe is quite strong so I would recommend using a vice. Carefully straight it out. Using a vice will make this step quite easy.
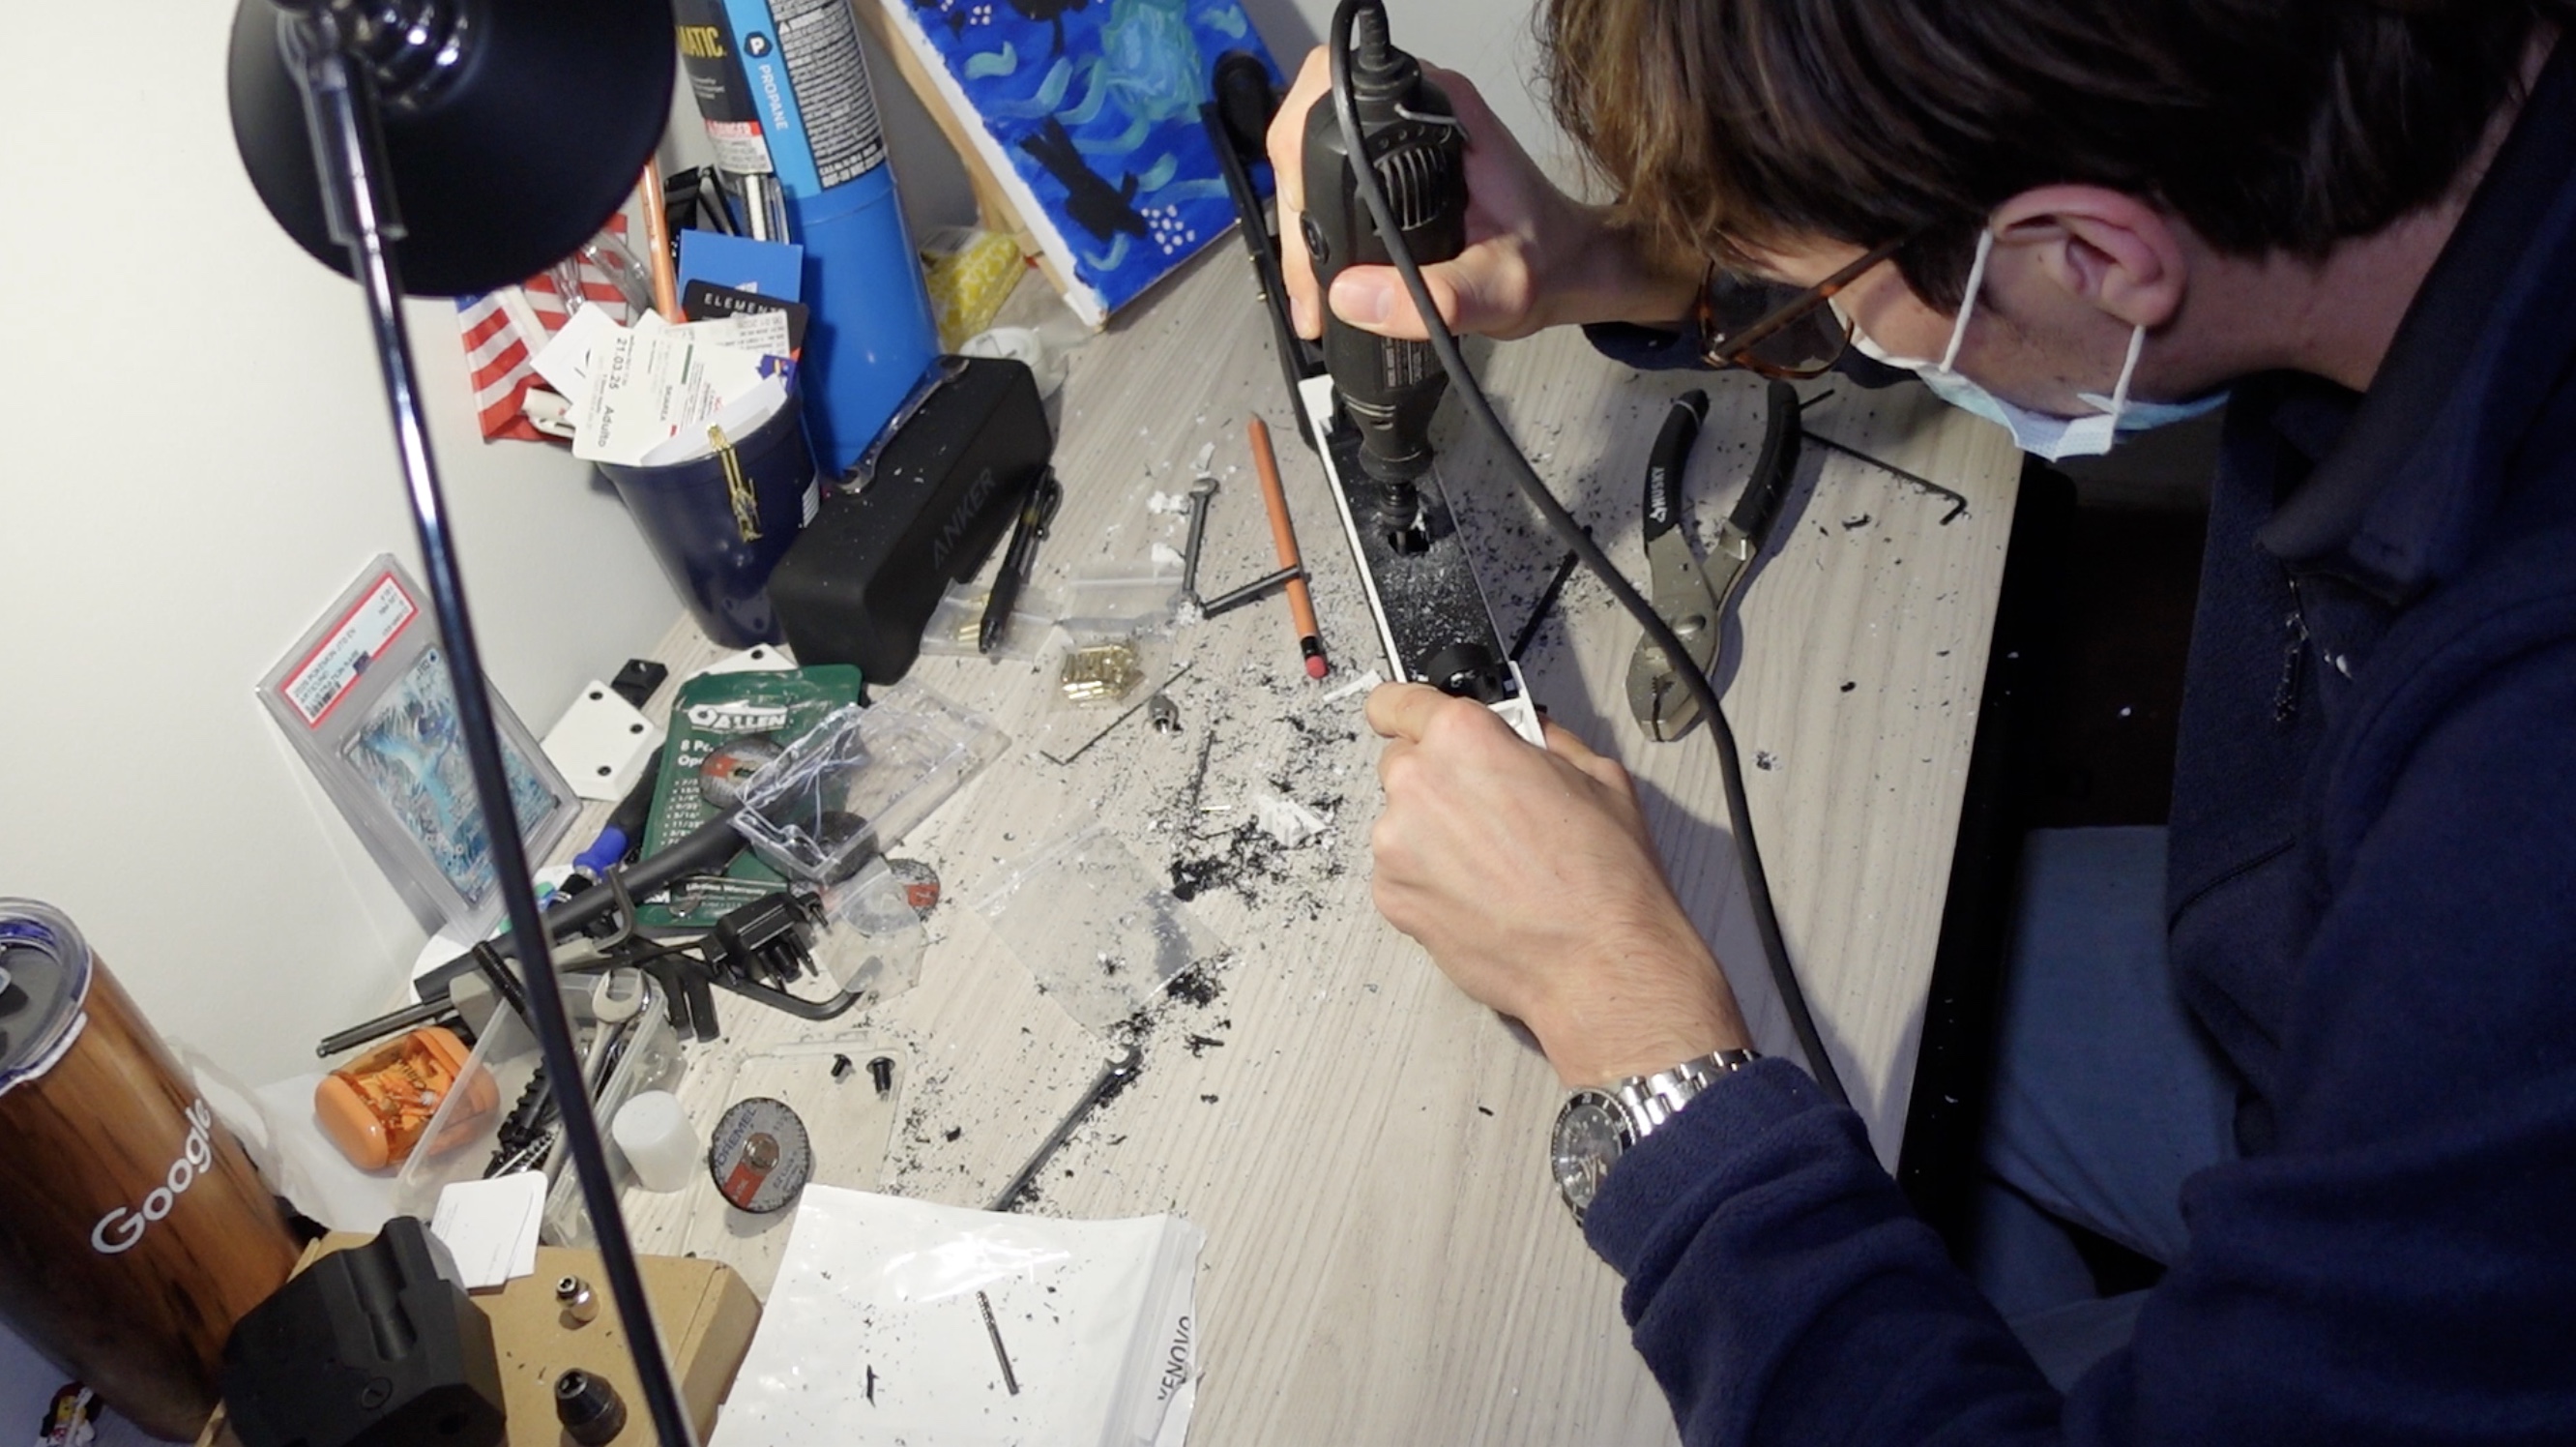
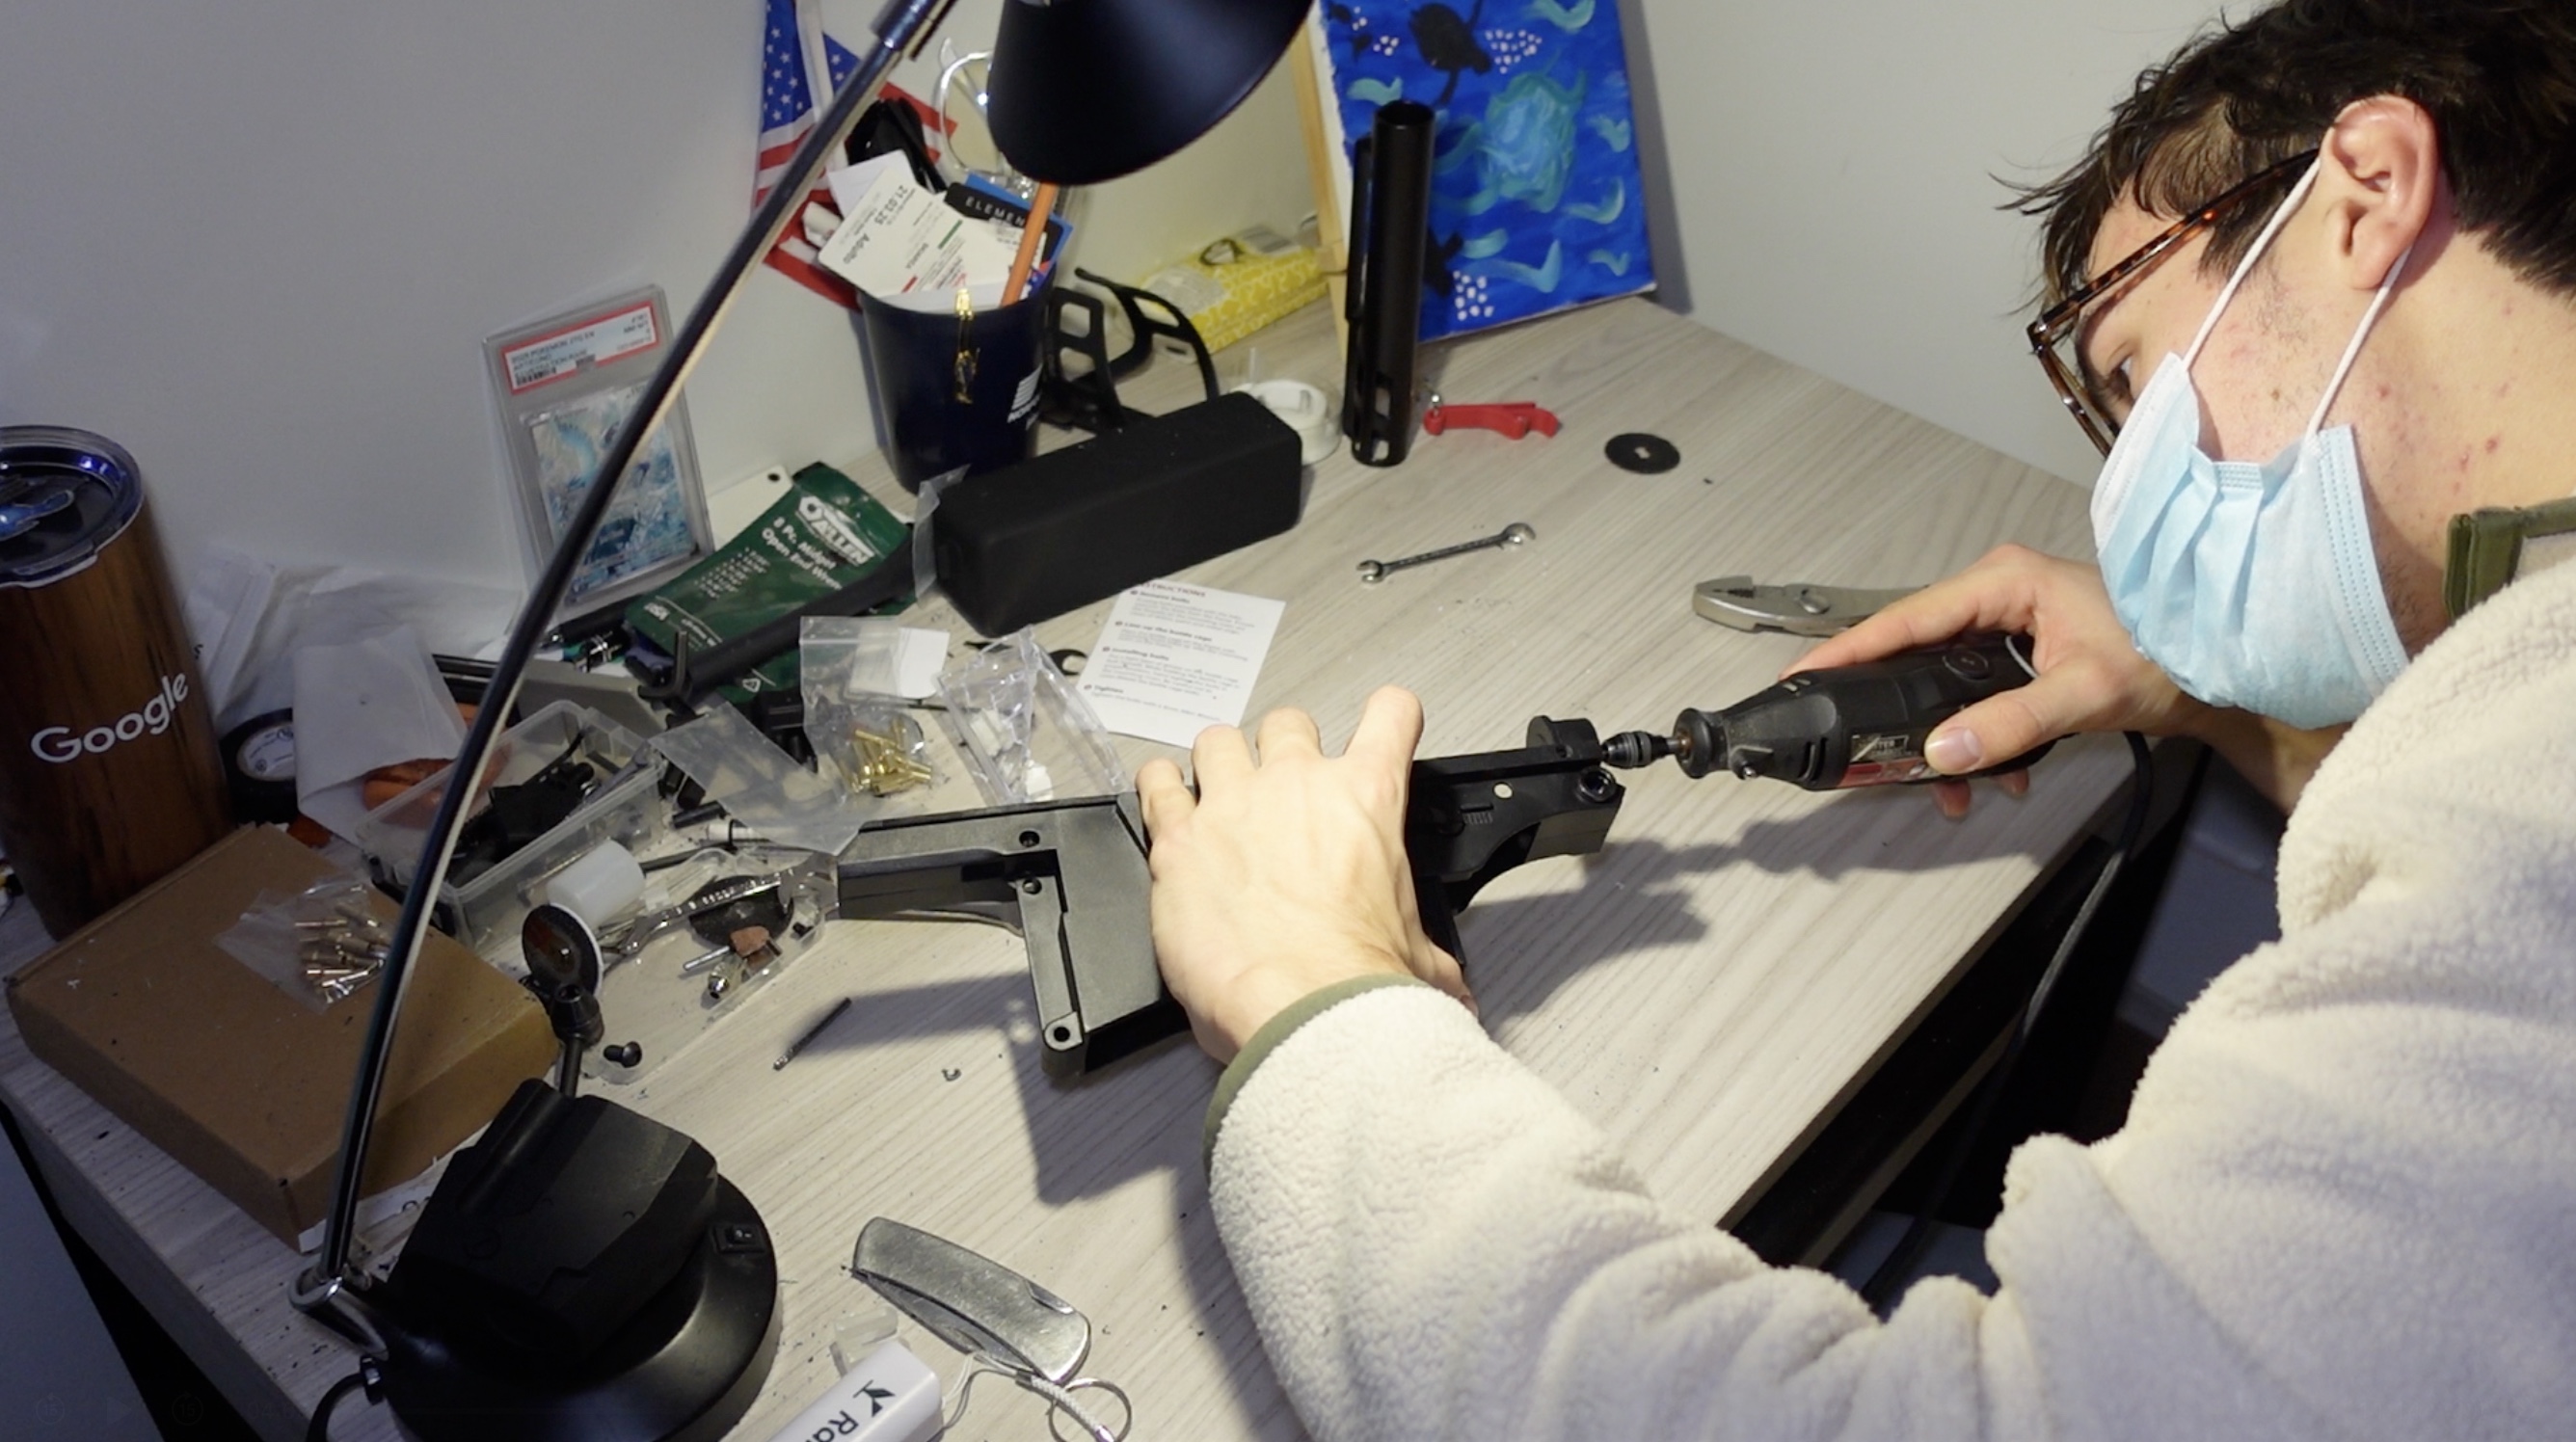
Step 4: Drill a V Shape Hole into the Propane Torch Ignition Trigger
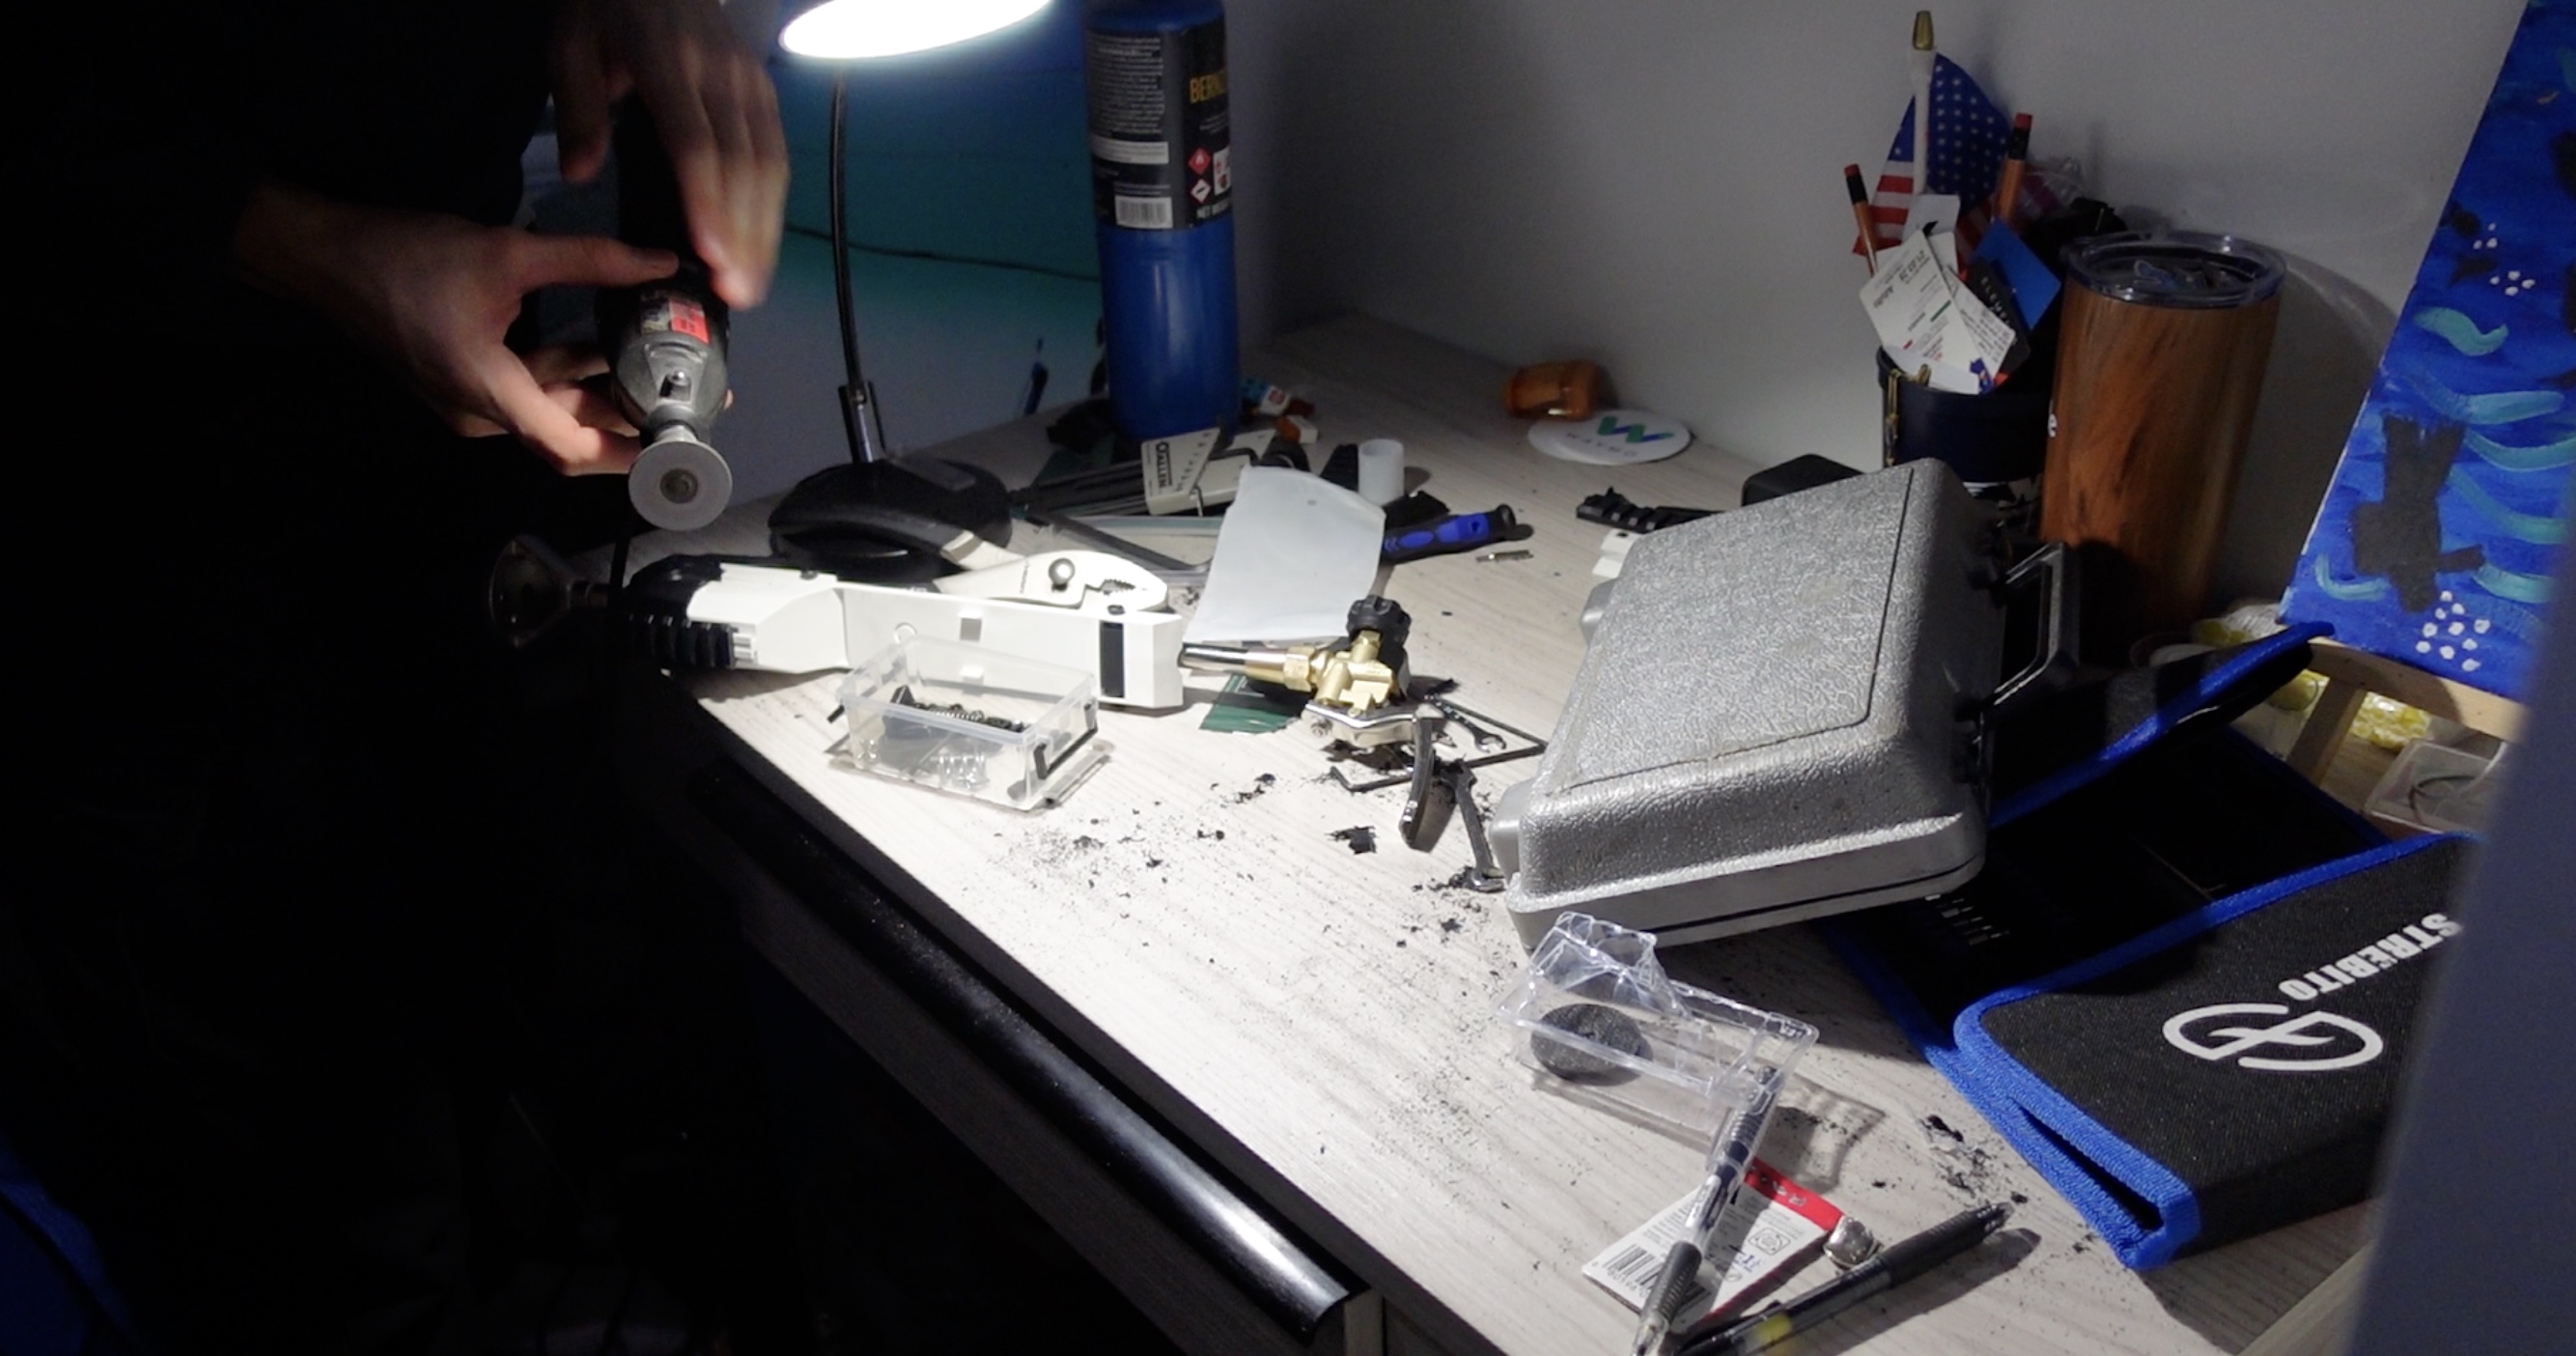
Step 5: Drill the Hole for the Trigger
The original trigger hole is too small. Now we will be drilling the hole for the trigger.
Step 6: Drill the Hole for the Gas Valve
Line up the pieces and now drill the hole for the gas valve. This valve should sit roughly halfway between the mounting brackets on the backside of the airsoft. Make sure the hole can fit the entirety of the valve. Also leave some wiggle room for adjustments later.
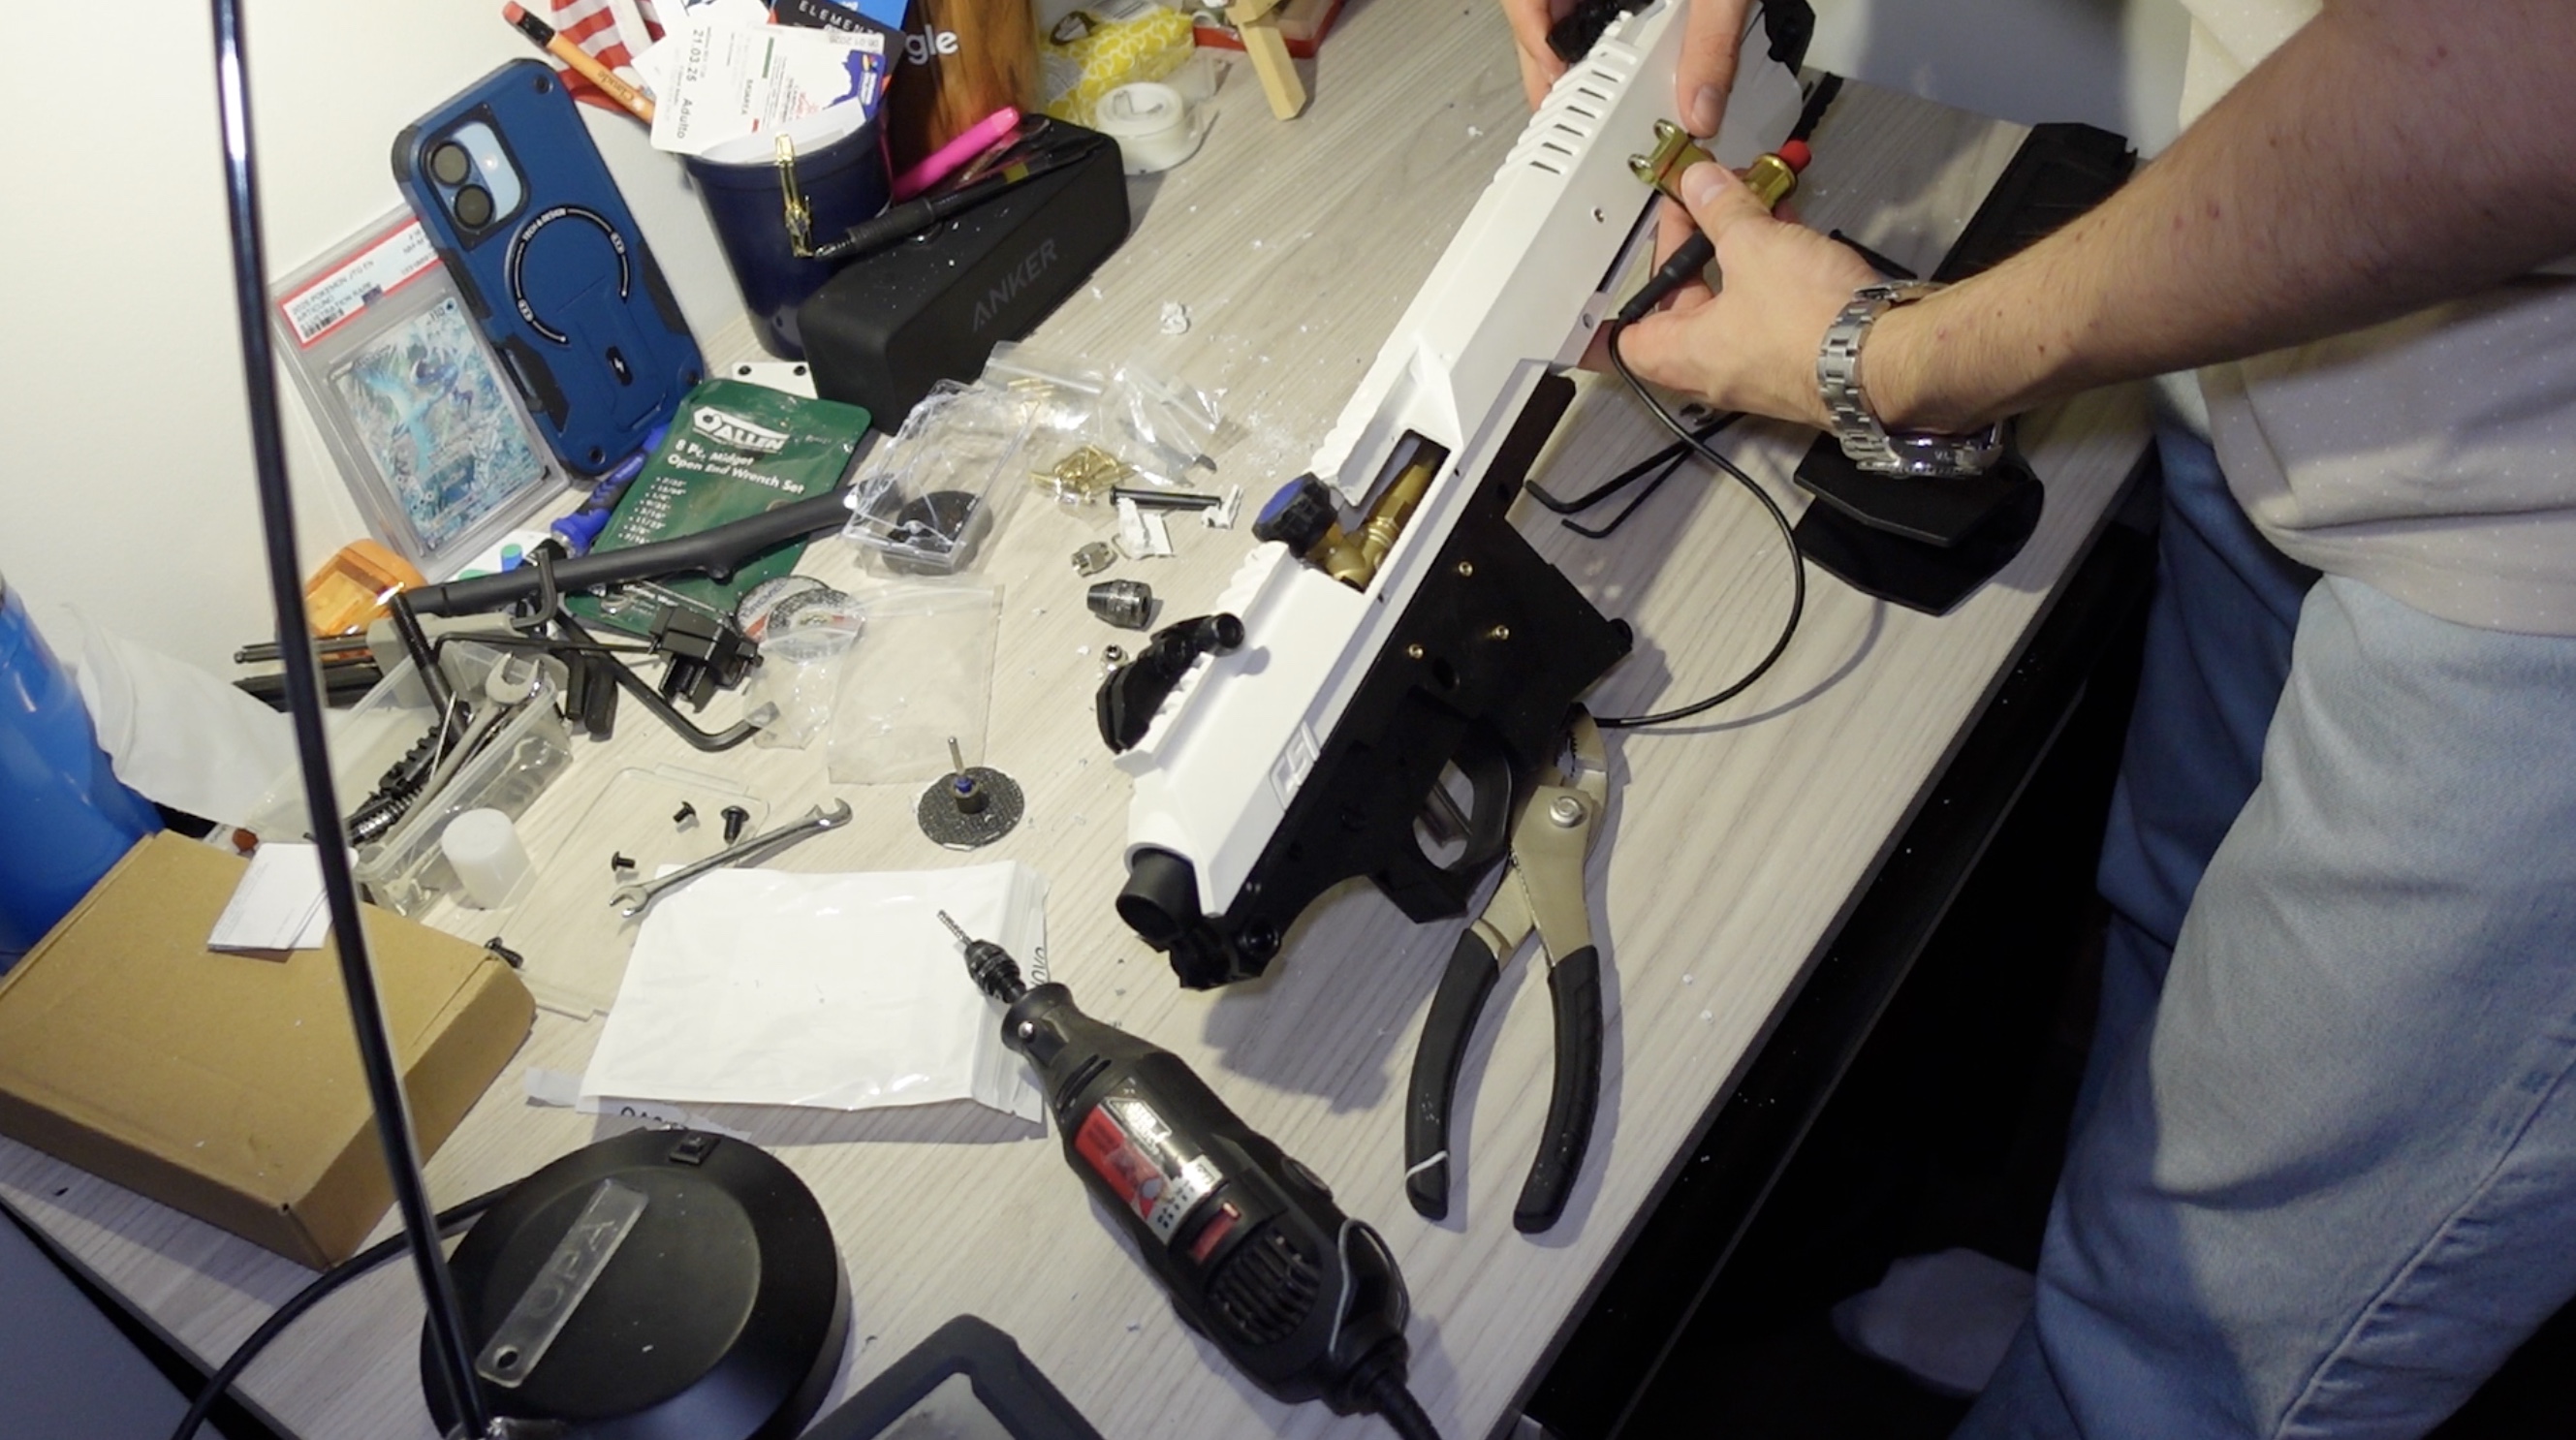
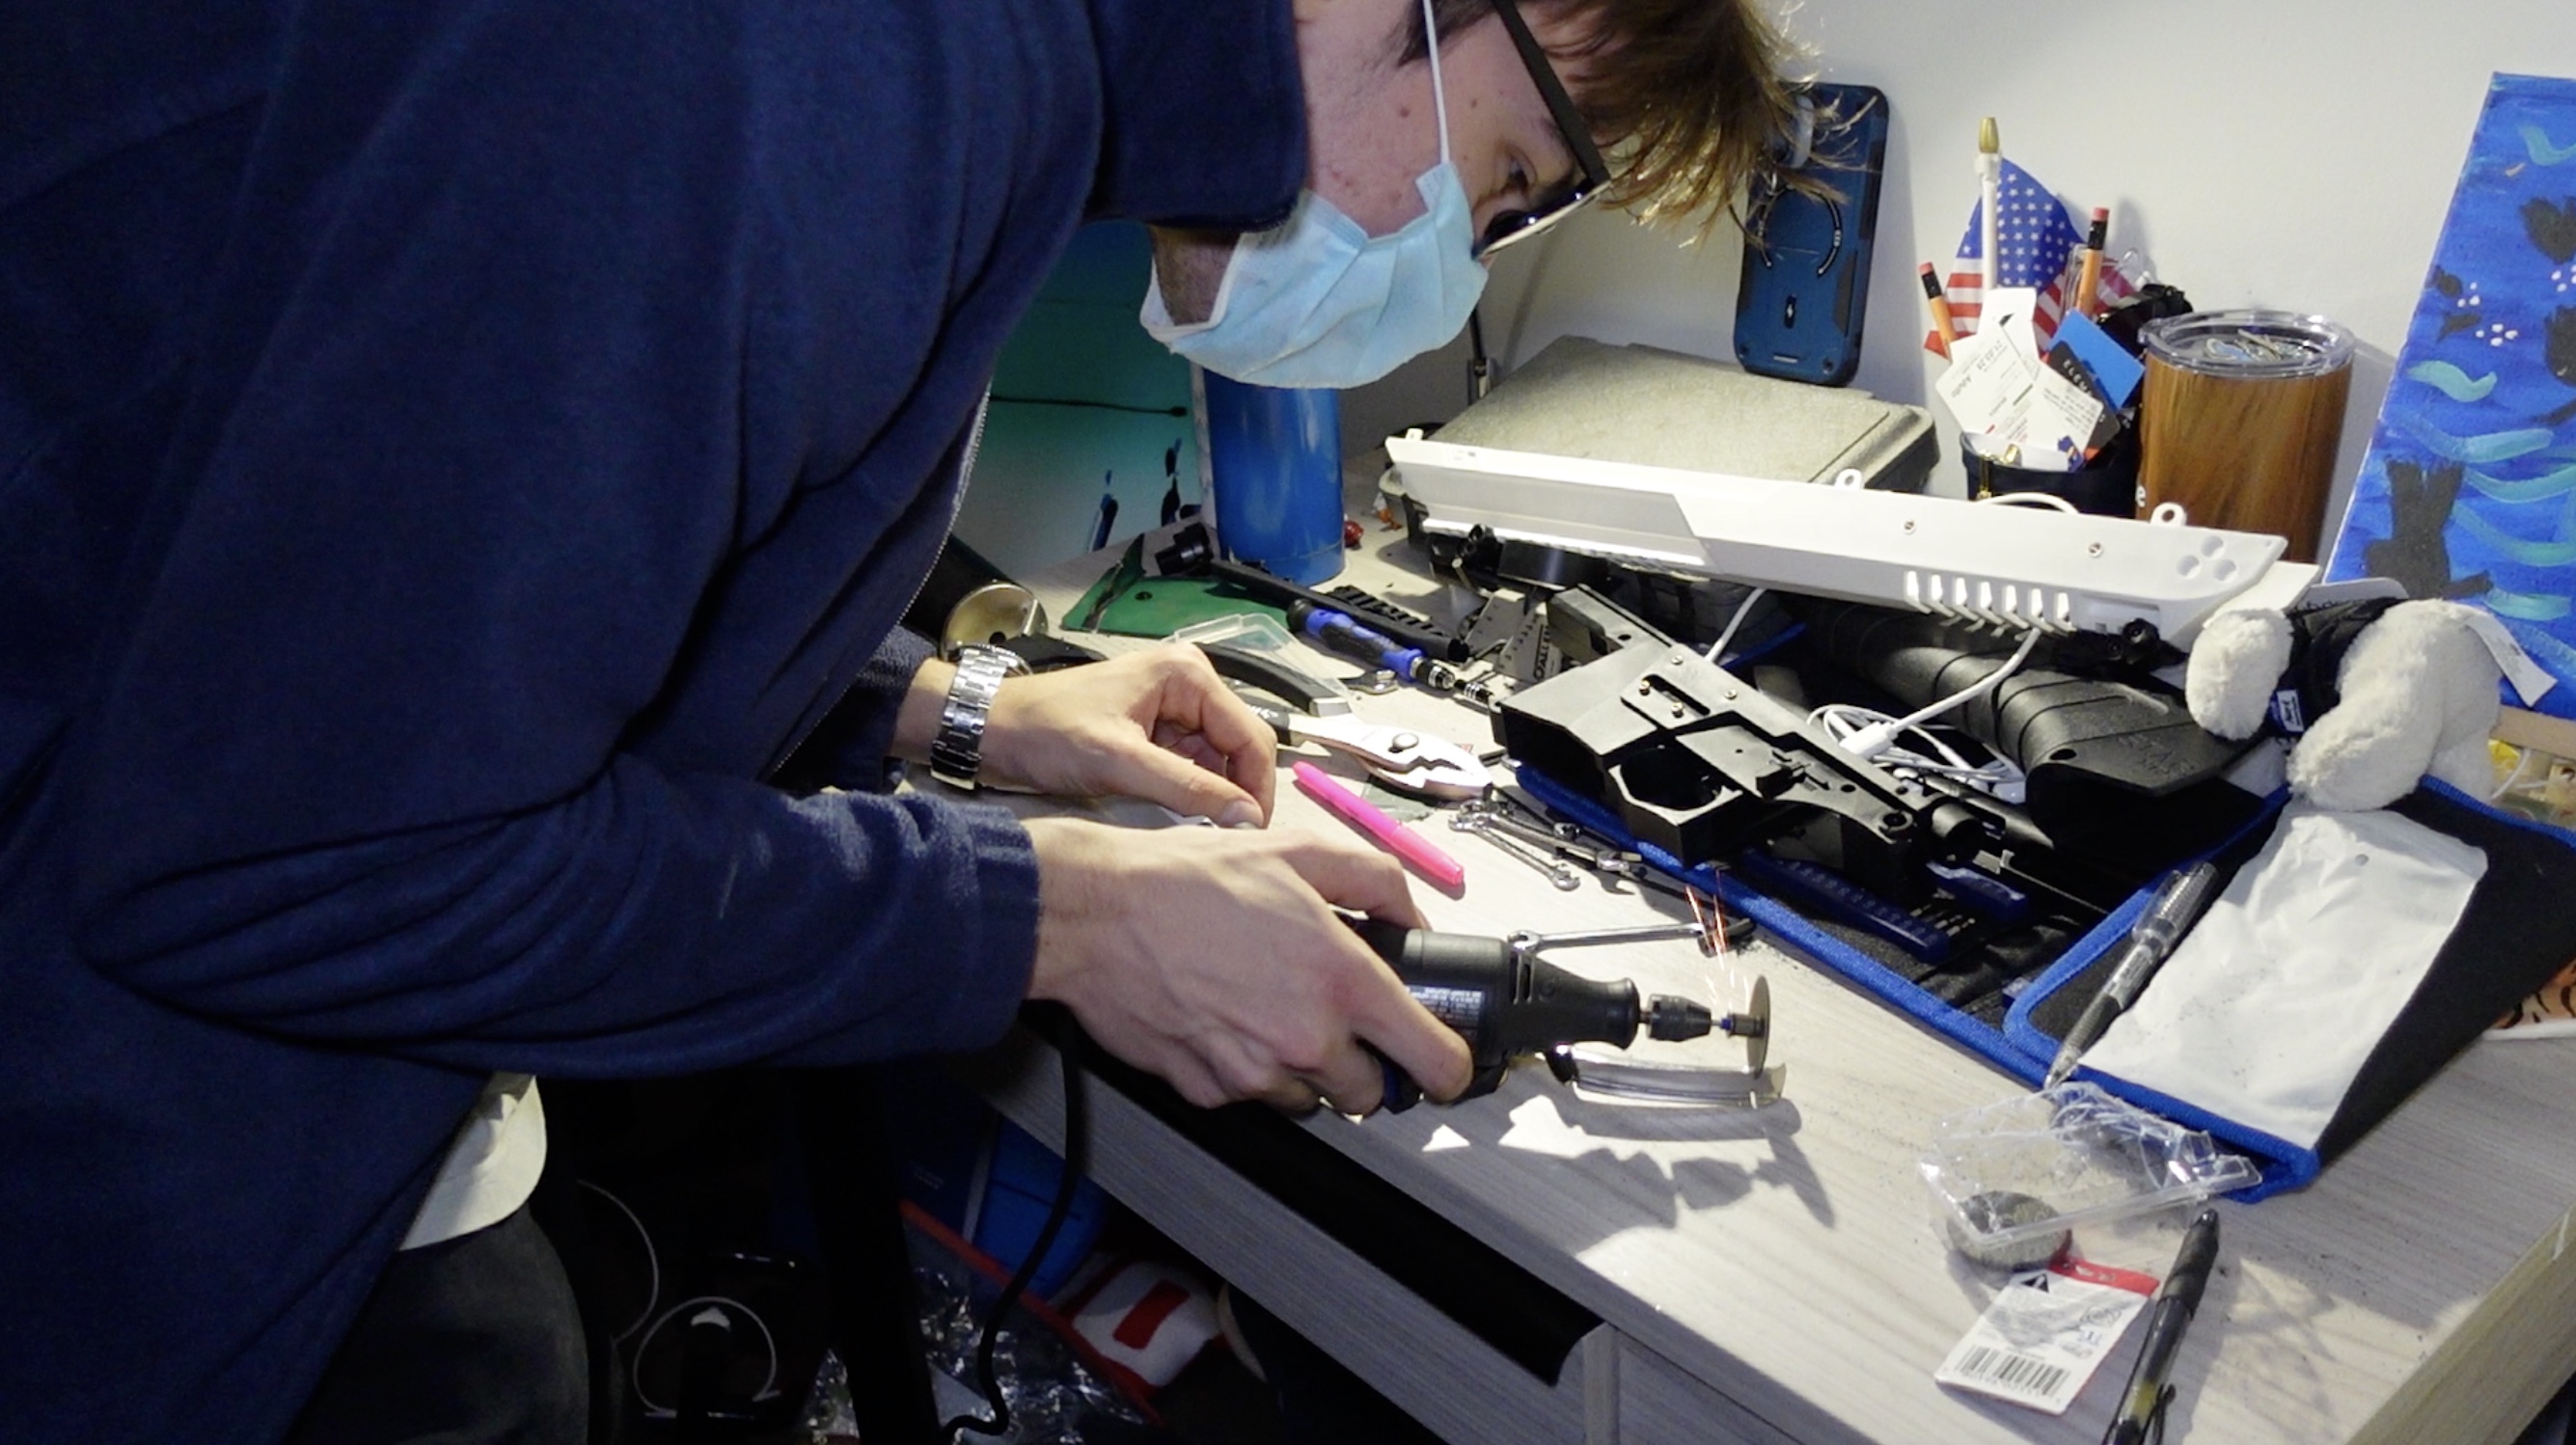
Step 7: Drill Holes for the Ignition Switch

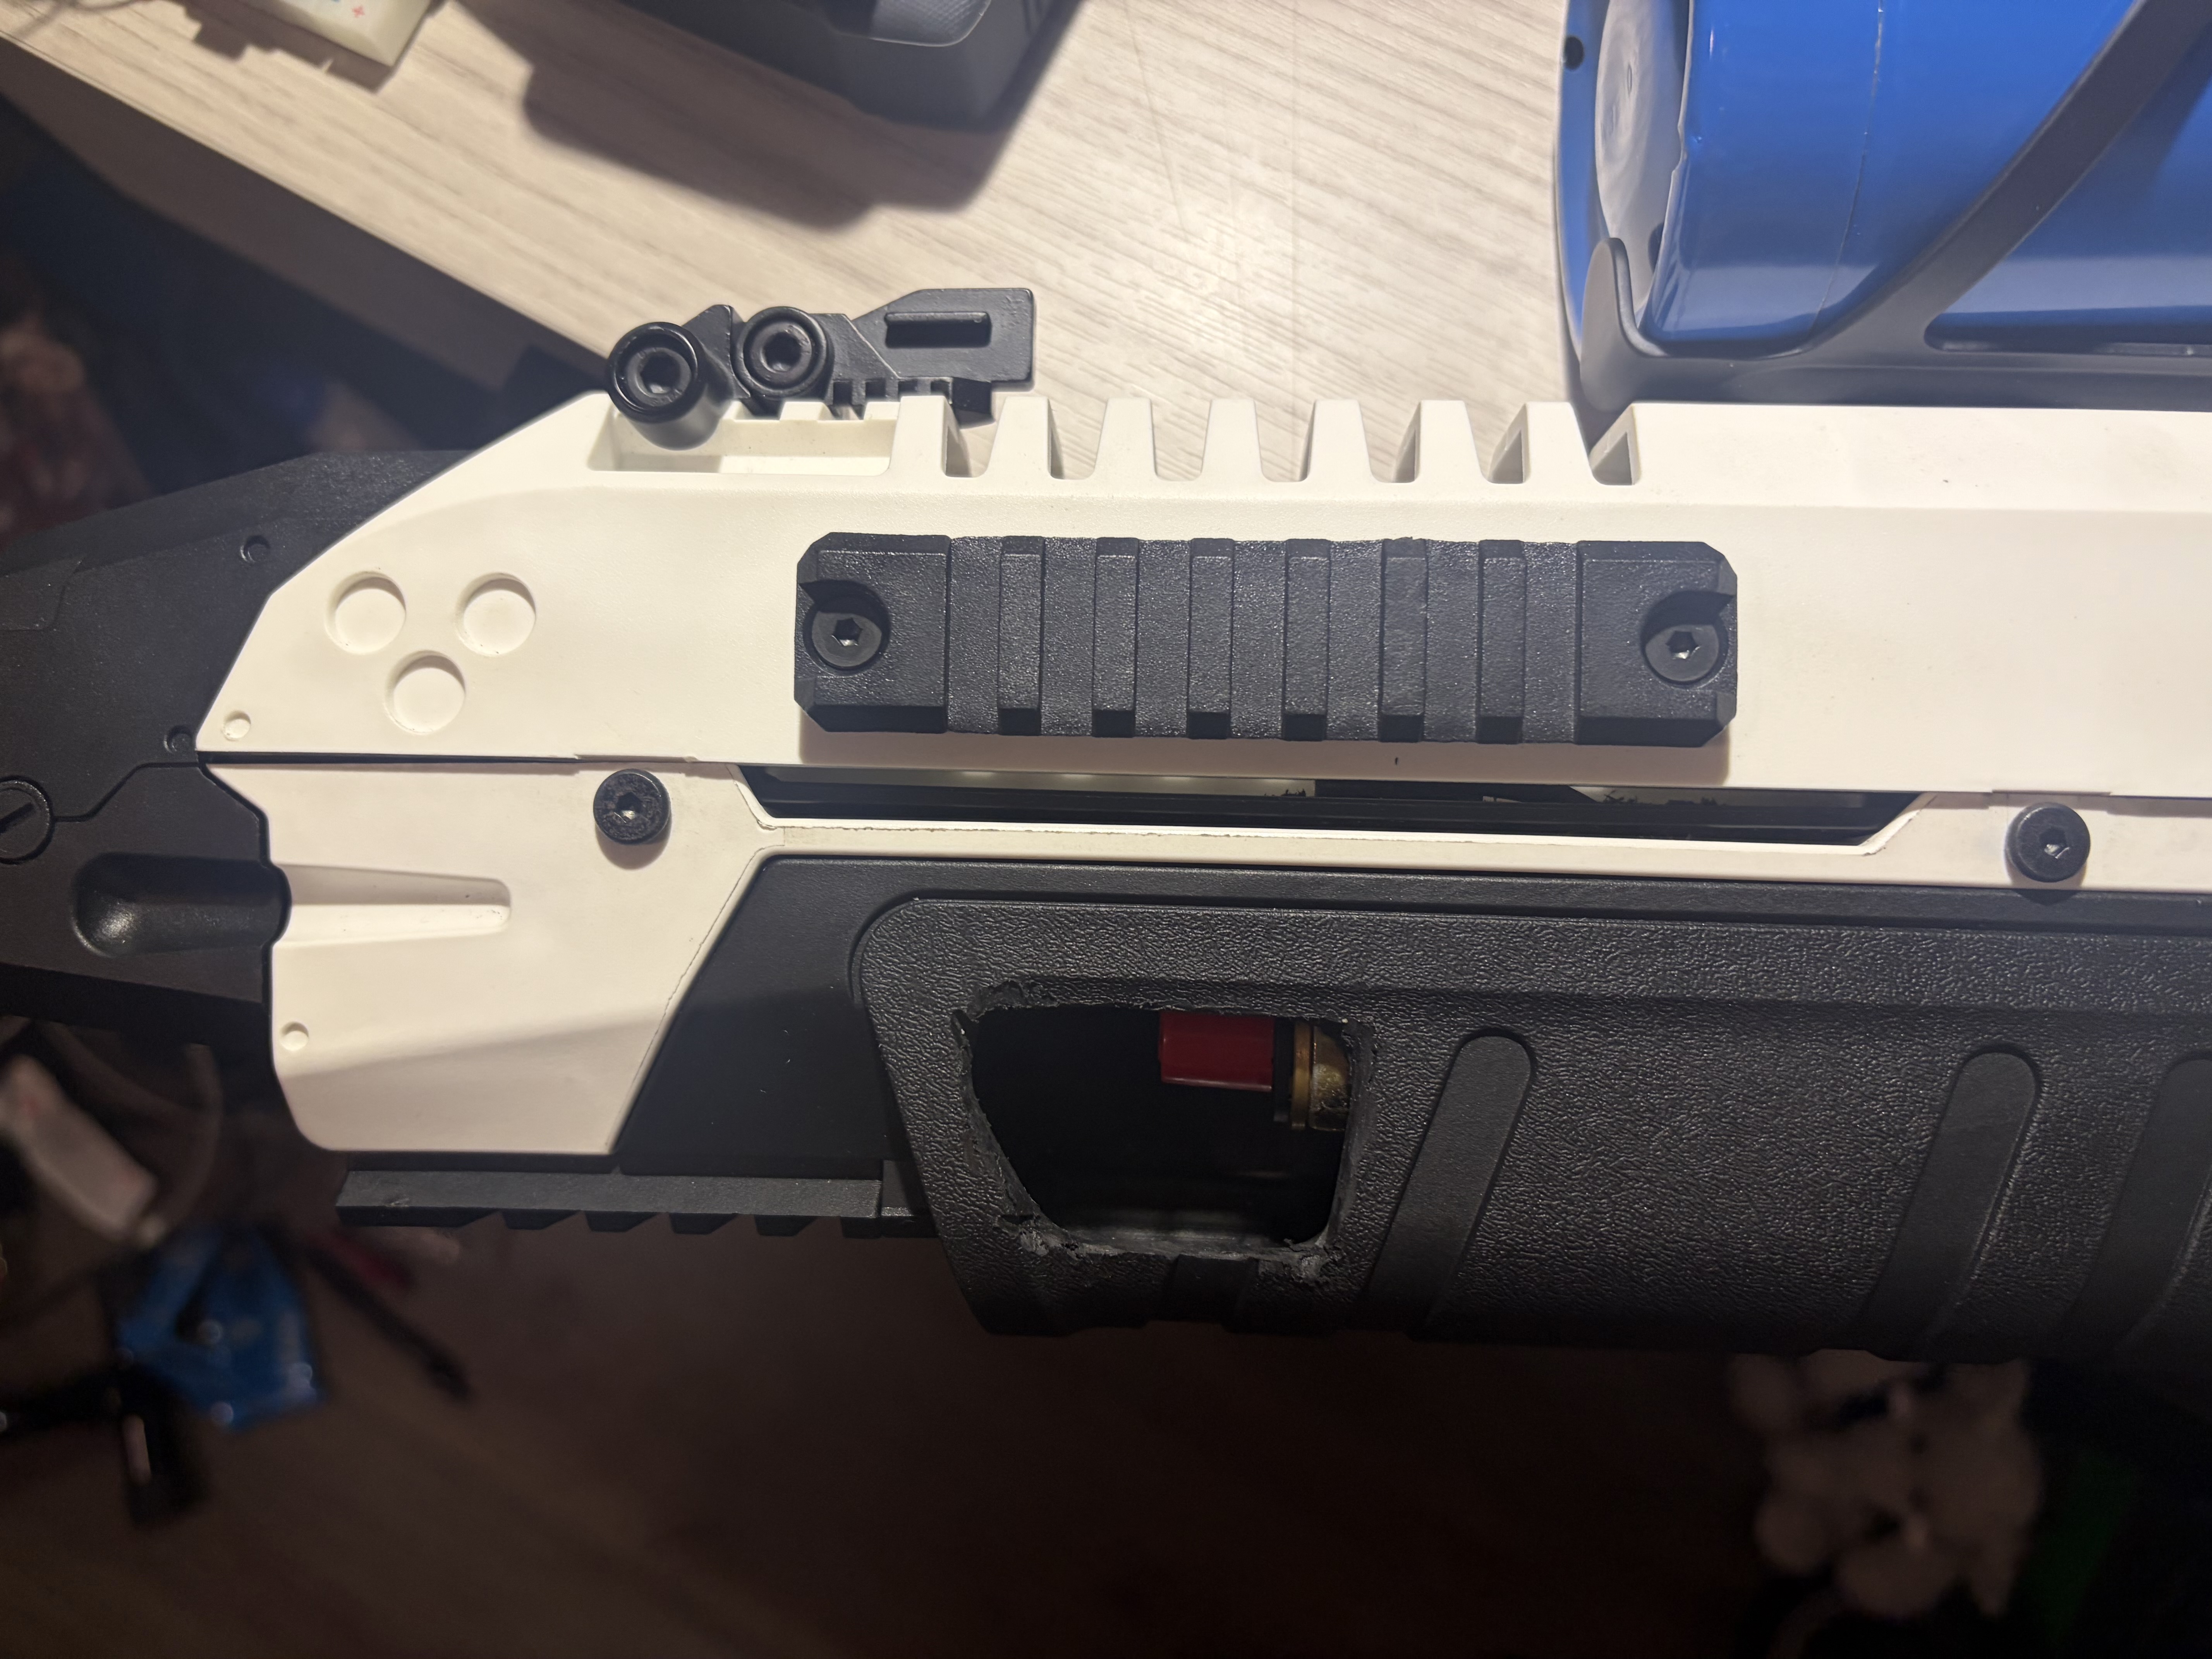
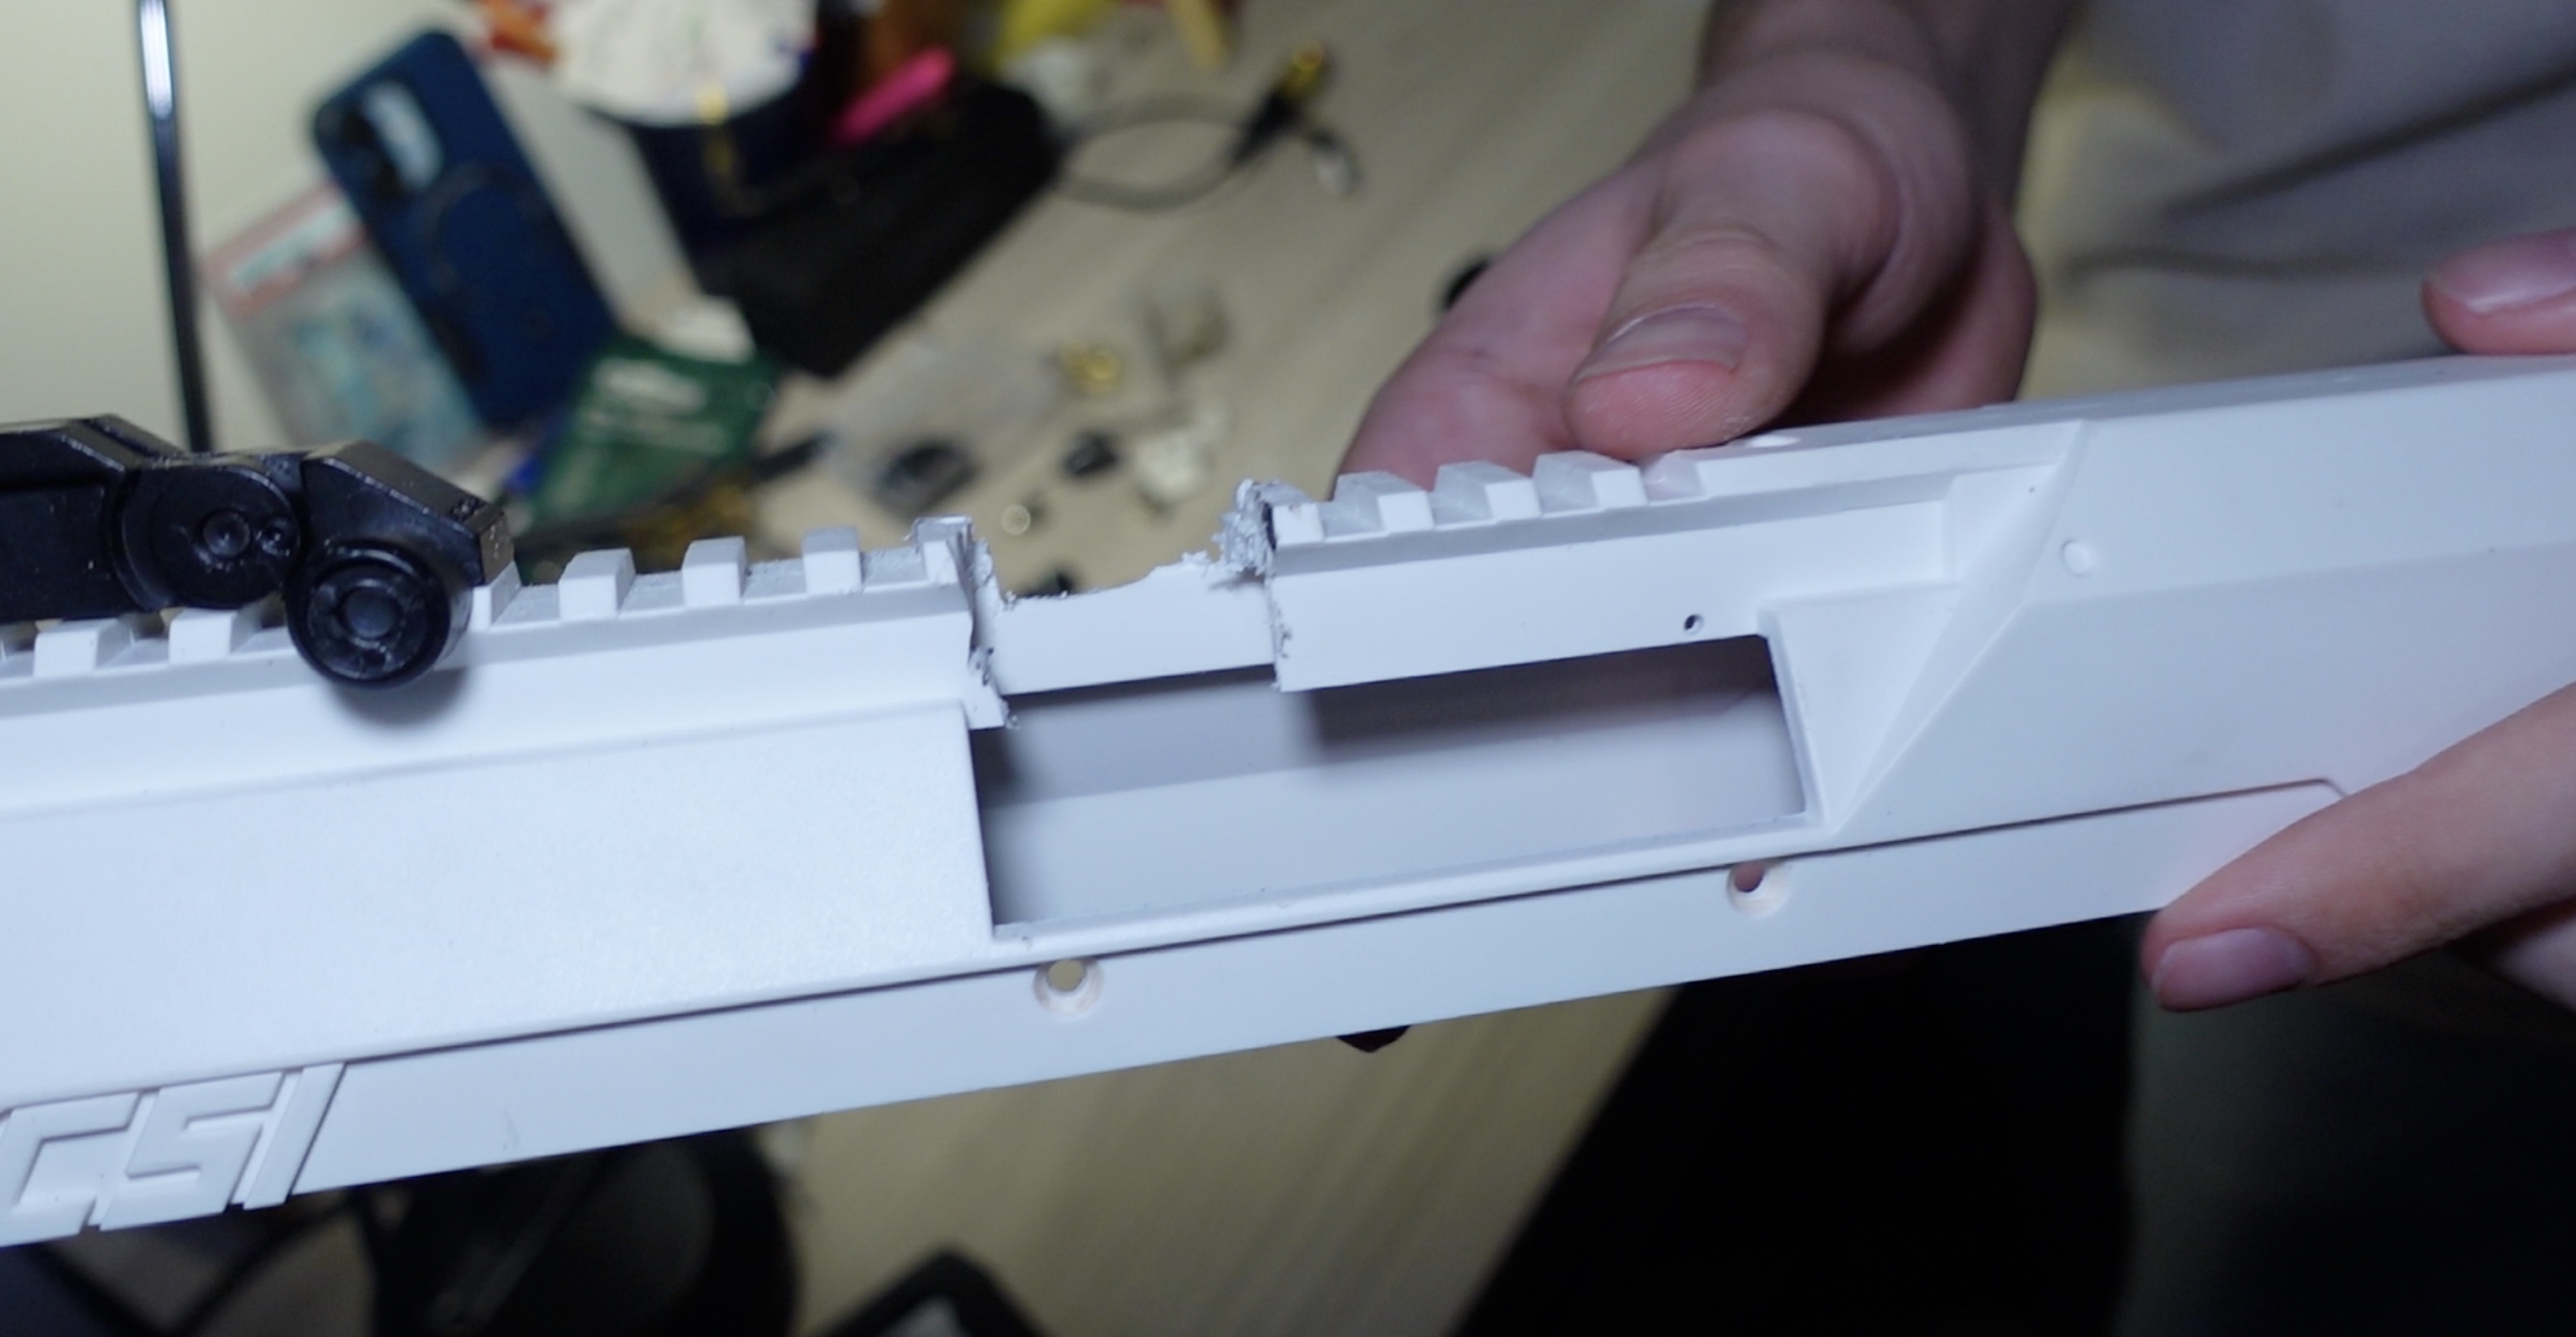
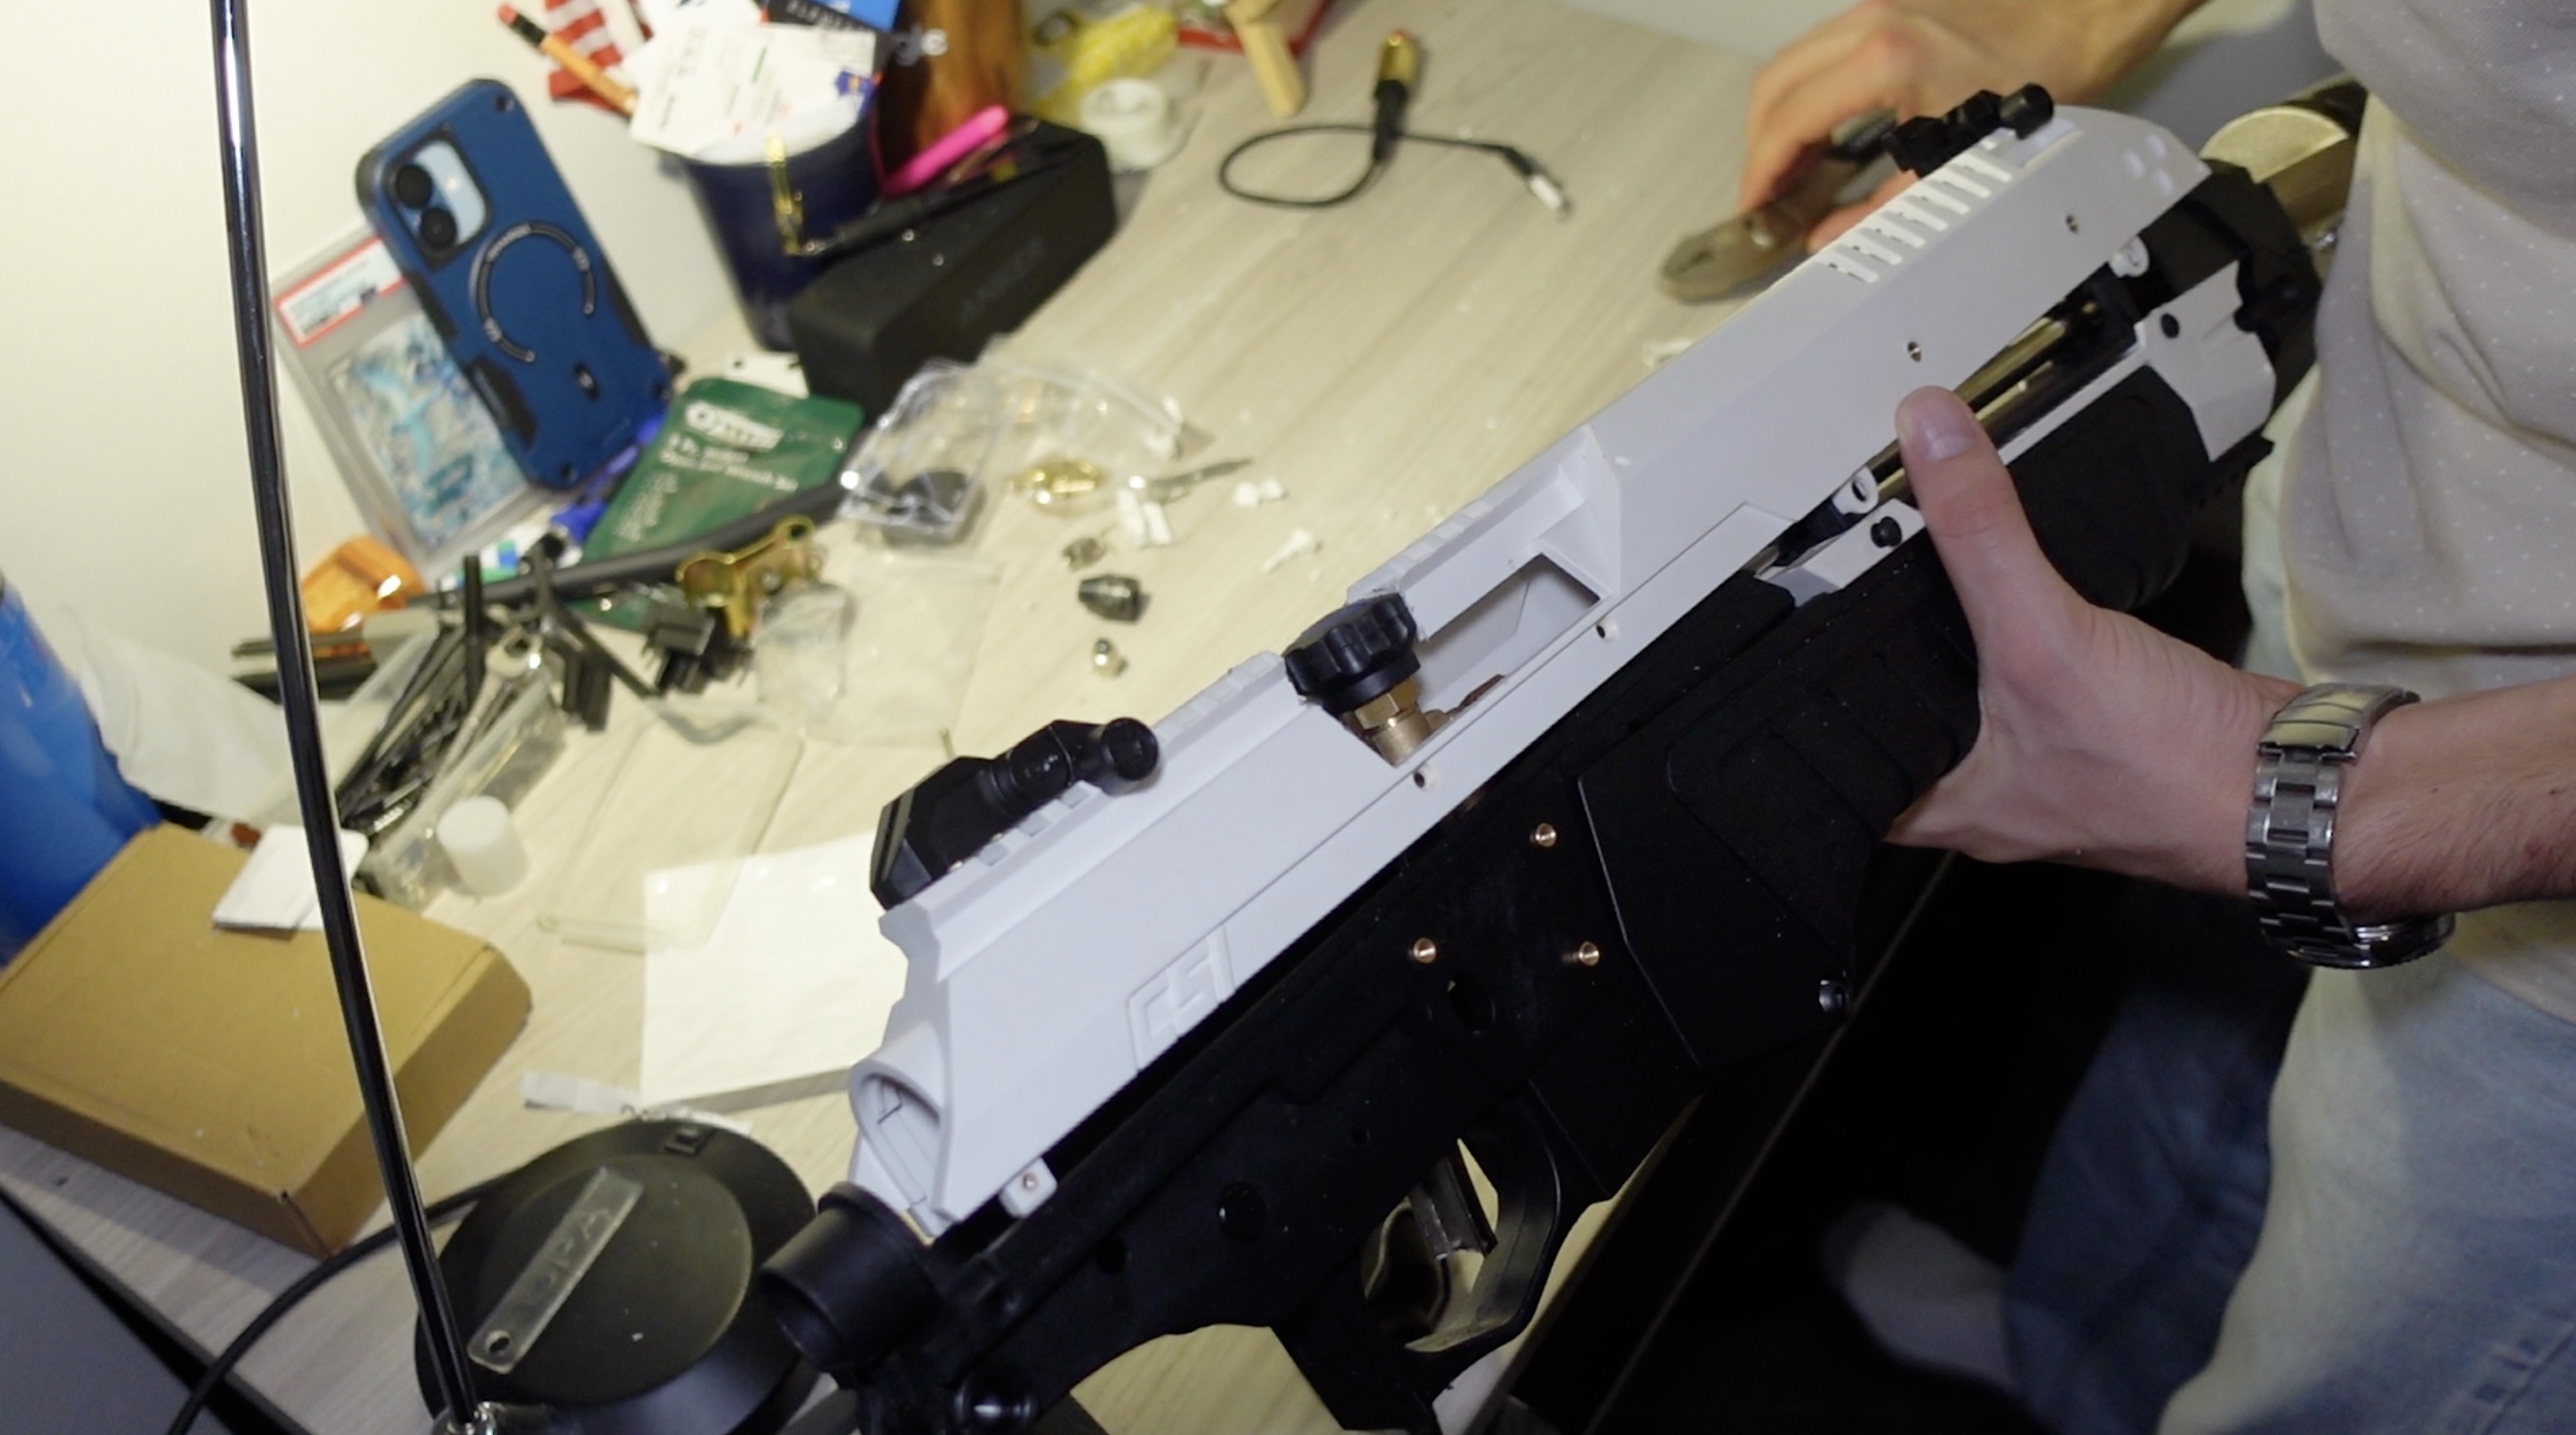
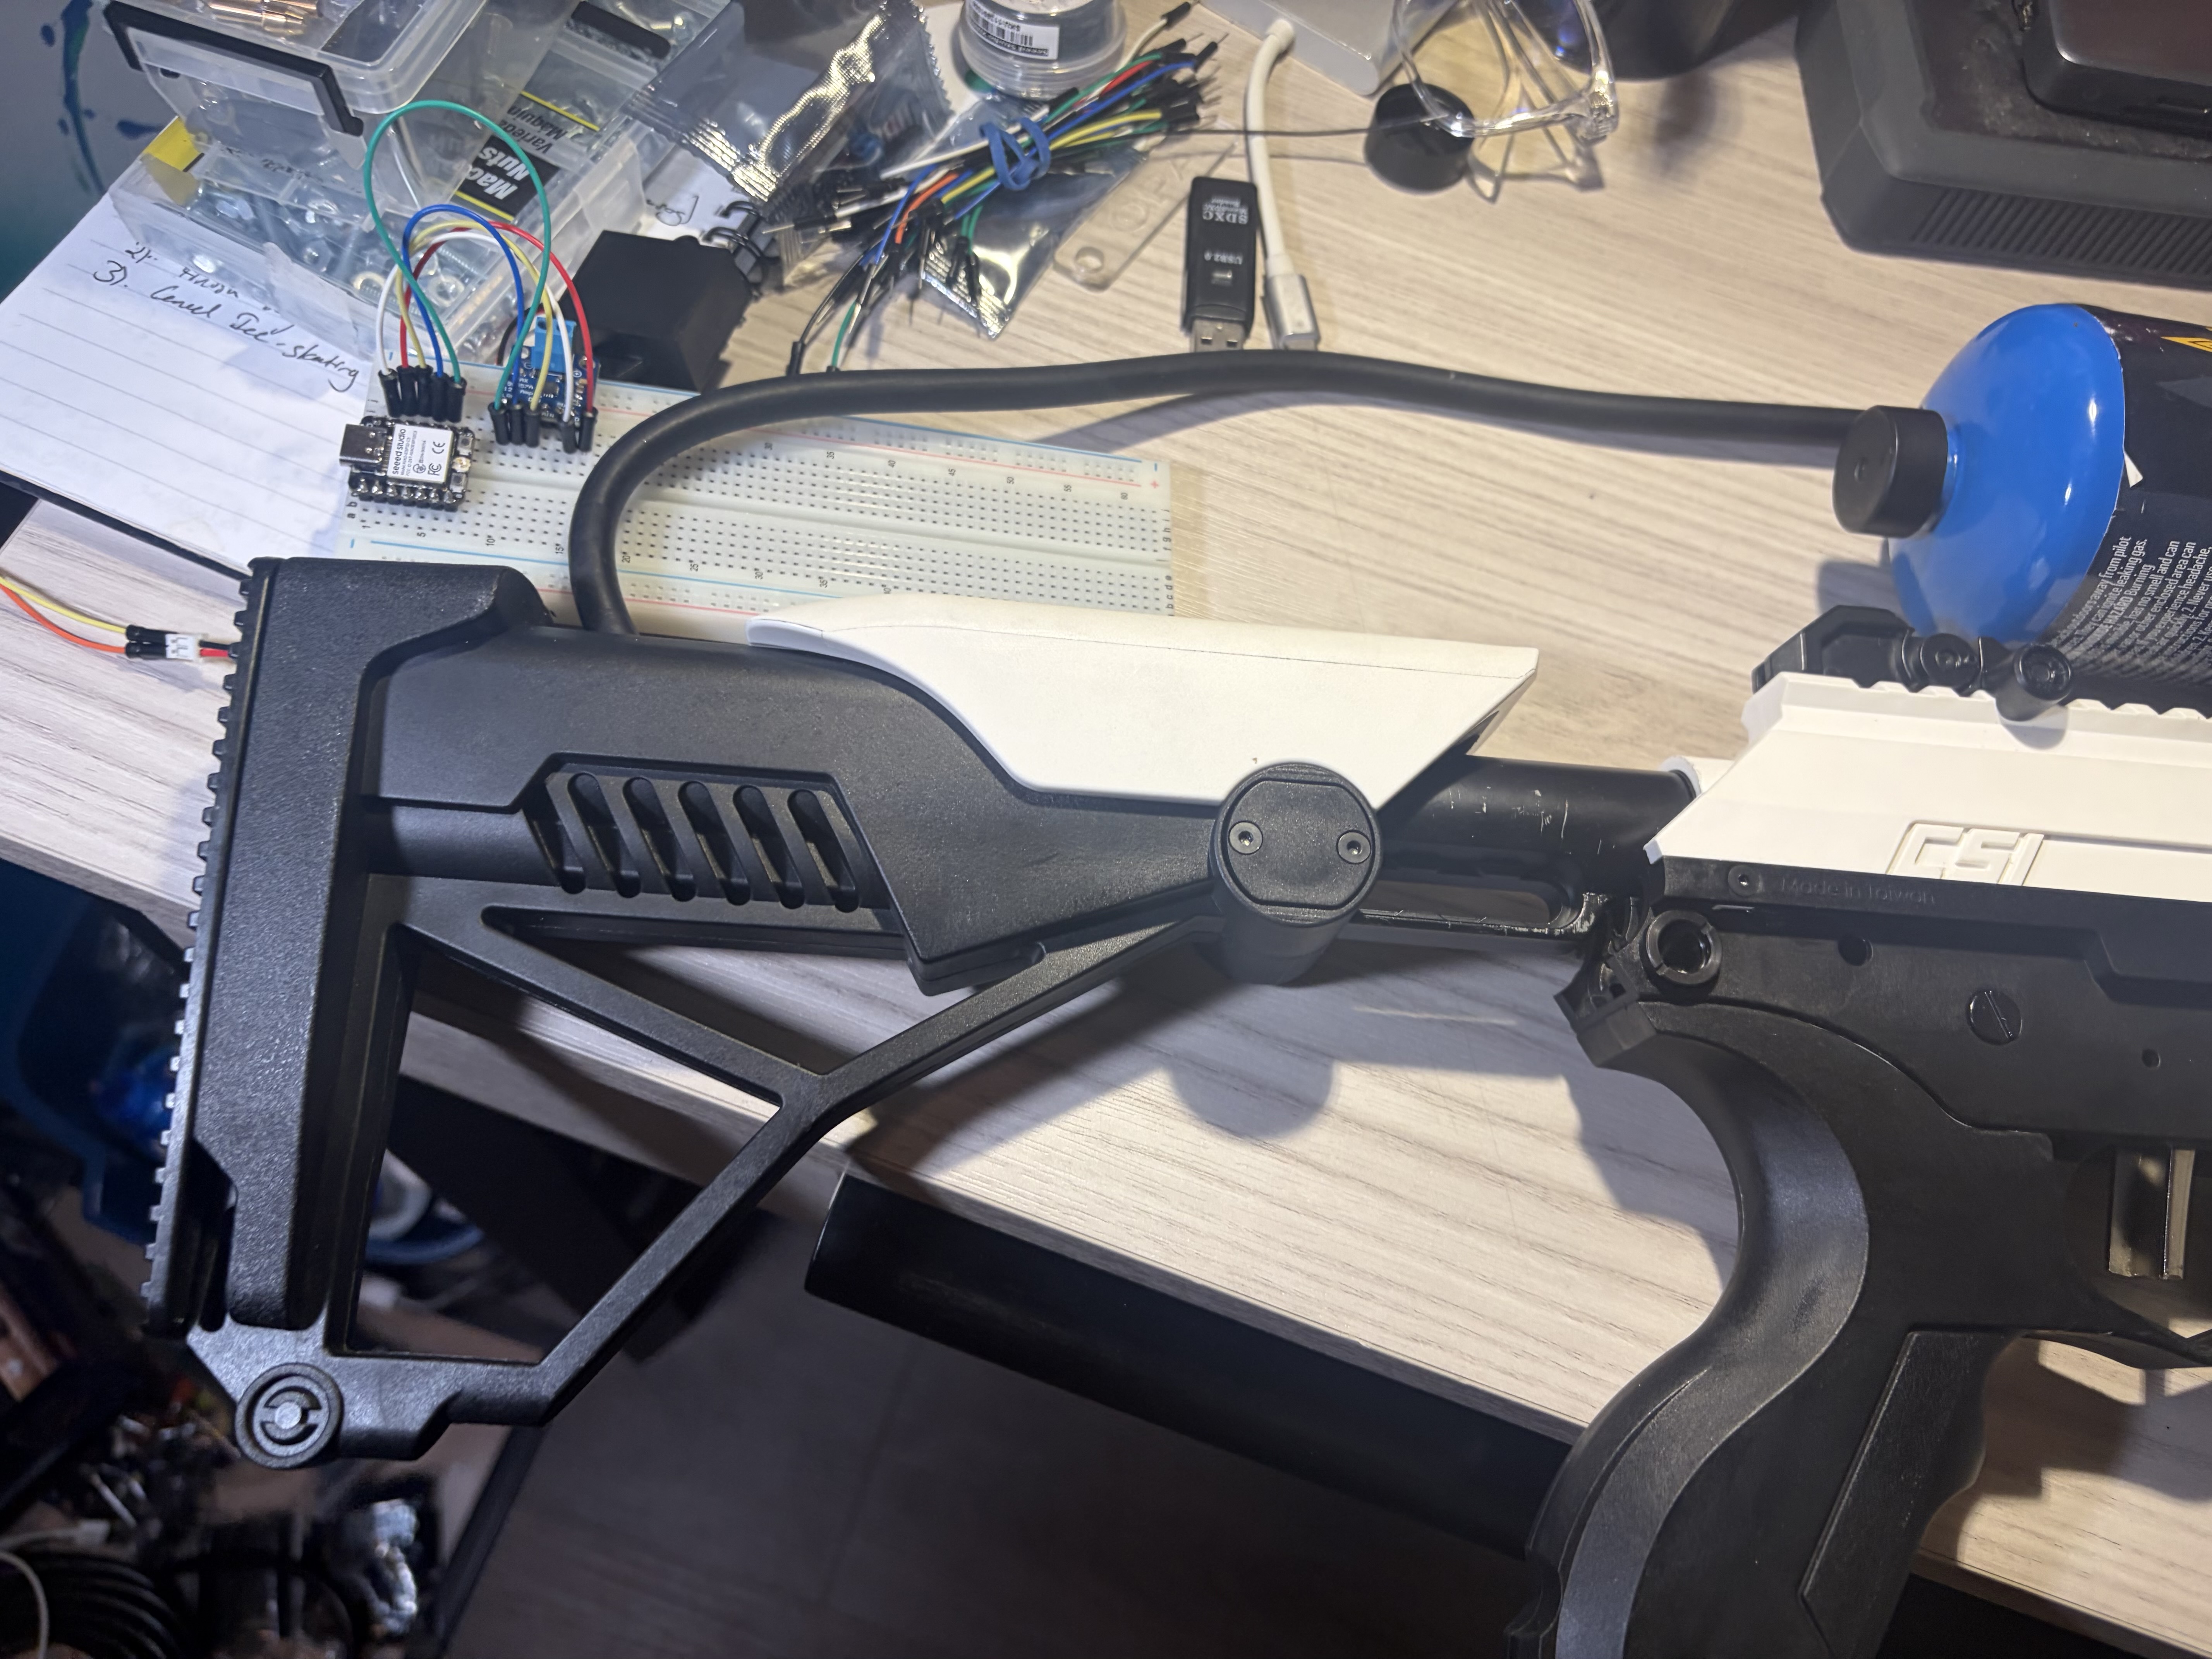
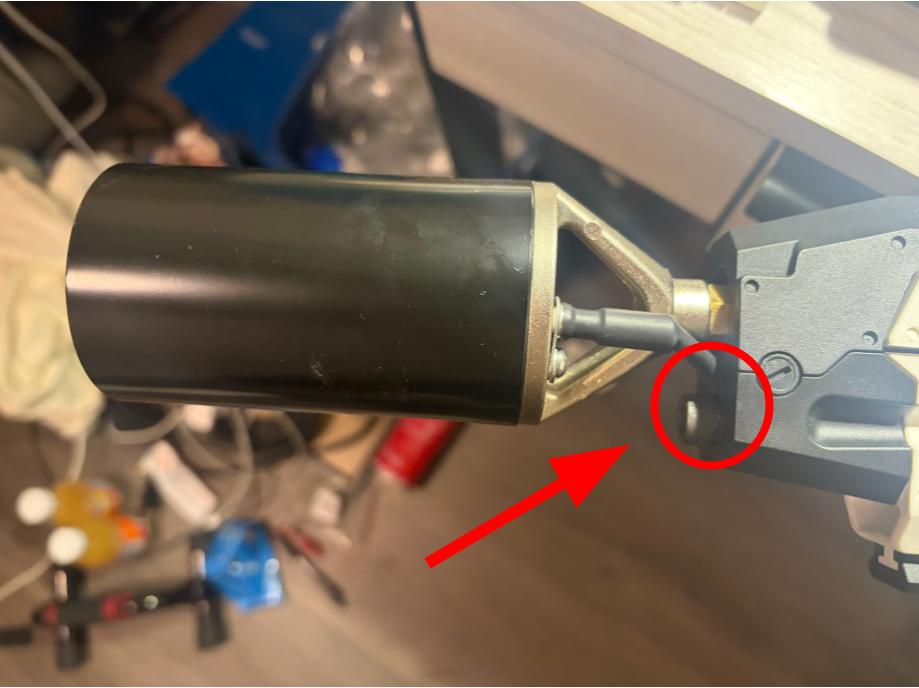
Step 8: Improvement Over Elon's - Drill Through the Back Connector
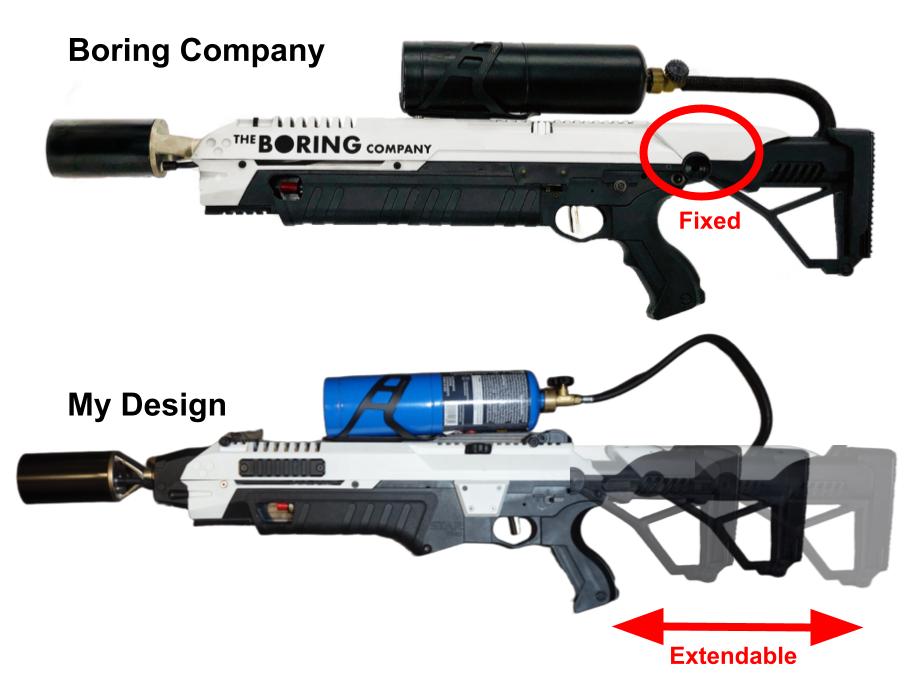
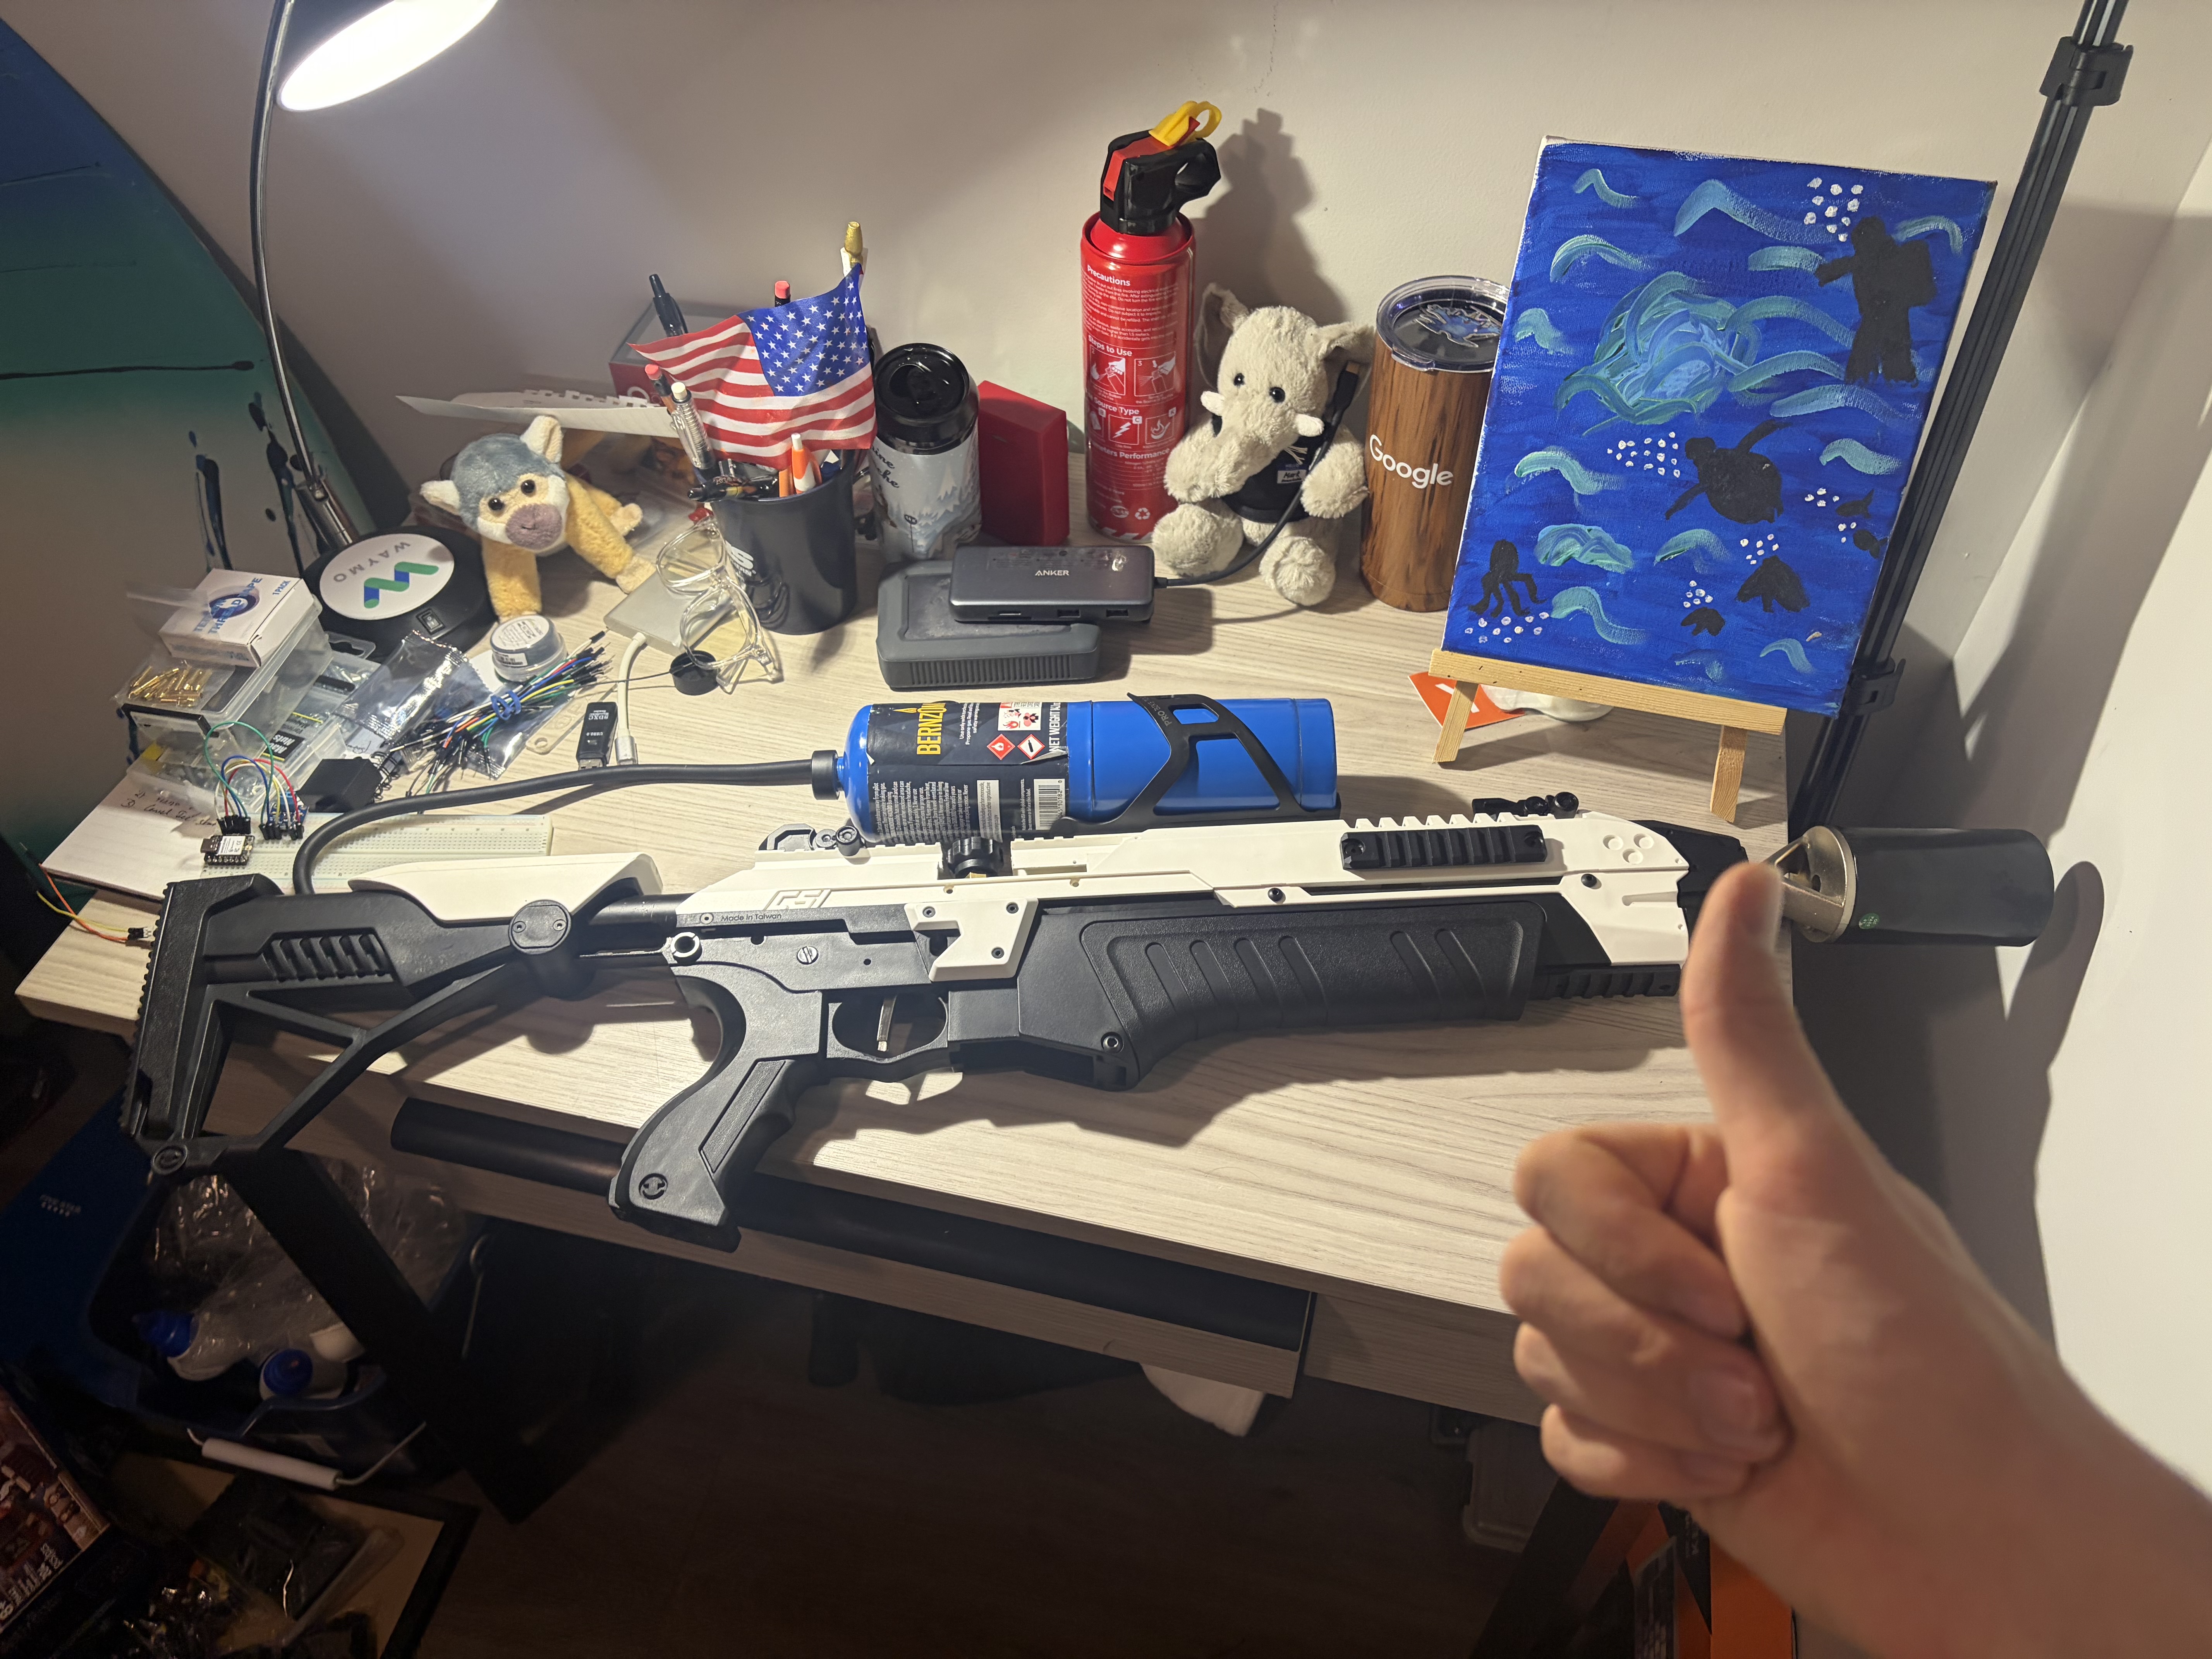
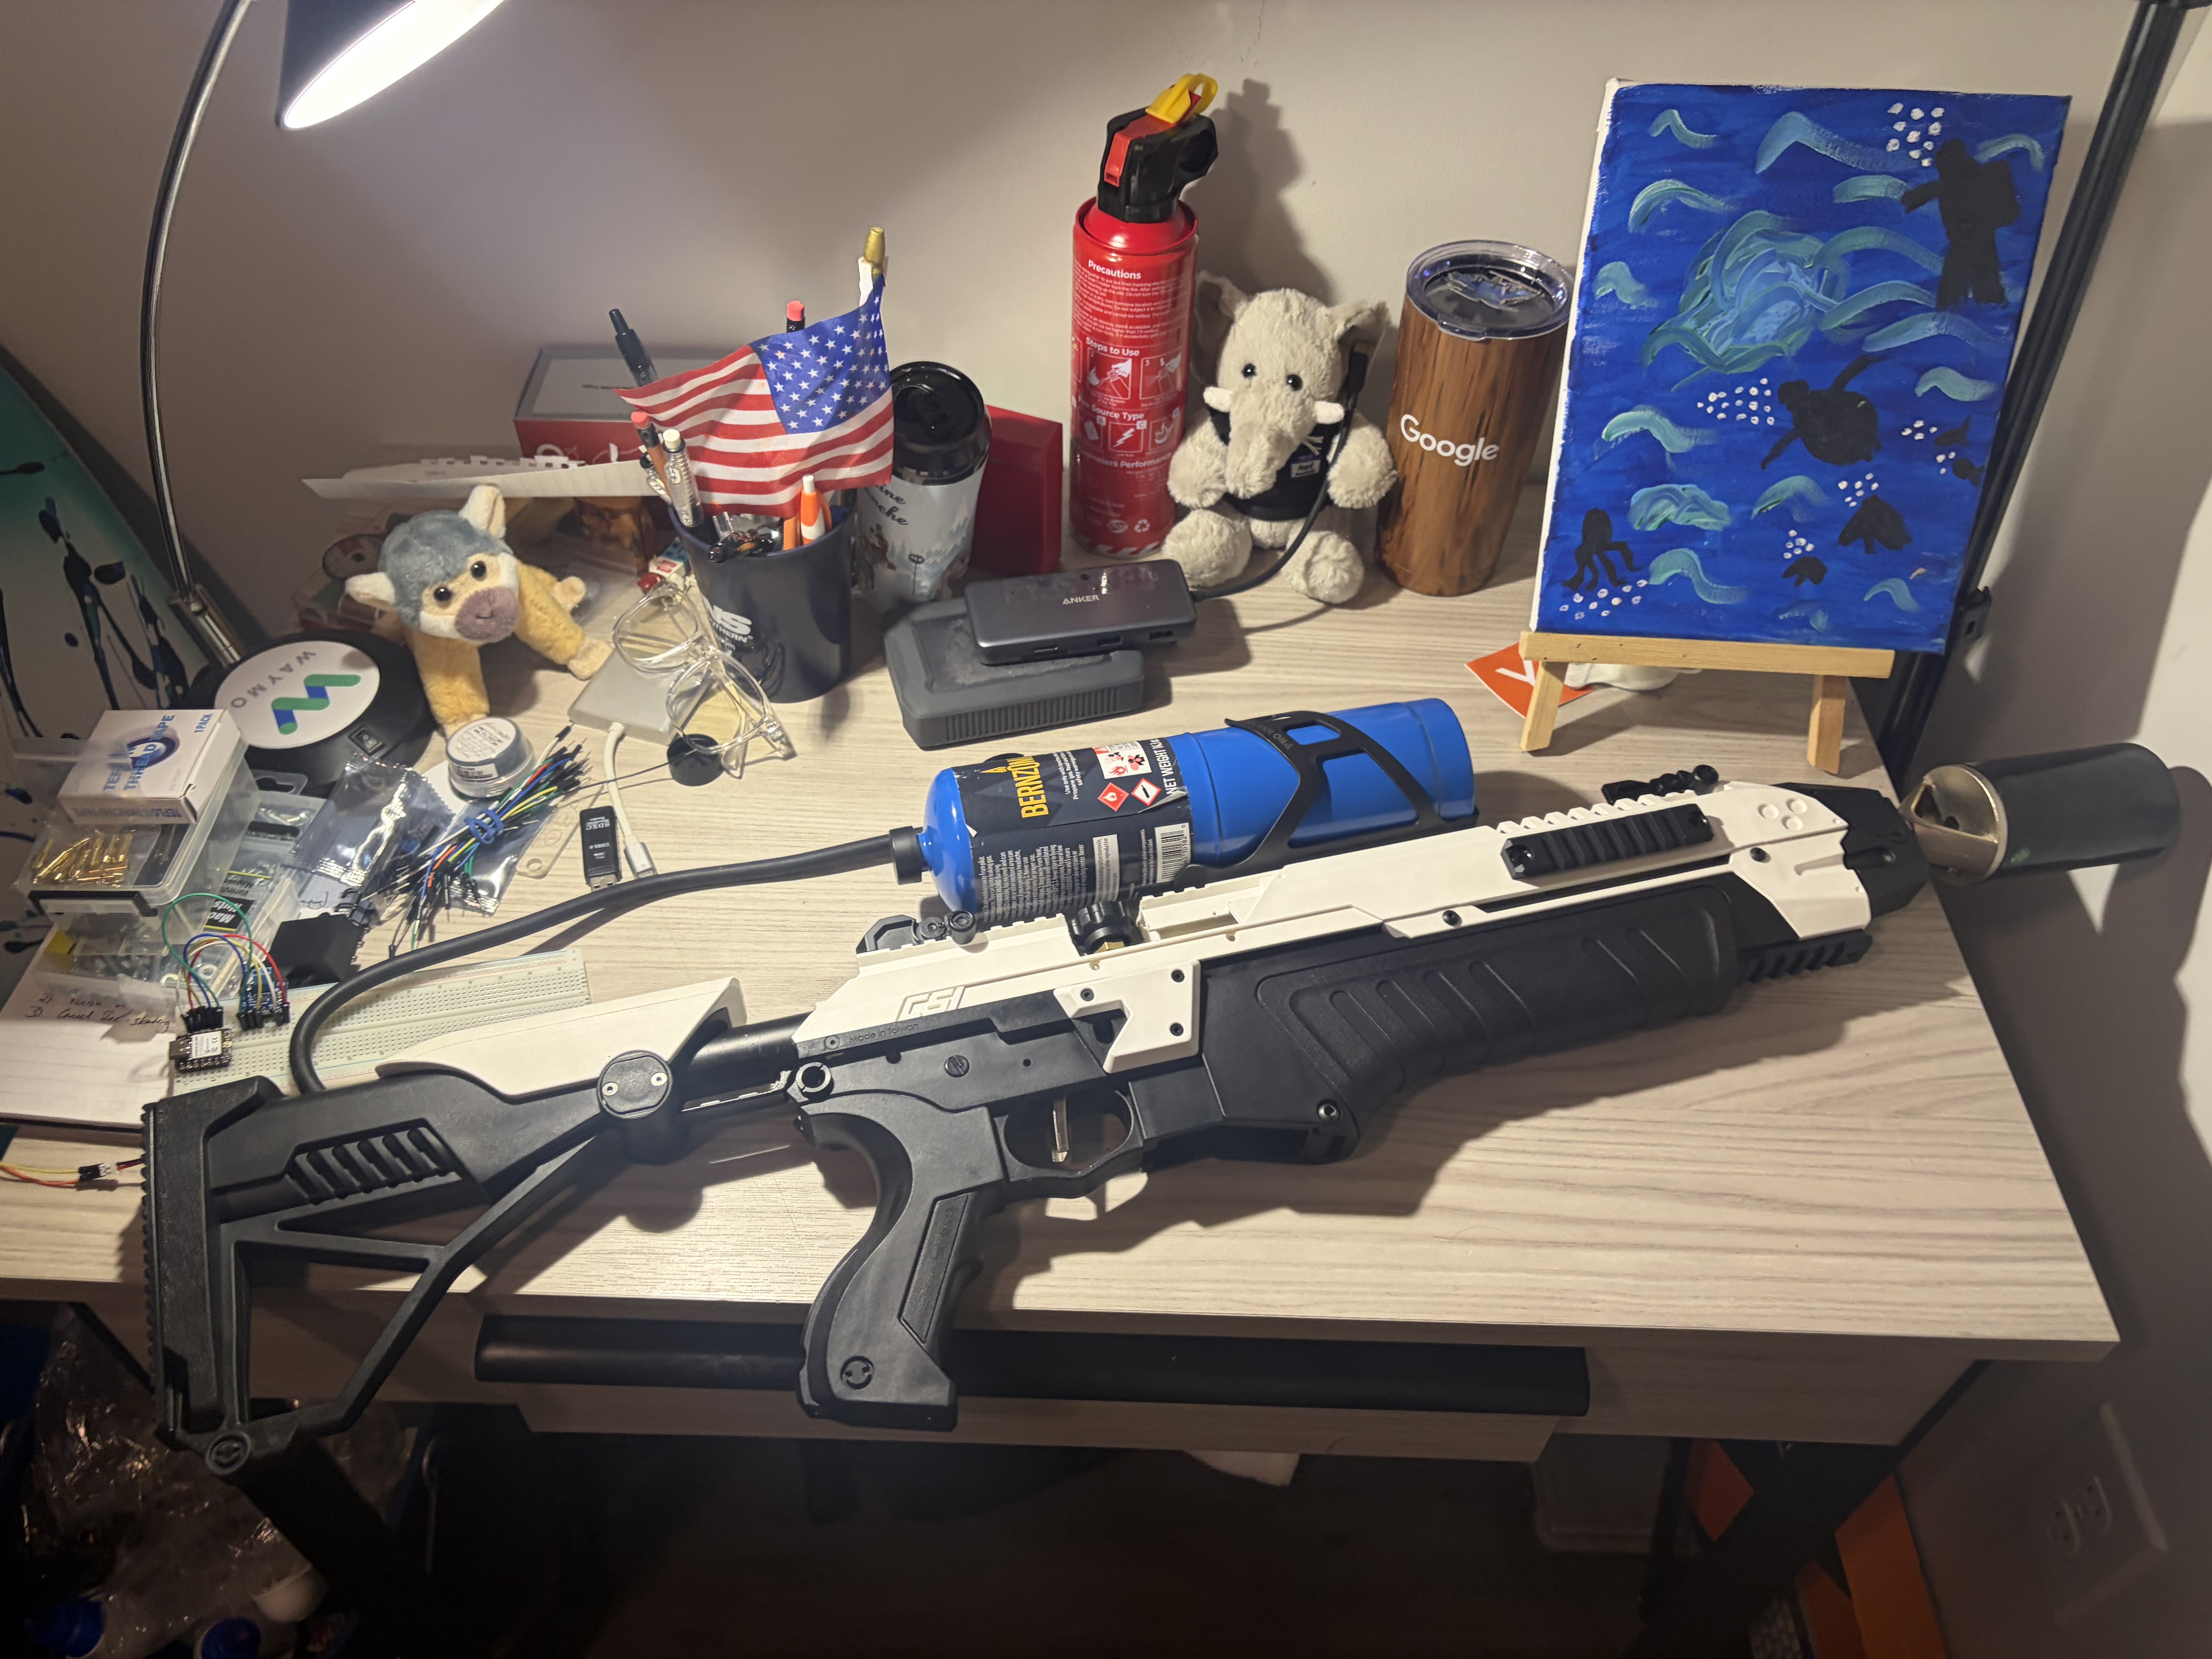
Elon's Not-A-Flamethrower has a fixed stock which is ultimately really short. This causes people to hold it in an awkward way where they have to extend their arms outward rather than shouldering it properly.
I wanted to fix this ergonomic flaw by adding an adjustable stock, similar to what you'd find on higher-end airsoft rifles, that could slide forward and backward to fit different users. With how expensive the not-a-flamethrower is, I'm surprise Elon did not consider this. The problem was that the internal metal pipe from the propane torch ran straight through where the stock adjustment mechanism would normally go. If I tried to slide the stock, it would collide with the fuel hose.
My solution was to drill an angled cut through the back connector pipe and then drill a hole through the outer plastic on the airsoft. This would allow the hose to thread through while still maintaining the structural rigidity of the gun. By routing the hose through the pipe itself, I could preserve the adjustable stock functionality without compromising the fuel delivery system.
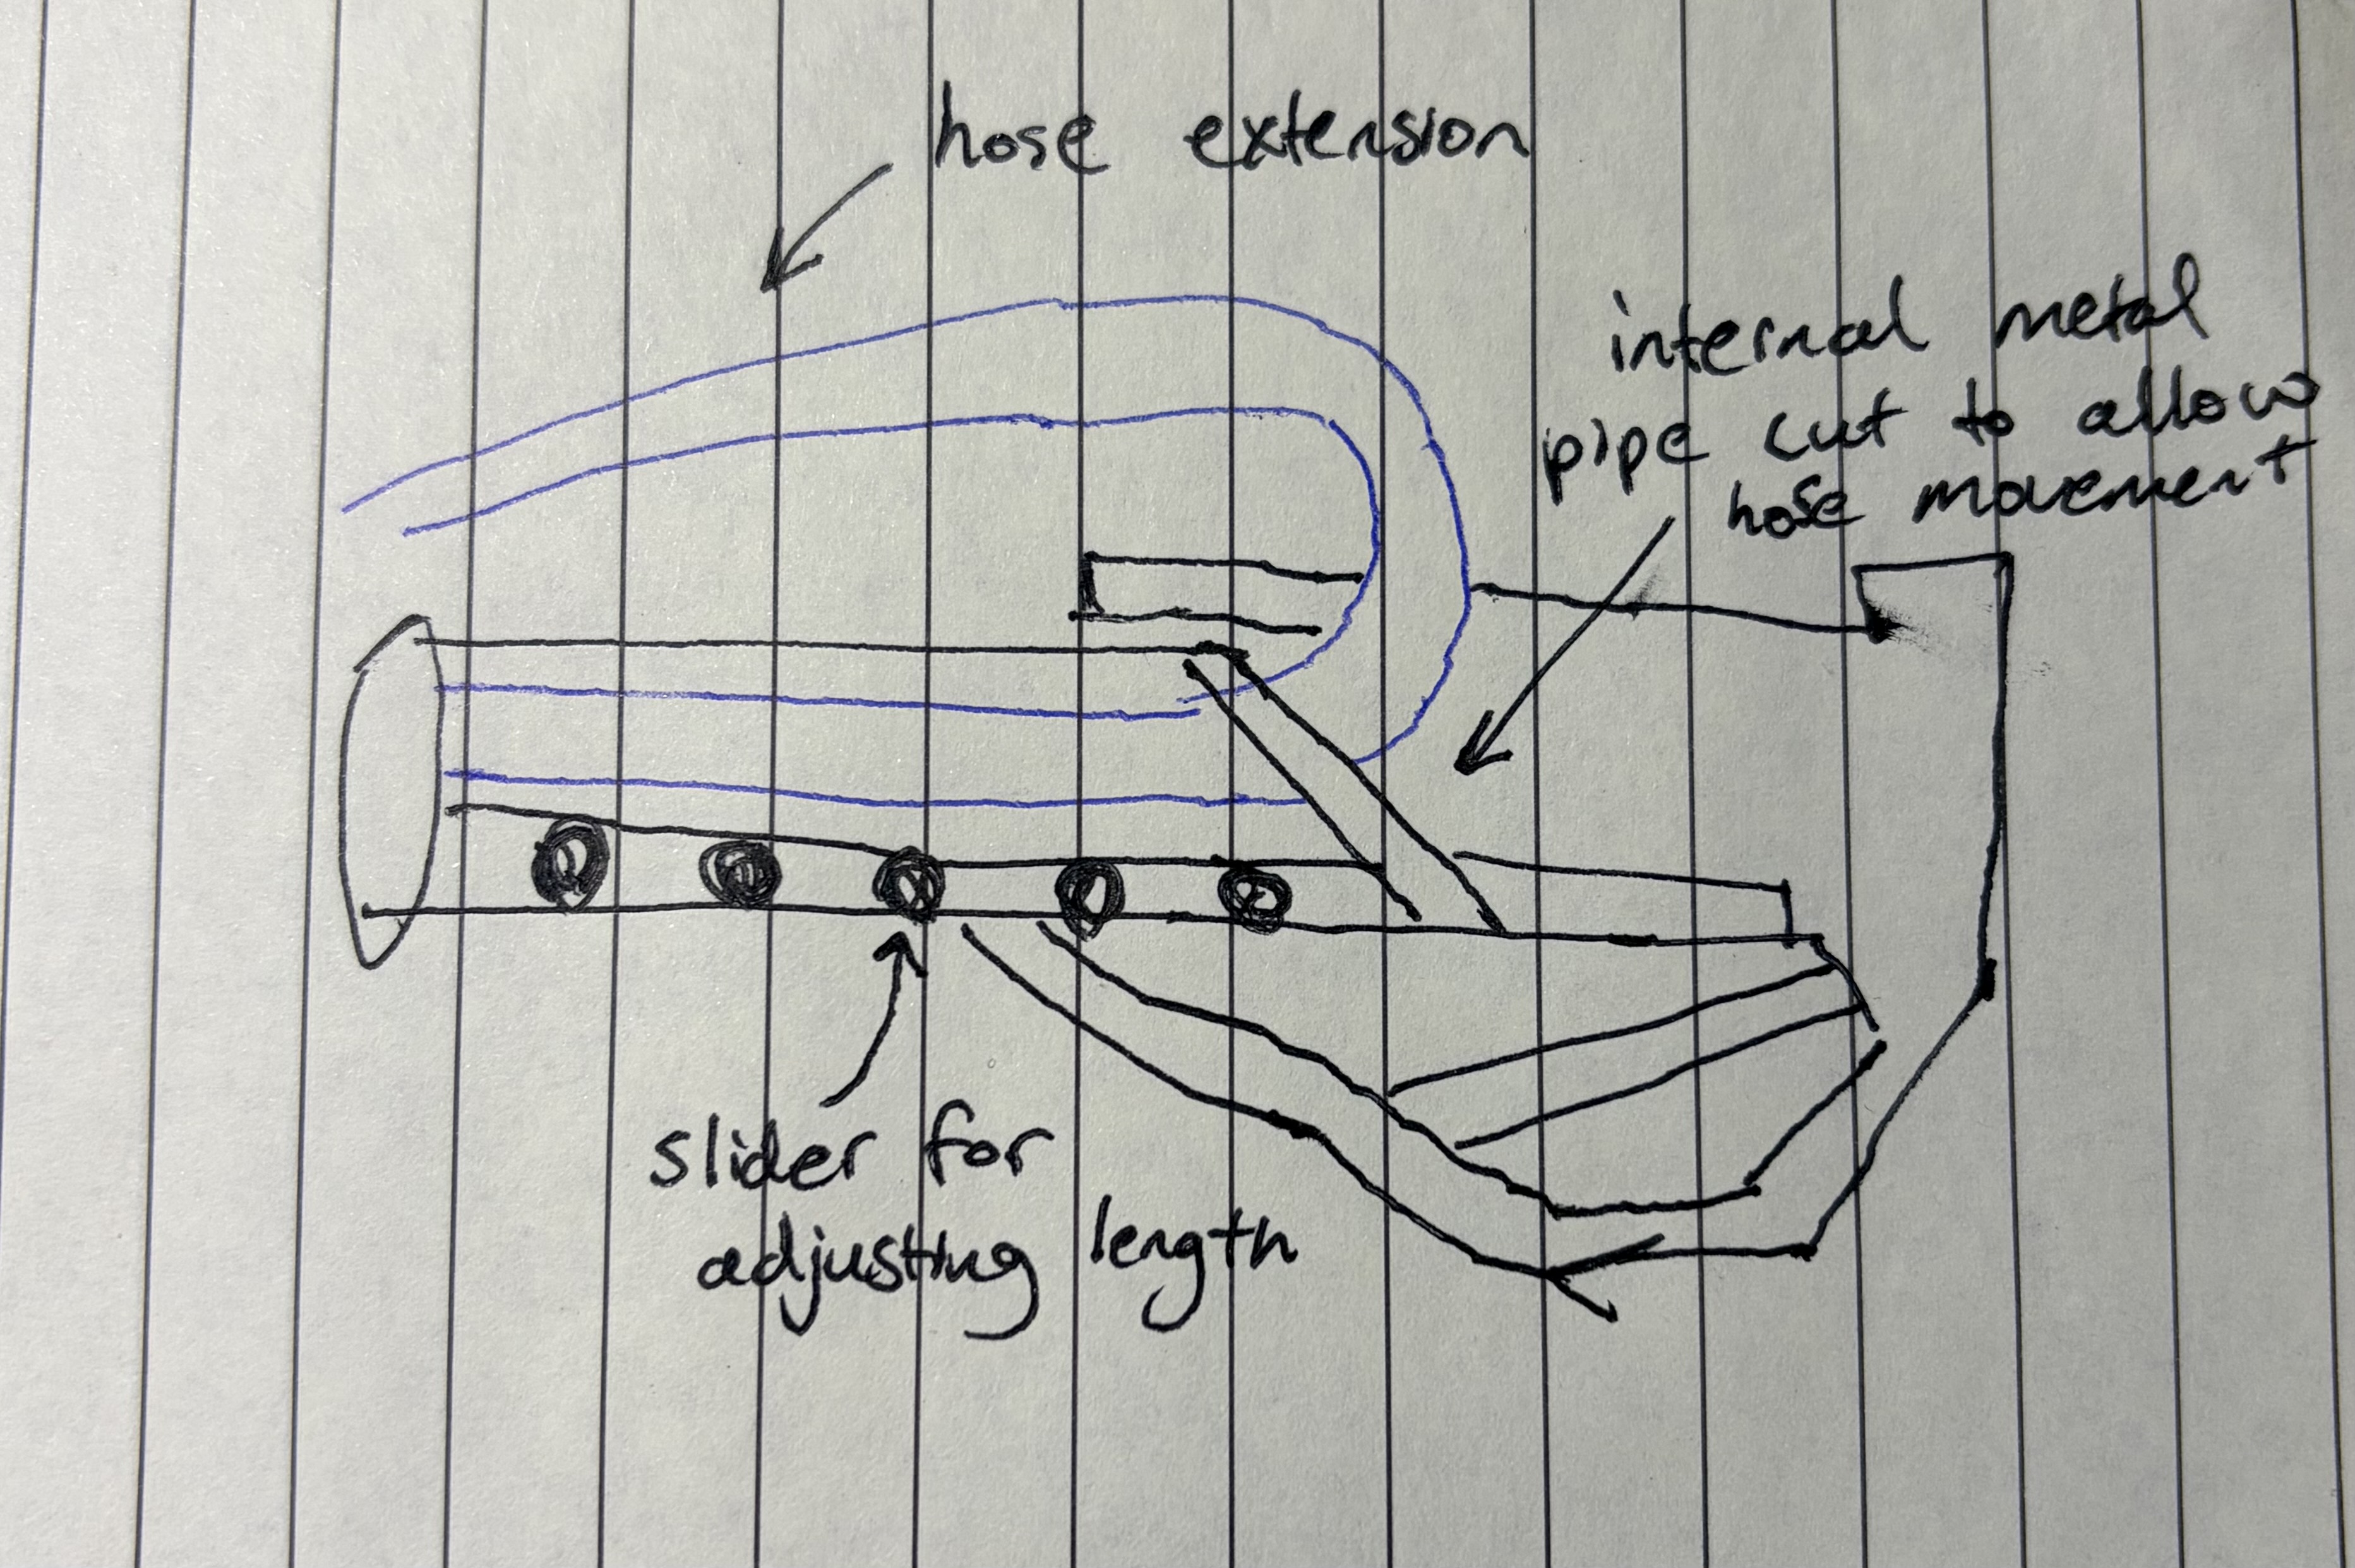
Drilling a hole through the back connector to allow adjustments.

Step 9: Cut the Extension Cord
Cut the spare extension cord to be the size of the back half of the gun connected to the propane cylinder.
Step 10: Drill Hole in Back Plastic
Drilling a hole in the back plastic for the cord to feed out of.
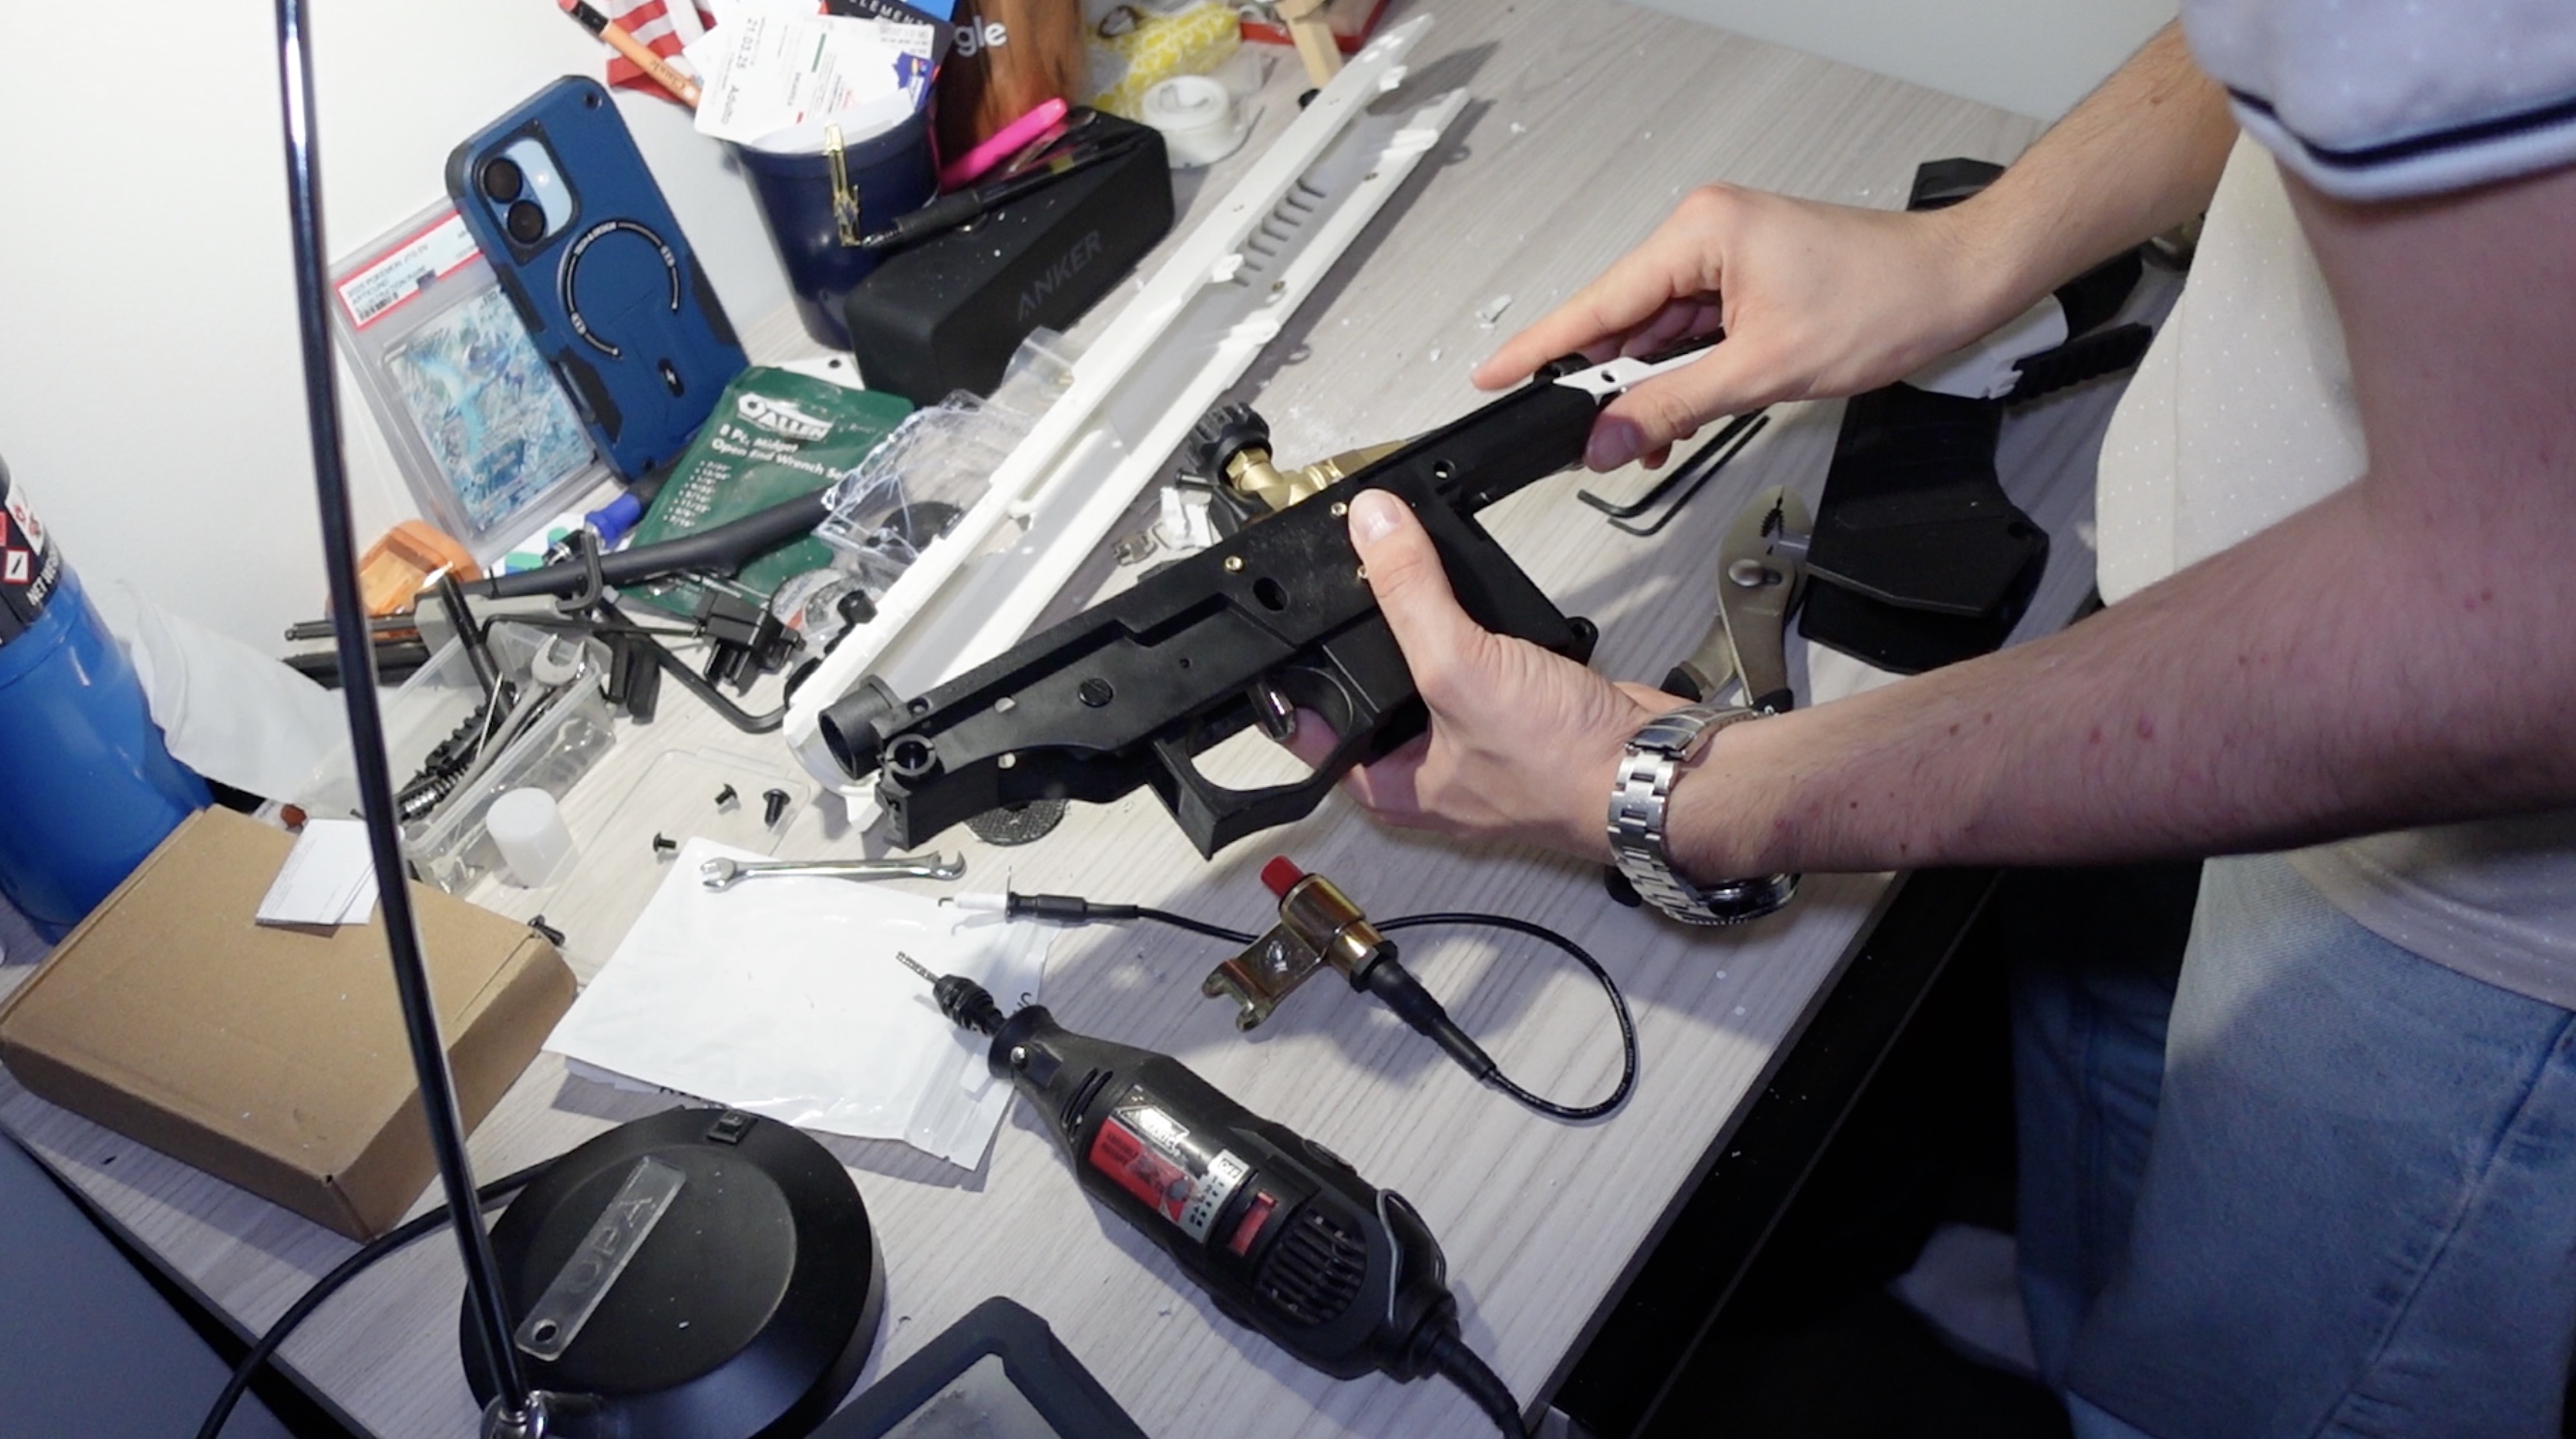
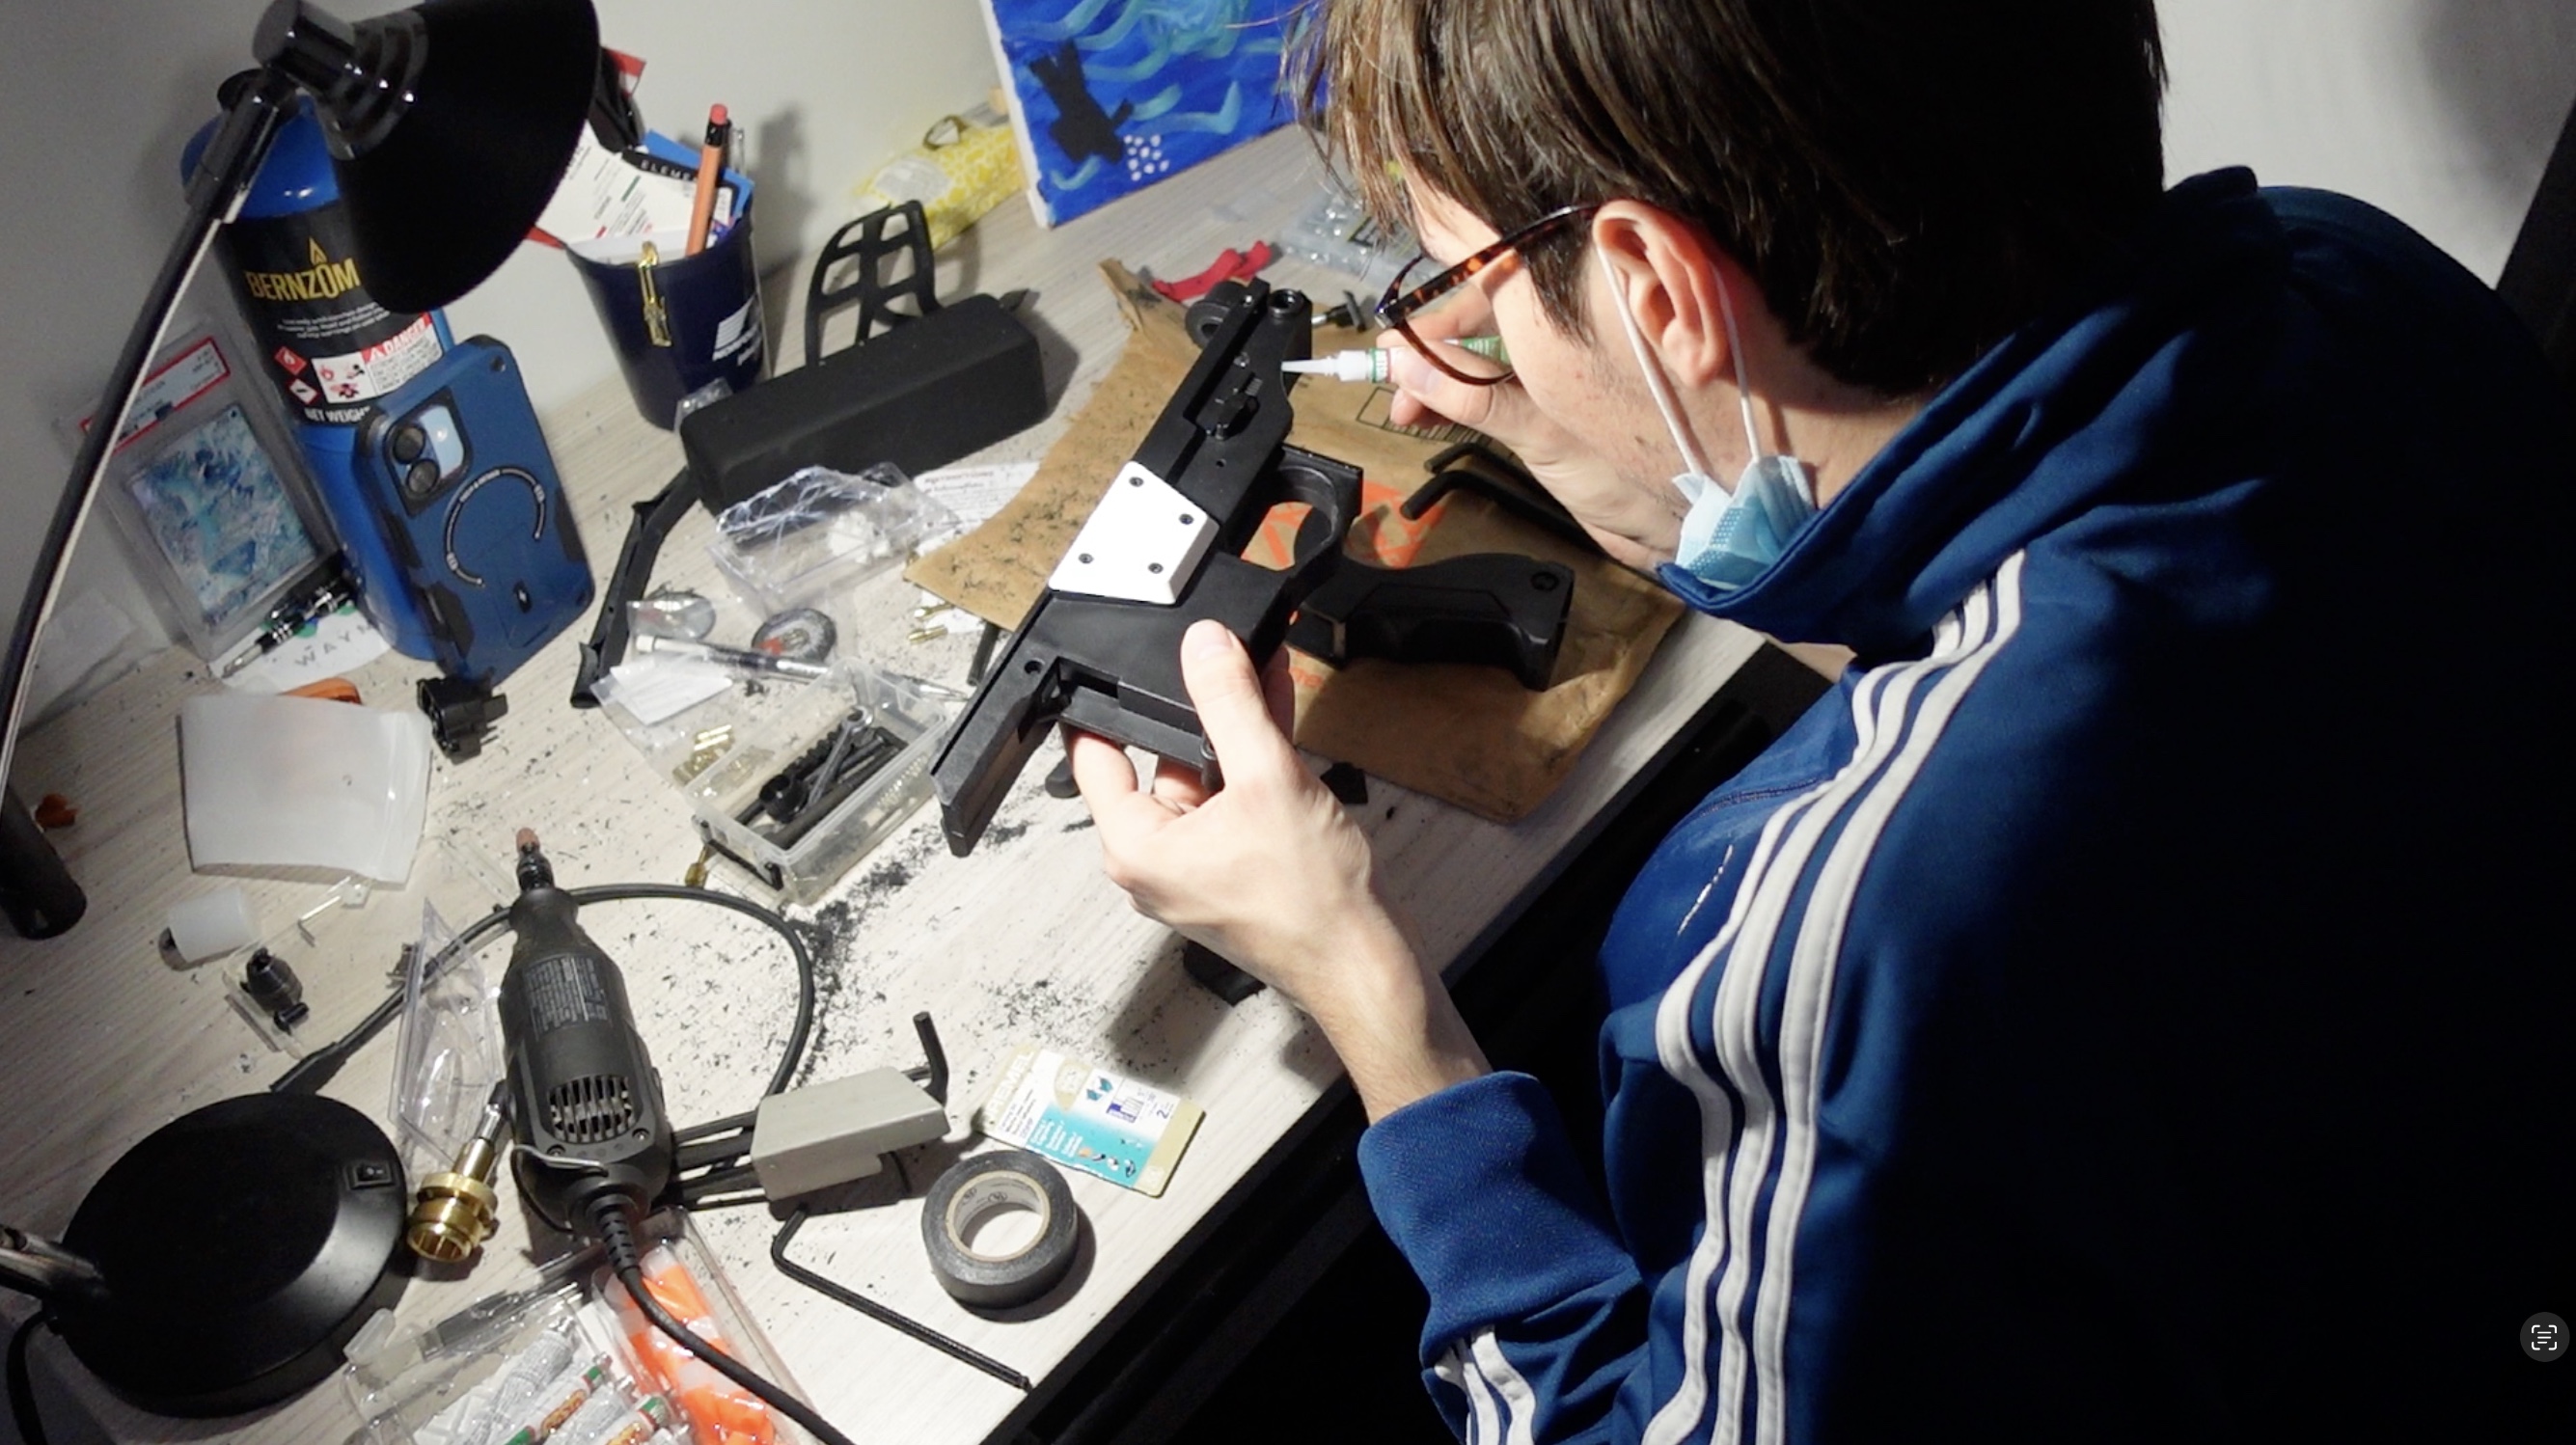
Step 11: Glue the Handle
Gluing the handle onto the main gun (there is no longer space for the main thread which was there before).
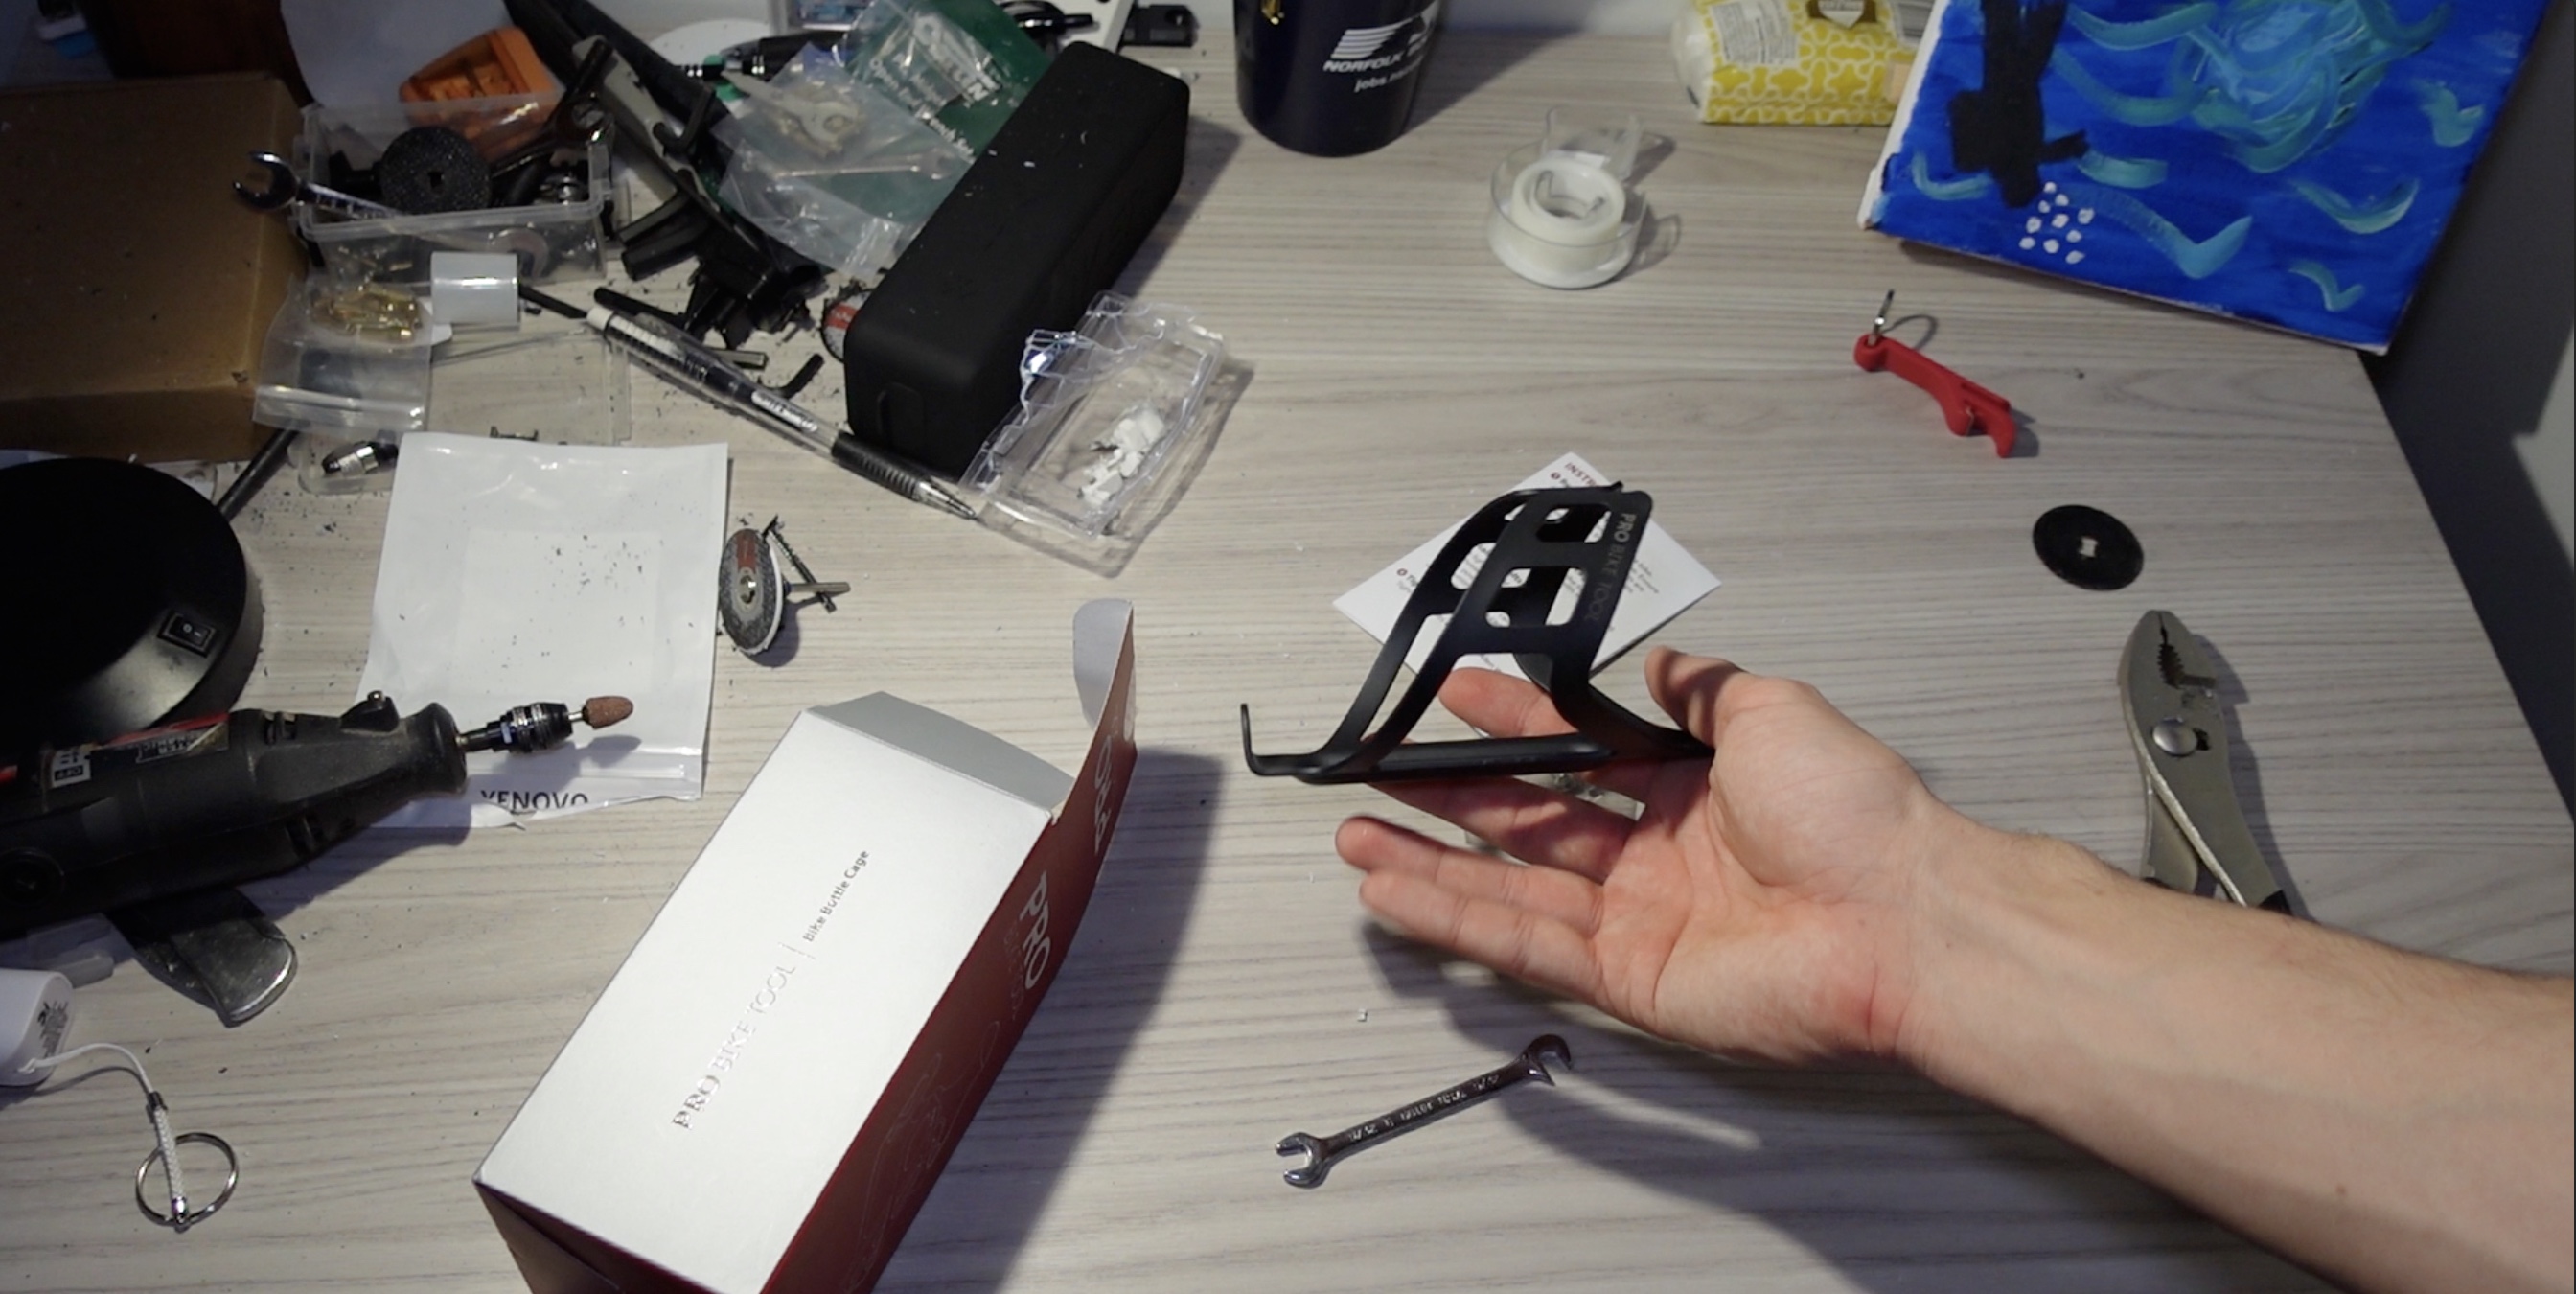
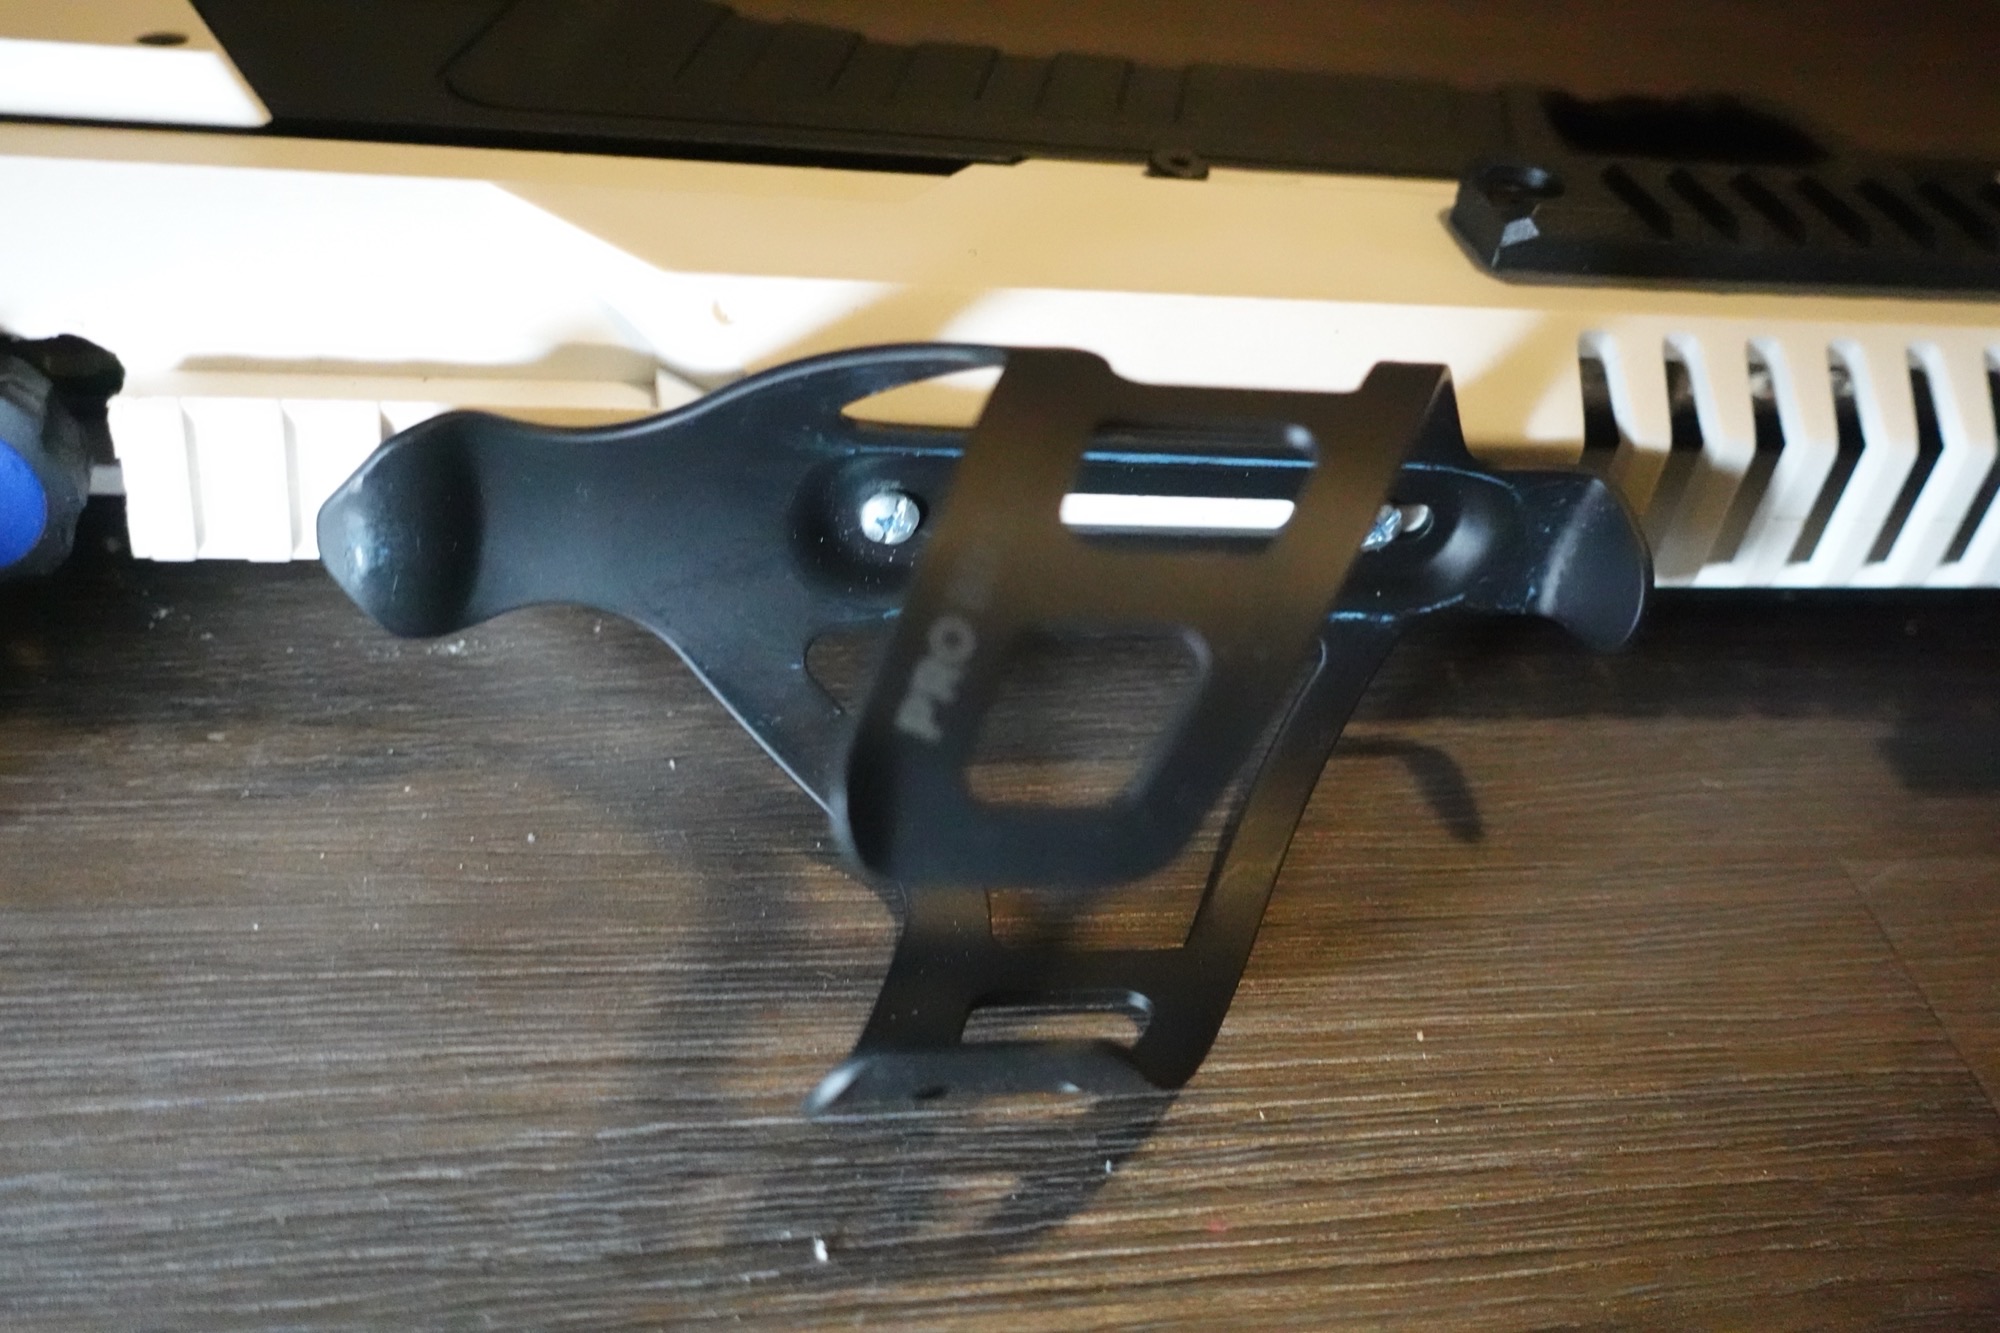
Step 12: Attach the Bike Holder
Drill the bike holder onto the gun and secure with nuts to hold the propane cylinder.
The Challenges
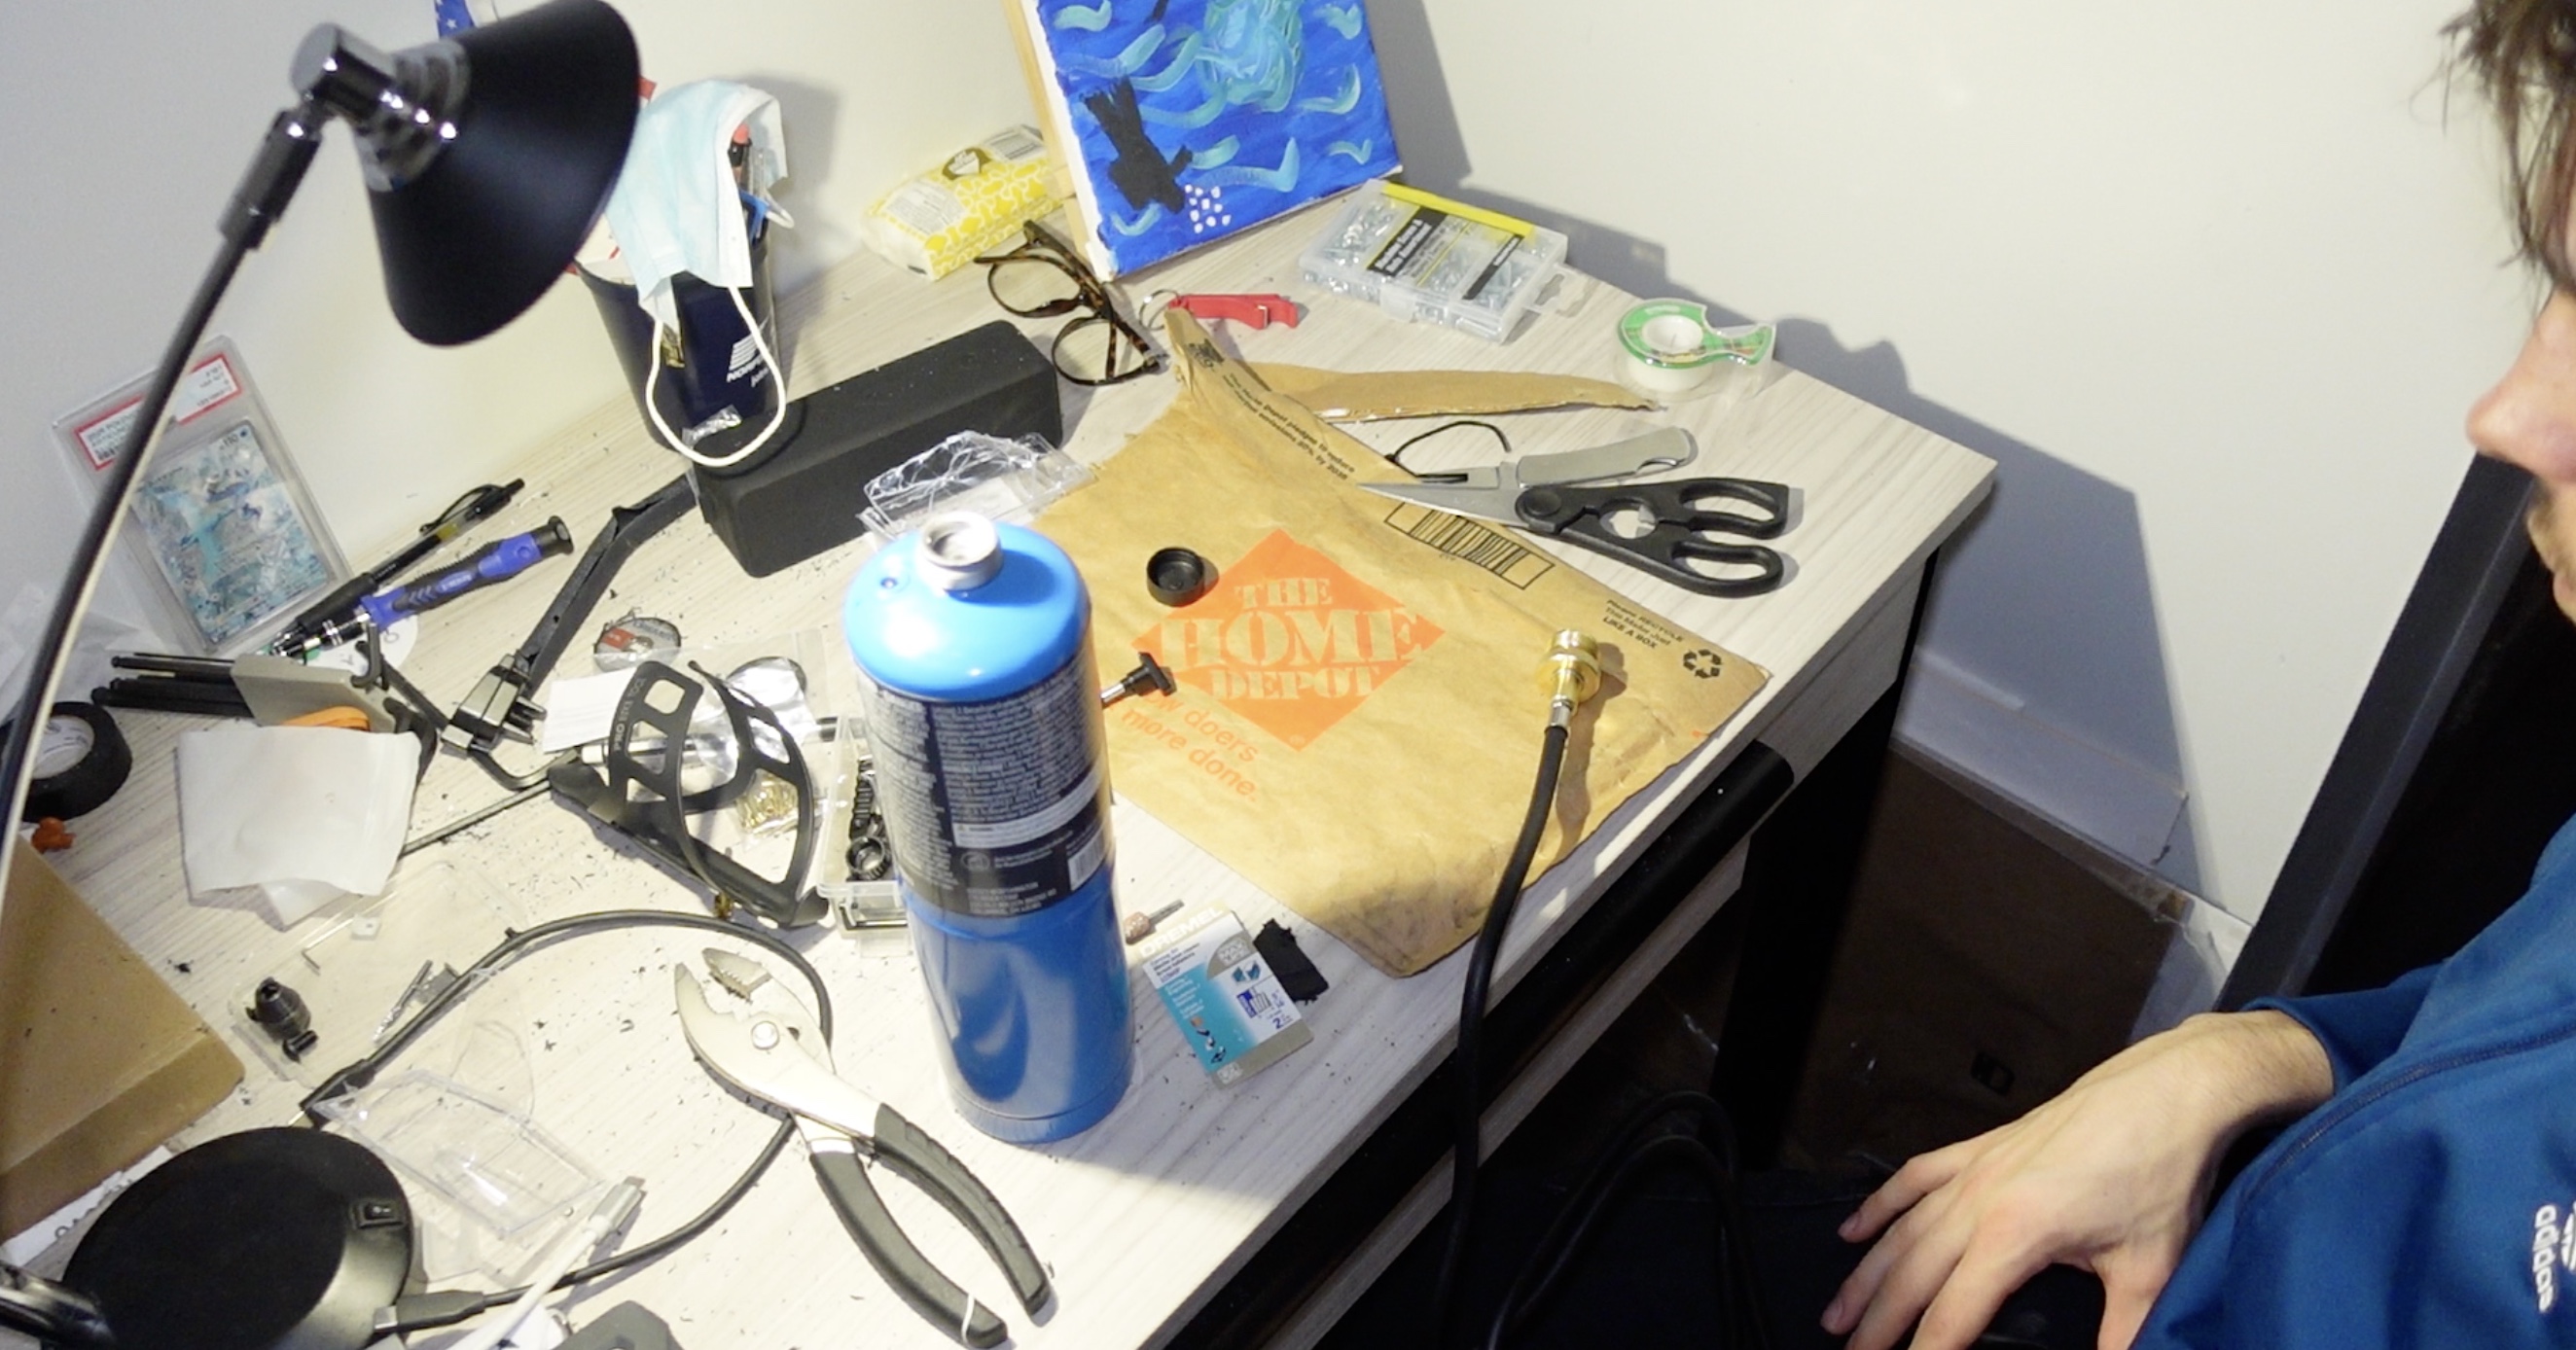
The build took way longer than expected. What I thought would be a weekend project turned into nearly two weeks of work. Between waiting for parts I didn't realize I needed, breaking tools, and having to redo steps that didn't work the first time, it was a test of patience. Throughout the process, I ended up destroying my dremel once through using improper cutting tools which caused plastic to melt into the drill head, breaking a few drill bits, and nearly forgetting crucial parts in the store of home depot (I am catastrophically good at losing things). But this project really taught me a lot about thinking ahead as to what parts to buy and how to keep the build organized throughout the process. And the cleanup process was definitely a challenge. I'm still finding plastic fragments in random places.
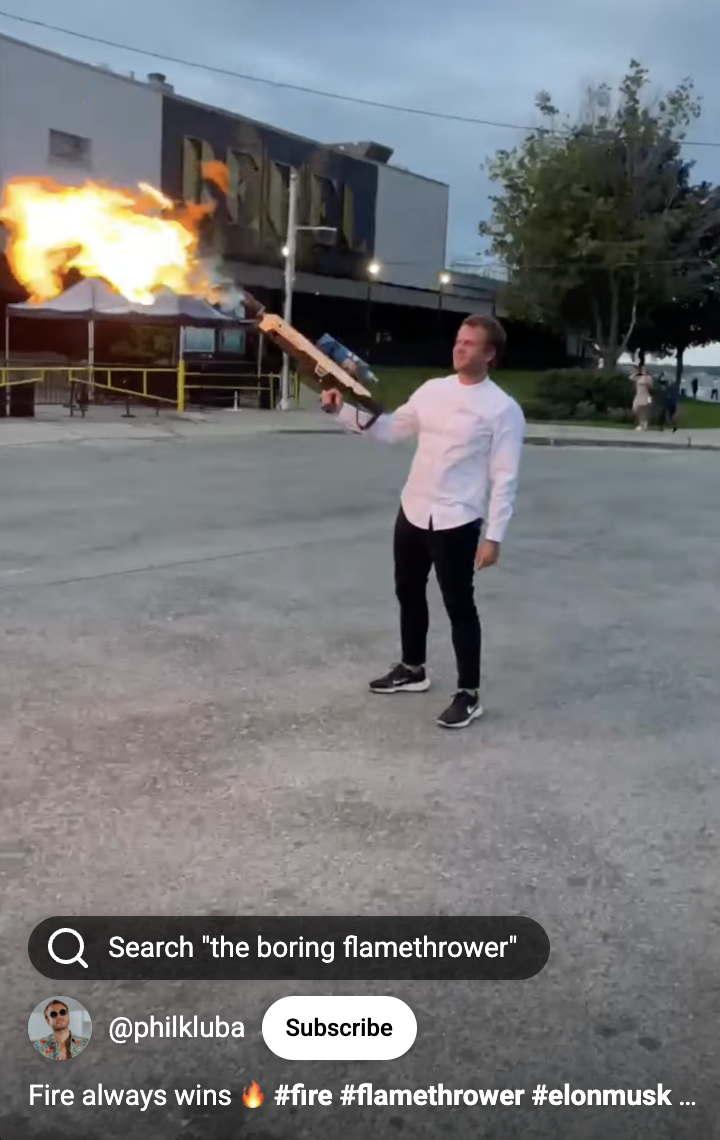
The end result looked really good though. It was super satisfying to take something I'd always admired as a kid but couldn't afford, and build it in a way that was better and gave more functionality to the user.
Is This Legal?
P.S. If you are wondering if this is legal. It is. It is not technically a flamethrower. At its core it is just a propane torch with a fancy shell. Similar to what you would use to kill weeds or melt ice. However, as with any device that produces open flames, caution is extremely important and always having a fire extinguisher nearby is a good idea. Always use common sense and prioritize safety.

I'm Adam Kulikowski, a Computer Science student at Georgia Tech passionate about software engineering, machine learning, and occasionally building things that make fire.
← Return to Main